Introduction
Fixing a hole in drywall can seem like a daunting task, but with the right tools and guidance, it can be a simple DIY project. Whether you have a small nail hole or a larger hole caused by an accident, fixing it yourself can save you money and give you the satisfaction of a job well done. In this article, we’ll provide step-by-step guidance, offer tips and solutions, and cover common mistakes to avoid when fixing a hole in drywall.
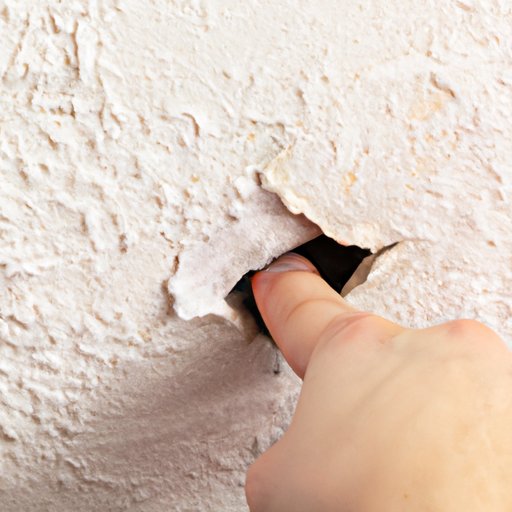
Step-by-Step Guide
The first step to fixing a hole in drywall is to prepare the area by removing any loose drywall or debris. Next, choose the right patching material for your particular hole size and wall type, which can vary between spackling compound, joint compound, and self-adhesive patches. Apply the patch and allow it to dry for the recommended time before sanding it down and applying paint touch-up. Here is a detailed, step-by-step guide:
- Prepare the area
- If there are any loose drywall or debris around the hole, gently remove it with a putty knife or sandpaper.
- Clean the area around the hole with a dry cloth or vacuum to ensure there is no dust or other debris.
- Choose the right patching material
- For small holes, you can use spackling compound, which is usually pre-mixed and can be applied with a putty knife.
- For larger holes or for holes near corners, use joint compound instead of spackling. You may need to use mesh tape to reinforce the patch.
- Self-adhesive patches are another convenient option for small or medium-sized holes. They can be cut to size and easily applied over the hole.
- Apply the patch
- For spackling and joint compound, use a putty knife to apply the patch, spreading it in a thin layer over the hole. Be sure to fill the hole completely with the patching material.
- If using a self-adhesive patch, press it firmly over the hole to ensure it adheres properly.
- Allow the patch to dry for the recommended time, usually between 1-24 hours depending on the product.
- Sand the patch
- Once the patch has dried, sand it down with a fine-grit sandpaper until smooth and level with the surrounding drywall.
- Wipe away any dust or debris with a cloth or vacuum.
- Paint touch-up
- If necessary, apply a primer to the patched area before painting to ensure proper adhesion.
- Paint the patched area to match the surrounding wall, blending in the paint with a brush or roller.
- Allow the paint to dry completely before adding a second coat as necessary.
Video Tutorial
If you’re more of a visual learner, check out this helpful video tutorial that demonstrates the step-by-step process of fixing a hole in drywall:
https://www.youtube.com/watch?v=S6mtrfo98BQ
Some key tips to keep in mind from the tutorial:
- Always use the right tools and materials for the job to ensure the best results.
- Be patient and allow enough time for the patching material to dry completely.
- Don’t rush the sanding process or you’ll end up with a lumpy or uneven patch.
Common Mistakes to Avoid
While fixing a hole in drywall can be a simple process, there are some common mistakes that people make. Here are some tips to avoid them:
- Using the wrong patching material: Make sure to choose the right type of patching material for your particular hole size and wall type.
- Not preparing the area properly: Clean the area around the hole and remove any loose drywall or debris to ensure proper adhesion of the patching material.
- Applying too much or too little patching material: Follow the recommended instructions and apply the patching material in a thin, even layer.
Patching Materials
There are several types of patching materials available for fixing a hole in drywall, each with its own pros and cons. Here’s a quick overview:
- Spackling compound: Convenient for small holes, dries quickly, and easy to sand. However, it’s not as strong as joint compound and may crack over time in larger holes.
- Joint compound: Stronger than spackling, can be used for larger holes, and can be sanded down easily. However, it takes longer to dry and may require mesh tape to reinforce the patch.
- Self-adhesive patches: Convenient for small or medium-sized holes, easy to apply, and no drying time required. However, it may not be strong enough for larger holes and may not blend in as well as spackle or joint compound.
When choosing the right patching material for your particular hole size and wall type, consider the strength and durability needed for the job, as well as the ease of use and blending with the surrounding wall.
Cost-Effective Fixes
If you’re on a budget or looking for a quick fix for minor holes in drywall, there are some DIY solutions that are readily available:
- Fill the hole with toothpaste or baking soda: Simply squeeze toothpaste or mix baking soda with water to make a paste, fill the hole with the mixture, and let it dry. Once dry, sand it down and paint over it.
- Use a wall patch kit: These kits come with a self-adhesive patch and spackling compound, and are convenient for small or medium-sized holes.
Professional Help
For larger holes or more complex jobs, it may be best to call in a professional to fix the holes in drywall. Here are some tips for choosing the right contractor and preparing your home:
- Get recommendations from friends, family, or online review sites.
- Request quotes from multiple contractors to compare pricing.
- Ask for proof of insurance and licensing.
- Remove any furniture or items from the room to give the contractor ample space to work.
- Communicate any special requests or considerations ahead of time.
Conclusion
Fixing a hole in drywall may seem intimidating at first, but with a little guidance and patience, it can be a simple DIY project. By following our step-by-step guide and avoiding common mistakes, you can save money and achieve a professional-looking result. Whether you choose a cost-effective DIY solution or hire a professional contractor, make sure to take action and fix your holes in drywall as soon as possible.


