I. Introduction
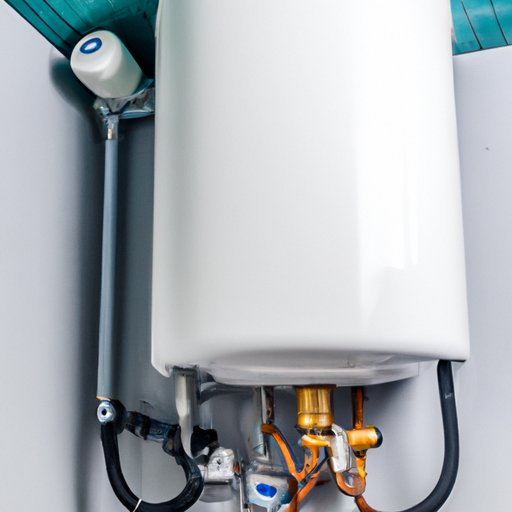
Have you ever heard of a tankless water heater? Unlike traditional water heaters, tankless water heaters do not store hot water in a tank. Instead, they heat the water as it flows through the unit. However, just like traditional water heaters, tankless water heaters need to be flushed regularly to maintain their efficiency and prevent damage.
This article will provide a complete guide on how to flush your tankless water heater, including the tools and materials needed, safety precautions to take, and step-by-step instructions for flushing.
II. Why It’s Important to Flush Your Tankless Water Heater and How to Do It Yourself
Flushing your tankless water heater is necessary to remove any buildup of sediment or minerals that accumulate over time. If left unchecked, this buildup can cause the unit to work harder than necessary and become less efficient. It can even cause damage that could lead to costly repairs.
To do it yourself, you’ll need a few things:
- A bucket
- A sump pump (submersible or handheld)
- A hose to connect to the sump pump
- A screwdriver or wrench to disconnect and reconnect the water and gas lines (if necessary)
Before starting, be sure to turn off the unit and the power supply. Then, follow these steps:
- Close the cold water supply valve that enters the water heater. You may need to disconnect the supply line to do this.
- Connect the hose to the hot water outlet valve on the unit, and the other end to the sump pump.
- Submerge the sump pump in the bucket filled with water and turn it on to pump water into the system. The water will flow through the unit and out through the hot water outlet where the hose is connected. Continue pumping between 4-10 gallons of distilled vinegar through the system, or until the water coming out of the hose is clear.
- Disconnect the hose and reconnect the hot water outlet valve on the unit, and turn the cold water supply valve back on. Then turn on the power supply to the unit.
III. Top Tips for Flushing Your Tankless Water Heater and Extending Its Lifespan
One of the best ways to extend the lifespan of your tankless water heater is to perform regular maintenance, which includes flushing the unit. Here are some tips to keep in mind:
- Flushing the unit should be done at least once a year to prevent sediment buildup.
- Keep the area around the unit clear of debris to prevent overheating.
- Check the water filter and replace it if it’s dirty or clogged.
- If you live in an area with hard water, consider installing a water softening system to prevent mineral buildup.
IV. The Benefits of Regularly Flushing Your Tankless Water Heater
Regularly flushing your tankless water heater can provide several benefits, including:
- More efficient water heating: Flushing removes any buildup of sediment or minerals that can cause the unit to work harder than necessary, which can result in more efficient water heating.
- Lower energy bills: A more efficient unit can result in lower energy bills, saving you money over time.
- Longer lifespan for the tankless water heater: By performing regular maintenance, including flushing, you can extend the lifespan of your tankless water heater and avoid costly repairs.
V. DIY Tankless Water Heater Maintenance: Flushing 101
Flushing your tankless water heater is just one aspect of routine maintenance you can perform to extend its lifespan. Here are some other things you should do:
- Check the pressure relief valve, which is located on the top or side of the unit. Make sure it’s working properly by lifting it and allowing it to snap back into place.
- Inspect the unit’s combustion chamber for any signs of soot or debris, which could impede proper function.
- Clean the air intake filter, which prevents debris from entering the unit.
- Remove any debris from around the unit that could cause overheating.
- If you have an outdoor unit, make sure it’s protected from the elements to prevent freezing or damage from weather.
By performing these tasks regularly, you can ensure that your tankless water heater is functioning properly and efficiently, and you can avoid costly repairs and replacements down the road.
VI. Expert Advice for Safely and Efficiently Flushing Your Tankless Water Heater
If you’re unsure about how to flush your tankless water heater safely and efficiently, consider seeking advice from a plumber or other expert. Here are some tips they might offer:
- Always turn off the power supply to the unit before starting any maintenance.
- Be careful when disconnecting and reconnecting water and gas lines, as a mistake could cause gas leaks or other problems.
- If you’re using a submersible sump pump, make sure it’s rated for hot water to prevent damage.
- If you’re not comfortable performing maintenance on your own, consider hiring a professional plumber.
VII. Step-by-Step Guide to Flushing Your Tankless Water Heater
Here’s a more detailed step-by-step guide to flushing your tankless water heater:
- Turn off the power supply to the unit.
- Shut off the water supply valve that enters the unit.
- Connect a hose to the unit’s hot water outlet and place the other end in a bucket or drain to catch the water.
- Turn on the hot water faucet nearest the unit to release any residual pressure.
- Remove the purge port valve caps and attach hoses to both the hot and cold service valves.
- Place the other ends of the hoses in a bucket of distilled vinegar.
- Open the hot and cold service valves to let the vinegar circulate through the system.
- Run the vinegar through the system for 45 minutes to an hour, or as long as recommended by the manufacturer.
- Turn off the hot and cold service valves, and remove the hoses.
- Reattach the caps to the purge port valves.
- Reconnect the hot water outlet hose and turn on the water supply valve.
- Turn on the hot water faucet nearest the unit to allow any air in the system to escape.
- Turn on the power supply to the unit.
VIII. Conclusion
Flushing your tankless water heater is a necessary part of routine maintenance, and it can provide several benefits, including lower energy bills, more efficient water heating, and a longer lifespan for the unit. By following the steps outlined in this article and performing other routine maintenance tasks regularly, you can ensure that your tankless water heater is functioning properly and efficiently, and you can avoid costly repairs and replacements down the road.


