I. Introduction
Have you ever wanted to fold a piece of paper into a heart but didn’t know how? Maybe you’re looking for a fun and easy activity to do with your kids, or perhaps you’re looking to create a unique gift for someone special. Whatever your reason, learning how to fold paper into a heart is a fun and creative skill to have. In this article, we’ll provide you with a step-by-step guide on how to fold a paper heart, creative ideas for how to use your folded hearts, the history and cultural significance of paper folding, tips for troubleshooting, and much more. So grab a piece of paper and let’s get folding!
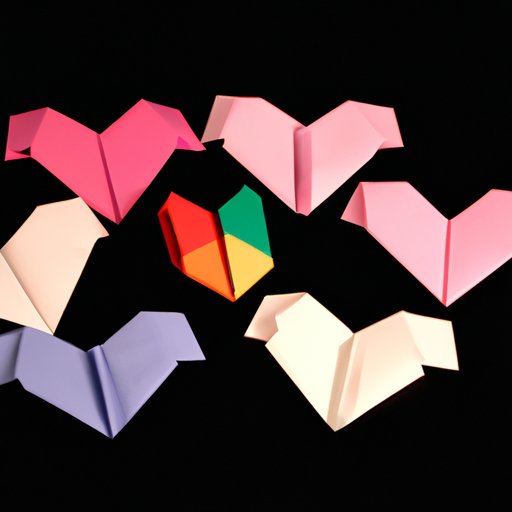
II. A Step-by-Step Guide with Accompanying Photographs
To begin, grab a square piece of paper, either 6×6 inches or 8×8 inches. Follow these simple steps to fold a paper heart:
Step 1: Fold the paper in half diagonally, bringing the top corner to the bottom corner and pressing down on the fold to create a crease.
Step 2: Unfold the paper and fold it in half diagonally in the opposite direction, bringing the left corner to the right corner.
Step 3: Unfold the paper and lay it flat on the table with the creases facing up and down. Then fold the paper in half horizontally, bringing the top edge to meet the bottom edge.
Step 4: Take the top layer of the left side of the paper and fold it diagonally toward the center crease, creating a new fold that forms a triangle.
Step 5: Repeat step 4 with the top layer of the right side of the paper, folding it diagonally toward the center crease, creating a second triangle on the right side.
Step 6: Turn the paper over and fold the bottom edge up to the center crease. Then fold the top edge down to meet the bottom edge.
Step 7: Take the top layer of the left side of the paper and fold it diagonally toward the center crease, creating a new fold that forms a triangle. Repeat this with the top layer of the right side of the paper, forming a second triangle on the right side.
Step 8: Take the top layer of the left side of the paper and fold it over to the right side. Crease the fold sharply and unfold the paper.
Step 9: Take the top layer of the right side of the paper and fold it over to the left side. Crease the fold sharply and unfold the paper.
Step 10: Pinch the top of the paper together along the center crease. Bring the bottom of the paper up to meet the top, tucking in the two flaps to form the point of the heart. Flatten the paper to create the final heart shape.
For more clarity, please refer to the accompanying photographs.
III. A Video Tutorial on How to Fold Paper into a Heart
If you’re a visual learner, a video tutorial can be a helpful supplement to the written instructions. Check out this video tutorial for a step-by-step guide on how to fold paper into a heart:
IV. List of Creative Ways to Use a Folded Paper Heart
Now that you’ve mastered the art of folding paper hearts, it’s time to get creative with how you use them. Here are some ideas to get you started:
- Make a Card: Fold a paper heart and use it to decorate a homemade card. Write a heartfelt message inside to show someone you care.
- Create a Paper Heart Chain: Fold multiple paper hearts in different colors and string them together to create a festive paper heart chain. Hang it up in your home or office as a fun decoration.
- Decorate a Gift: Use a folded paper heart to decorate a gift box or bag. It’s a creative way to add a personal touch to a present.
- Create a Wall Art: Fold a bunch of paper hearts in different sizes and colors and glue them onto a canvas or poster board to create a beautiful piece of wall art.
- Make a Mobile: Fold several paper hearts of different sizes, punch a hole in the top of each one, and string them together to create a beautiful mobile that can be hung from the ceiling.
V. Article on the History and Cultural Significance of the Paper Heart Fold
Did you know that folding paper into shapes dates back to ancient Chinese and Japanese cultures? Origami, the traditional Japanese art of paper folding, was first practiced in the 17th century. In recent years, paper folding has become a popular crafting trend around the world, with people using it to create everything from decorations to artwork.
What about the heart shape specifically? The heart has long been a symbol of love and affection, so it’s no surprise that people have been folding paper hearts for centuries. During the Victorian Era, folded paper hearts were used as Valentine’s Day cards and given as tokens of love and friendship. Today, paper hearts remain a popular crafting activity for people of all ages and backgrounds.
VI. Troubleshooting Guide for Beginners
If you’re having trouble folding your paper heart, don’t worry! Here are some common problems beginners may encounter and tips for overcoming them:
- Ripped Paper: If your paper is ripping, try using a thicker or sturdier paper. You can also use tape to reinforce the folds.
- Inaccurate Folds: Accurate folds are key to creating a well-formed paper heart. Take your time and be patient. Use a ruler or bone folder to make sharp, even creases.
- Difficulty with Step 10: If you’re having trouble tucking in the flaps to form the point of the heart, try using a toothpick or other small tool to help guide the paper into place.
VII. Suggestions for Alternative Materials for Creating Folded Paper Hearts
If you’re feeling adventurous, try experimenting with different materials for making folded paper hearts. Instead of using traditional origami paper, try using recycled paper or wrapping paper. You can also adjust the size of the paper to create larger or smaller hearts. Don’t be afraid to get creative!
VIII. Tips for Personalizing a Folded Paper Heart
Once you’ve mastered the basic paper heart fold, it’s time to get creative and personalize your hearts to suit your taste. Here are some tips for making your hearts stand out:
- Add a Message: Write a message on the paper heart with a permanent marker or paint pen to make it extra special.
- Add Glitter: Use glitter or sparkly paint to add a fun and festive touch to your paper heart.
- Add Paint: Use paint or watercolors to add a unique design or pattern to your paper heart.
IX. Conclusion
Congratulations on learning how to fold paper into a heart! We hope this article has been helpful and provided you with some fun and creative ideas for how to use your folded hearts. Remember to get creative and experiment with different materials and designs.


