I. Introduction
Have you ever been in a situation where you needed an envelope, but didn’t have one? Perhaps you’re sending a handmade card to a friend or family member, or a simple note to a colleague. Whatever it may be, making a paper envelope is an easy DIY solution that will allow you to personalize your message and show off your creative skills.
In this article, we’ll explore six different types of articles that will help you learn how to fold paper into an envelope. From step-by-step tutorials to creative ideas, we’ve got everything you need to get started.
II. Step-by-step tutorial
The first method we’ll cover is the standard way of making a paper envelope. Here’s how it’s done:
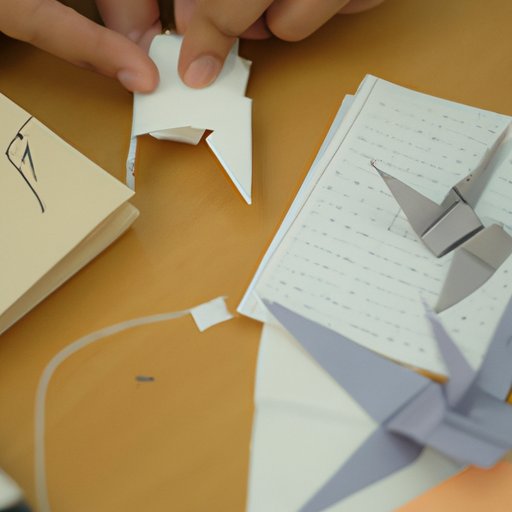
- Take a square piece of paper. You can use any size as long as it’s a square.
- Place the paper on a flat surface, with the patterned or colored side facing down.
- Fold the paper in half diagonally, bringing the top edge to meet the bottom edge. Crease down the center, then unfold.
- Now fold the paper in half diagonally the other way, bringing the left edge to meet the right edge. Crease down the center, then unfold.
- Take the top corner of the paper and fold it down to meet the center crease. Repeat with the bottom corner, folding it up to meet the center crease.
- Now fold the left corner of the paper inwards, lining it up with the center crease. Repeat with the right corner, folding it inwards to meet the center crease.
- You should now have a rectangular shape with triangular flaps at the top and bottom. Fold the lower flap up, then tuck it under the upper flap to seal the envelope.
- Your envelope is ready to use! You can decorate it with stickers, washi tape, or anything else you like.
Practice this a few times until you get the hang of it. Once you’ve mastered the basic method, you can start experimenting with different paper sizes and patterns.
III. Infographic
If you’re a visual learner, an infographic can be a helpful tool to guide you through the process of folding paper into an envelope. Check out the infographic below, which provides a step-by-step breakdown of the process:

The infographic includes additional tips, such as how to choose the right paper and how to make sure your folds are crisp and clean. Use it as a reference while you’re practicing your envelope-folding skills.
IV. Video tutorial
In addition to the written and infographic tutorials, some people may find it helpful to watch a video tutorial. Check out this short video, which provides a clear and concise guide to folding paper into an envelope:
The video includes a voiceover that explains each step in detail, as well as captions to help you follow along. This is a great option if you’re a beginner or if you’re struggling with a particular step.
V. Listicle
Now that you’ve learned the basic method of folding paper into an envelope, let’s explore some other ways you can do it. Check out this list of different techniques:
- The Angle Fold: This method involves folding the paper on a diagonal, rather than in half. It creates a unique variation of the traditional envelope shape, with angled flaps at the top and bottom.
- The Envelope Liner: If you want to add some color or pattern to your envelope, try creating a liner. Cut a piece of decorative paper to fit the size of your envelope and glue it to the inside.
- The Notched Fold: This method involves folding the top flap of the envelope into a triangle shape, then notching it with scissors. This creates a decorative border and adds some personality to your envelope.
- The Pocket Envelope: If you’re sending a card or other small item, create a pocket envelope to keep it secure. Simply fold the paper in half and glue the sides together, leaving the top open. You can then fold the top down to create a flap.
- The Square Envelope: If you’re feeling adventurous, try making a square envelope. This requires a larger piece of paper, but creates a unique and eye-catching result.
Each of these methods has its pros and cons, depending on your needs. Experiment with each one and see which works best for you.
VI. Historical overview
Paper folding has been around for centuries, with different cultures and eras developing their own styles and techniques. Envelopes, in particular, have a fascinating history.
During the 15th and 16th centuries, envelopes were rare and expensive. They were often used by royalty or wealthy individuals to send letters or other important documents. It wasn’t until the 19th century that envelopes became more widely used and affordable for the general public.
Today, envelopes come in all shapes and sizes, and can be made from a variety of materials. But the simple act of folding a piece of paper into an envelope remains a timeless and practical skill.
VII. Creative envelope ideas
If you’re looking to take your envelope-making skills to the next level, here are some creative ideas to try:
- Washi tape: Use washi tape to create decorative borders or patterns on your envelope. You can also use it to create stripes or other designs.
- Stickers: Use stickers to add some personality to your envelope. You can create a theme based on the occasion or recipient, or simply use your favorite stickers.
- Hand lettering: If you have good penmanship, try hand-lettering the recipient’s name and address on the envelope. This creates a personalized touch that will make your envelope stand out.
- Stamping: Use rubber stamps to create unique designs or patterns on your envelope. You can also use different colors of ink to create a gradient effect.
- Embossing: Embossing adds a raised, textured effect to your envelope. You can emboss a pattern or design onto the paper using a special tool and heat gun.
With these ideas, the possibilities are endless. Don’t be afraid to experiment and try new things!
VIII. Comparison article
Now that you’ve learned about the different methods and creative ideas for folding paper into an envelope, let’s compare them. Here are some pros and cons of each method:
| Method | Pros | Cons |
|---|---|---|
| Standard fold | Easy to learn; works with any size of paper | May not be as interesting or unique as other methods |
| Angle fold | Creates a unique, angled shape; adds visual interest | Requires more skill and practice |
| Envelope liner | Adds color and pattern to your envelope | Takes more time and effort |
| Notched fold | Adds a decorative element to your envelope | Requires precise cutting with scissors |
| Pocket envelope | Great for holding cards or small items | Not as secure as other methods |
| Square envelope | Creates a unique and eye-catching result | Requires a larger piece of paper |
As you can see, each method has its own pros and cons. Consider your needs and preferences when choosing a method. You can also experiment with combining different methods for a truly one-of-a-kind envelope.
IX. Conclusion
In this article, we’ve explored six different types of articles that will help you learn how to fold paper into an envelope. We started with a step-by-step tutorial and moved on to an infographic, video tutorial, listicle, historical overview, and creative ideas.
By practicing these different methods and ideas, you’ll be able to create personalized envelopes for any occasion.


