Introduction
French braids can give you a stylish and elegant look for any occasion, from a casual day out to a formal event. But perfecting the art of French braiding can be a challenge. The purpose of this article is to provide an easy-to-follow guide to help you create the perfect French braid.
Step-by-step guide to French Braiding Hair
The key to creating a French braid is to start at the top of the head and gradually braid toward the back of the head, keeping the braid tight. Here is a step-by-step guide to help you create your own French braid.
Preparing the hair
Before you start braiding, brush your hair and remove any tangles. You can also use a detangling spray to make your hair easier to work with. For a tighter braid, you can also dampen your hair slightly.
Starting the braid
To begin the braid, gather a section of hair at the crown of your head, and split it into three smaller sections. Hold the three sections with each hand, with the middle section under the other two.
Adding hair to the braid
Take a small section of hair from the left side of your head and add it to the left section of the braid. Cross the left section over the middle section. Repeat on the right side of your head, adding a small section of hair to the right section of the braid, and crossing it over the middle section.
Braiding toward the back of the head
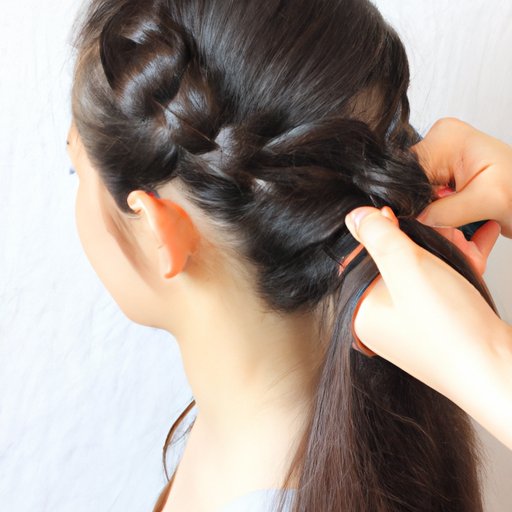
Keep adding small sections of hair to the braid as you move toward the back of the head. Make sure to keep the braid tight as you go, pulling the hair gently as you weave it into the braid.
Finishing the braid
When you reach the nape of your neck, braid the remaining hair to the end of your hair. Secure the braid with a hair tie or bobby pins for a flawless look.
Video tutorial on French Braiding Hair
There is no substitute for a visual tutorial to help you master the technique of French braiding. We recommend watching a step-by-step video tutorial that covers the process from start to finish.
Breaking down the video tutorial
The video tutorial should showcase each step with clear, concise explanations, highlighting each step with visual aids. Pay close attention to the hand movements and the order in which hair is added to the braid. Mimic the actions and practice the steps until you feel comfortable with the process.
Troubleshooting common issues with French Braids
French braiding can be challenging, but with a little patience and the right tips and tricks, you can achieve a flawless braid. Here are some common issues that you may encounter, along with tips for overcoming them.
Tangling
Brush your hair before beginning the braid, and make sure you have removed any tangles. If you have particularly tangled hair, it can help to use a detangling spray or to dampen your hair slightly before starting.
Uneven braids
If you find your braid is uneven, try taking smaller sections of hair from each side and adding it to the braid. This will help ensure that the braid is even and consistent throughout.
Difficulty keeping the braid tight
If you find your braid is becoming loose or unraveling, try using a hair tie to secure the braid at the nape of your neck. This will help keep the braid tight and prevent it from unraveling.
Variations on French Braiding Hair
French braids don’t have to be limited to one style. Experimenting with different variations can help you find the perfect style for any occasion.
Sideways French braid
A sideways French braid starts at the nape of your neck and continues around to one side of your head. Begin the braid at the nape of your neck, and continue braiding around the head towards one ear. Finish the braid at the ear and secure it with a hair tie.
Upside down French braid
An upside-down French braid starts at the bottom of your head and continues up towards the crown. Start by flipping your head upside down and gathering a section of hair at the nape of your neck. Begin the braid and continue upward towards the crown, finishing the braid at the top of your head and securing it with a hair tie.
Inside-out French braid
An inside-out French braid is a neat and tight braid that appears to sit on top of the hair. Begin the braid at the nape of your neck and braid upwards, adding more hair to it at each cross over. As you add hair, cross the outside strands under the middle section, instead of over like in a regular French braid, to create the inside-out effect. Secure the braid at the end.
French braids for different hair types
French braiding can work for all hair types, but different techniques may be required depending on the texture and length of your hair.
Short hair
For short hair, take smaller sections of hair to create a tighter braid and use hair ties to help hold the braid in place. Alternatively, try a half-up French braid, securing the braid at the crown of the head, and leaving the rest of the hair loose.
Curly hair
For curly hair, it can help to use a styling cream or gel to define the curls before braiding. Take smaller sections of hair and braid the hair loosely, so as not to damage or flatten the curls.
Fine hair
For fine hair, use a volumizing mousse or spray to give the hair some texture. Braid the hair tightly and use hair ties to help secure the braid in place.
French braids for different occasions
French braids are versatile and can be styled to suit any occasion, from casual outings to formal events.
Incorporating French braids into different hairstyles
For a more casual look, try a messy French braid or a half-up style with loose waves. For a formal event, create a sleek and classic look by braiding along the crown and ending in a low bun.
Conclusion
French braids can elevate any hairstyle and are incredibly versatile, once you master the technique. Practice makes perfect, so don’t be afraid to experiment with different hair types and styles.


