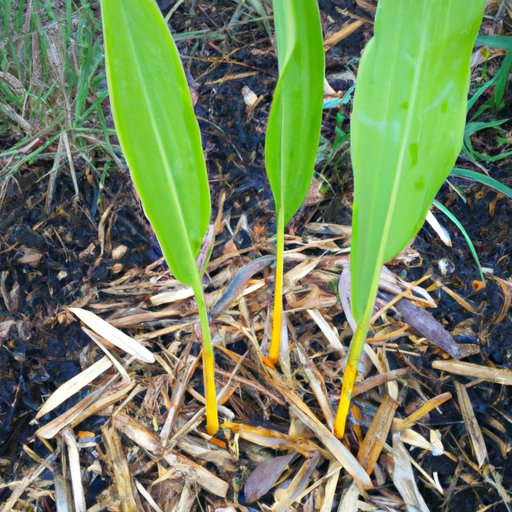
Growing Turmeric: A Step-by-Step Guide to Cultivating Your Own
Have you ever thought about growing your own turmeric? Not only can it be a fun and rewarding experience, but it also allows you to have control over the source of your food and save money in the long run. In this article, we provide a step-by-step guide on how to grow turmeric successfully, along with tips on dealing with common problems, modifying the growing process for different seasons, and using fresh turmeric in cooking.
A Step-by-Step Guide
Before we get started, it’s important to note that turmeric is a tropical plant that thrives in warm, humid environments with well-draining soil. Here’s a step-by-step guide to growing turmeric:
Step 1: Selecting the right location
Choose a spot that receives partial to full sunlight and has well-drained, loamy soil. Avoid areas that are prone to waterlogging or receive heavy rainfall. Turmeric grows well in warm, humid environments, so a temperature of around 68-95°F (20-35°C) is ideal.
Step 2: Preparing the soil
Turmeric grows well in soil that is rich in organic matter and nutrients. You can enhance the soil quality by adding compost or organic fertilizers. Make sure to loosen the soil to a depth of at least 12 inches. This helps to provide sufficient oxygen and allows the roots to penetrate the soil more easily.
Step 3: Choosing the right turmeric variety and planting method
You can grow turmeric either from rhizomes or seedlings. Rhizomes are pieces of the turmeric plant’s root system. Choose fresh, plump rhizomes that are free from mold or infestation. Seedlings are relatively easy to grow. Make sure to plant them around 1-2 inches deep and keep them well-watered.
Step 4: Watering and fertilizing the plants
After planting the turmeric, water the plants thoroughly. Turmeric plants need to be watered frequently, so make sure to keep the soil moist but not waterlogged. Reduce watering during colder months. Turmeric plants require regular feeding with organic fertilizers like compost tea or bone meal.
Step 5: Dealing with pests and diseases
Turmeric plants are susceptible to pests like spider mites and aphids, as well as diseases like fungal infections and bacterial blight. The best way to prevent these problems is to keep the plants well-fed and watered, and to practice proper crop rotation. You can also use natural pest control methods like neem oil or garlic spray.
Step 6: Harvesting the turmeric crop
Turmeric is typically ready to harvest after around 8-10 months of planting. You can tell that it’s ready when the leaves and stems start to wither. Carefully dig up the rhizomes from the soil, remove the leaves and stems, and rinse the rhizomes with water. You can then store the turmeric in a cool, dark, and dry place for future use.
Problem/Solution Approach
While growing turmeric is relatively easy, you may encounter some common problems like slow growth, yellowing leaves, or pests. Here are some solutions to these problems:
Problem: Slow growth
Solution: Improve soil quality by adding organic matter or fertilizers. Provide sufficient water and maintain a warm temperature.
Problem: Yellowing leaves
Solution: Reduce watering to prevent root rot. Make sure the plant is not receiving too much direct sunlight.
Problem: Pests
Solution: Use natural pest control methods like neem oil or garlic spray. Practice proper crop rotation.
Seasonal Advice
While turmeric can be grown all year round in warm and humid locations, the growing process can be modified based on the seasons:
Spring
Start seeds indoors to give them a head start. Plant seedlings after the last frost.
Summer
Water the plants frequently to maintain soil moisture. Add fertilizer or compost regularly to support growth.
Fall
Protect the plants from frost by covering them with blankets or tarps. Harvest the turmeric before the first frost.
Winter
Reduce watering to prevent root rot. Move the plants indoors if the temperature drops below 55°F (13°C).
Recipe-Based Approach
Now that you know how to grow turmeric, it’s time to start using it in your cooking. Here are a few turmeric-based recipes to try:
- Turmeric tea: Boil water and add fresh turmeric slices and some ginger. Add honey and lemon for flavor and enjoy!
- Turmeric curry: Sauté vegetables like cauliflower, carrots, and potatoes in a pan. Add turmeric and other spices like cumin and coriander. Serve with rice or naan.
- Turmeric smoothie: Blend coconut milk, mangoes, bananas, and turmeric powder for a refreshing and healthy smoothie.
Remember to use fresh turmeric in your recipes to get the most out of its flavor and health benefits. And don’t forget to harvest and store your own turmeric for future use.
Quick Tips
Here are some quick tips for growing turmeric:
- Plant turmeric in a warm and humid environment with well-draining soil.
- Water the plants frequently but don’t allow the soil to become waterlogged.
- Provide regular feeding with organic fertilizers like compost tea or bone meal.
- Use natural pest control methods like neem oil or garlic spray to prevent infestations.
- Harvest the turmeric after around 8-10 months of planting.
Conclusion
Growing turmeric can be a fun and rewarding experience that provides you with fresh, organic produce right at your doorstep. By following our step-by-step guide, you’ll be on your way to growing your own turmeric in no time. Remember to modify the growing process based on the seasons, use fresh turmeric in your cooking, and share your experiences with others.


