Introduction
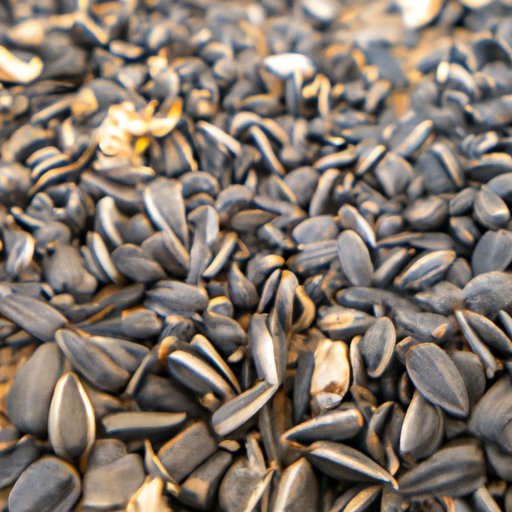
Harvesting sunflower seeds is a satisfying and rewarding experience for gardeners and seed savers. Whether you want to grow your own sunflowers or simply enjoy the delicious taste of sunflower seeds, knowing how to harvest them correctly is key.
In this article, we will explore the best techniques, tips, and tricks for harvesting sunflower seeds. From preparation to roasting, this comprehensive guide will help you get the most out of your sunflowers.
10 Simple Steps to Harvest Sunflower Seeds Like a Pro
Before diving into the harvesting process, it’s essential to have the right tools and equipment. You will need a few basic items:
- Gardening gloves
- Pruning shears or scissors
- Buckets or basins
- A large flat surface for drying
Once you have gathered your tools, the first step is to determine whether your sunflowers are ready for harvesting. Look for signs of maturity such as dried-up petals, wilted flowers, and droopy heads. To double-check, gently rub the center of the sunflower head with your fingers. If seeds come loose easily, your sunflowers are ready for harvesting.
Next, it’s time to start harvesting sunflower seeds. Follow these simple steps:
- Put on your gloves to protect your hands from prickly stalks and sharp seed pods.
- Use pruning shears or scissors to cut the sunflower heads off the stalks. Leave about six inches of stem attached to the head.
- Place the sunflower heads in a bucket or basin as you work. If you have a lot of sunflowers, you may need multiple containers.
- Take the sunflower heads to a flat surface for drying. Avoid exposing them to direct sunlight or wind.
- Remove the seeds from the sunflower head by gently rubbing them with your hands or using a fork to loosen them from the stalk.
- Remove any debris or chaff from the seeds by winnowing. This involves pouring the seeds from one container to another in the wind or using a fan to blow away the debris.
- Rinse the seeds in water and dry them thoroughly on a flat surface or in a dehydrator.
- Store the seeds in an airtight container in a cool, dark place.
- Enjoy your harvested sunflower seeds as a tasty snack or save them for planting or cooking.
With these steps, you can now harvest sunflower seeds like a pro! However, there are some additional tips and tricks that can help improve the process.
The Ultimate Guide to Gathering Sunflower Seeds: Tips and Tricks
Harvesting sunflower seeds can be challenging, especially if you have a large sunflower field. Here are some useful tips and tricks to help you tackle the task efficiently:
Harvest in the morning: Sunflowers are more hydrated in the morning, which makes it easier to remove the seeds. It’s also easier to spot mature heads when they are facing the sun.
Work in dry conditions: Moisture can cause the heads to mold during storage, so avoid harvesting during or just after a rainstorm. Wait for dry weather conditions to harvest.
Have a sorting area: Keep a clean, well-ventilated area near the garden where you can sort and dry the seeds. This prevents debris and moisture from getting into the harvested seeds and helps them dry faster.
Be aware of wildlife: If you are harvesting sunflower seeds in a rural area, be aware of wildlife such as birds and squirrels that may also be interested in the seeds. Cover the sunflower heads with a paper bag or cheese cloth to protect them from animals.
With these tips, you can easily manage a large sunflower field and achieve a bountiful harvest.
From Field to Plate: How to Harvest Sunflower Seeds for Your Next Snack
After harvesting sunflower seeds, you can enjoy them as a healthy and flavorful snack. Here are some ideas for preparing sunflower seeds for consumption:
Roasting: Preheat your oven to 300 degrees Fahrenheit. Spread the cleaned and dried seeds on a baking sheet and coat them lightly with olive oil or cooking spray. Add a pinch of salt or other seasonings as desired. Roast the seeds in the oven for 30-40 minutes, stirring occasionally, until they are golden brown.
Seasoning: Sunflower seeds are delicious on their own, but you can also experiment with different flavorings. Some popular choices include garlic powder, chili powder, honey, or cinnamon and sugar.
Cooking: Sunflower seeds can also be used in recipes such as salads, soups, and stir-fries. They add a crunchy texture and nutty flavor to your favorite dishes.
Get creative with your sunflower seeds and try different flavor combinations to find your favorite snack!
DIY Guide to Harvesting Sunflower Seeds for Gardening Enthusiasts
For gardening enthusiasts, harvesting sunflower seeds is an excellent way to save money and maintain the quality of your plants. Here’s why:
Open-pollinated vs. Hybrid Seeds: By harvesting your own sunflower seeds, you can be sure you are saving open-pollinated seeds that will produce identical plants next year. Hybrid seeds, on the other hand, do not breed true and may produce inferior plants if saved.
Proper Storage: When you save sunflower seeds from your own plants, you know exactly how they were grown and harvested, ensuring you get high-quality seeds for planting next year. Just make sure to store them properly in a cool, dry place, so they remain viable.
Here’s how to harvest sunflower seeds for planting:
- Choose mature sunflower heads with plenty of plump seeds.
- Cut the heads from the stalks and leave them to dry on a flat surface in a well-ventilated area.
- Remove the seeds from the dried heads using your hands or a fork.
- Winnow the seeds to remove debris and chaff.
- Dry the seeds thoroughly and store them in a labeled container in a cool, dry place.
By following these steps, you can save your own sunflower seeds and enjoy a bountiful harvest next year.
Seed Saving 101: Harvesting Sunflower Seeds for Future Planting
If you are serious about seed saving, you can take steps to ensure the success of your future sunflower plants. Here are some best practices:
Label and record-keeping: Keep detailed records of the sunflower varieties you are saving and how they are performing. This enables you to track their performance over time and make adjustments as needed.
Proper Storage: Store your sunflower seeds in a cool, dry place to maintain their viability. You can also store them in labeled envelopes or mason jars to keep them organized.
Germination Testing: Before planting saved sunflower seeds the following year, test them for germination. Place ten seeds on a damp paper towel, roll it up, and place it in a plastic bag. Check the seeds after seven days to see how many have germinated. If less than six seeds have germinated, plant the seeds thickly in the garden.
By following these practices, you can successfully save sunflower seeds from year to year.
Conclusion
Harvesting sunflower seeds is an enjoyable and fulfilling experience. Whether you are a gardener, seed saver, or snack enthusiast, the techniques and tips in this guide can help you get the most out of your sunflowers. With the right preparation, tools, and strategies, you can harvest sunflower seeds like a pro and enjoy them in a variety of ways.
So, take up the challenge and start harvesting sunflower seeds to enjoy as a snack, plant for future gardening, or save for future plantings.


