Introduction
If you’re someone looking for a creative way to decorate items, then hydro dipping can be an excellent option for you. The technique has recently gained immense popularity because it is inexpensive, easy to do, and can give a unique and professional look to almost anything.
With hydro dipping you can easily transform everyday objects into something unique and special. Whether you’re looking to decorate your room with DIY projects or want to upgrade your regular sports gear, hydro dipping can do it all.
In this guide, we will go over all the essential steps to learn how to hydro dip. We’ll also provide you with different project ideas and tips on how to create special effects.
Step by Step Guide: Beginner-Friendly Guide to Hydro Dipping
Hydro dipping can be a lot fun and easy, but it’s essential to prepare well before diving in. Here are the essential steps you need to follow to get started.
Gather your Supplies
Before you begin, you will need to have all the necessary items for the project. The three key things you’ll need are:
1. A container that can hold enough water to submerge your item.
2. A water-based spray paint that is compatible with hydro dipping.
3. An item you want to hydro dip that can be made of materials like plastic, wood, glass, metal, ceramic, or anything that can stay underwater for 30 seconds.
Prepare the Item for Hydro Dipping
Once you have gathered all the necessary items, you’ll need to prepare the object you want to hydro dip. You can do that by:
1. Cleaning the item: Ensure that the item is clean and free of debris and dust. If the item is not clean, it could affect the final result.
2. Base-coating the item: Before dipping, paint the item with a base color in a single layer. The base color will show through the hydro dip design. Once the base coat dries, you can dip it onto the hydro dip pattern.
The Dipping Process
Once you have prepped the item, the next step is dipping the item in the water-based spray paint. Follow these steps:
1. Fill up the container: Fill a container with enough water, ensuring that the water temperature is around 80°F or 27°C.
2. Spray the paint: Select your desired paint and spray it on the water’s surface. You can use one color or can create a multicolored design.
3. Dip the item: Slowly immerse the prepped object into the solution until it’s fully submerged.
4. Rinse the item: Once the object is dipped, remove it from the solution and rinse it with clean water.
Safety Precautions
It’s essential to take precautions when working with hydro dip paint to protect your lungs and skin from any potential harmful chemicals. We recommend working in a well-ventilated room or even outdoors. Also, wear a mask, gloves, and goggles to protect your eyes when you’re working with paint and other chemicals.
DIY Project Ideas
Here are some creative DIY project ideas that you can try out with hydro dipping.
Custom Phone Cases
With hydro dipping, you can turn regular phone cases into unique pieces of art. You can use multiple colored paint or add some stickers to create a beautiful pattern that will make your phone look distinctive.
Home Decor Items
Hydro dipping can be an excellent way to bring colors and personality to your home interiors. You can try dipping anything like flower pots, candle jars, lampshades, photo frames, and more. The colors and texture created from hydro dipping will make them look like high-end designer pieces.
Athletic Equipment
Hydro dipping can be used to customize your athletic equipment, like hockey sticks, shin pads, helmets, and more. You can make your sports gear look unique and eye-catching with hydro dipping.
FAQs
What surfaces are best for Hydro Dipping?
You can hydro dip any non-porous surface like plastic, wood, glass, and metal. But the preparation and dipping process might vary a little depending on the material you choose.
How to clean up after a project?
It’s essential to clean up after hydro dipping, taking proper precautions to avoid any damage to surroundings. You can follow the instructions provided with the paint on how to dispose of remaining paint and water solution. Clean the container with soapy water, and you can use rubbing alcohol to remove excess paint stains.
Video Tutorial
Here is a detailed video tutorial that can help you understand the process of hydro dipping.
Special Effects
Once you learn the basics of hydro dipping, you can start exploring different techniques to create stunning patterns and textures. Here are some advanced hydro dipping techniques:
Marbling
Marbling is the process of creating a swirly pattern on top of the water. You can use a skewer or toothpick to create a swirling effect on the solution and then dip the item.
Ombre
Ombre is the gradual blending of two or three colors into each other. For ombre patterns, you need to dip your item multiple times, each time using a lighter or darker shade than the previous one.
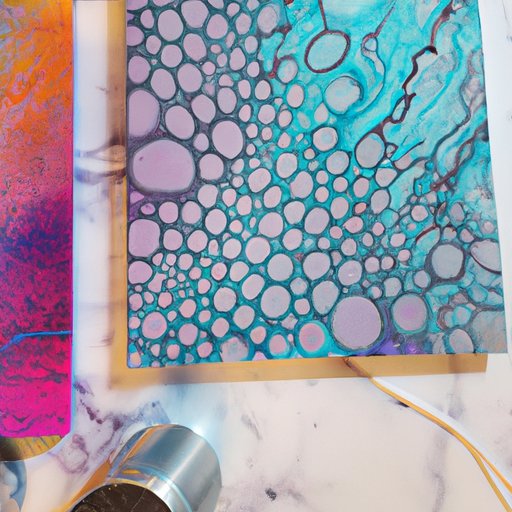
Inspiring Galleries
Here are some inspiring photos of hydro dipped items, showcasing the endless possibilities of hydro dipping.


Conclusion
Hydro dipping is a great way to create unique and vibrant DIY projects. It is a simple and fun activity that anyone can easily manage. You can turn ordinary items into something extraordinary with hydro dipping.


