Introduction
Have your dresser drawers started to stick or become difficult to open and close? It might be time to replace the drawer slides! Installing new slides can seem daunting, but with the right tools and some patience, you can do it yourself. In this step-by-step guide, we will walk you through how to install new drawer slides, from removing the old ones to troubleshooting common issues.
Step-by-Step Guide
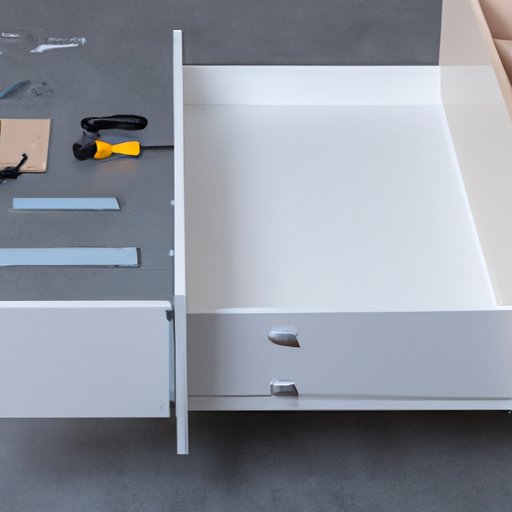
A. Preparation: Tools and Materials Needed
Before starting, gather the necessary tools: a drill, measuring tape, level, screwdriver, and screws required for your particular slide model. You will also need new drawer slides, which can be purchased at any home improvement store or online.
B. Removing Old Slides (If Applicable)
If replacing slides, first remove the old ones. Begin by pulling the drawer out and unscrewing the screws from the old slides with a screwdriver. After the old ones have been removed, take a moment to clean and vacuum any debris or dust.
C. Measuring and Marking Where the New Slides Will Go
Using the measuring tape, measure the distance from the bottom of the drawer to the center of the slide mounting area. Mark this distance on both sides of the drawer. You will also need to measure the height from the bottom of the cabinet to the position of the drawer slides. Mark this position on both sides. Use a level to make sure your markings are straight.
D. Attaching the Slides to the Drawer
Attach the slides to the drawer by aligning them with the markings made in the previous step. Carefully screw in the mounting brackets, making sure they are flush with the side of the drawer. Repeat on both sides.
E. Installing the Slides in the Cabinet
Lift the drawer and position the slides in the cabinet. You may need a helper to hold the drawer in place while you align the slides with the marks made in Step C. Once aligned, screw the slides into place using the provided screws.
F. Testing the Drawer’s Movement
Test the movement of the drawer by sliding it in and out. Make sure it slides smoothly and isn’t binding. Adjust and test its placement until the drawer opens and closes easily.
G. Troubleshooting Common Issues
If your drawer doesn’t slide smoothly or if it’s too loose, it’s likely that the slide installation was done improperly. Try adjusting the slides and testing the drawer again. If it still doesn’t work, reference the troubleshooting guide in Section VIII.
Video Tutorial
A. Embed Video demonstrating installation process
For visual learners, we’ve included a video tutorial that walks through the entire process of installing drawer slides.
B. Benefits of Visual Learners Having This Resource
Visual learners may find it easier to grasp the installation process by watching how it’s done. Reference the video as many times as necessary to fully understand the process and necessary steps.
Dos and Don’ts
A. Common Mistakes Made When Installing Drawer Slides
One common mistake when installing drawer slides is not measuring correctly. Take your time making accurate measurements, and double-check before drilling holes. Another mistake is fastening the screw too tightly, which can ultimately cause harm to the slide. It’s best practice to install these screws loosely until all screws are in place across the rails.
B. Tips for Avoiding These Mistakes, Such as Measuring Twice and Drilling Carefully
Use a measuring tape to measure twice before drilling. If you are concerned about drilling into the wrong spot, use a piece of masking tape to mark where you want the hole. Drill slowly and carefully to avoid damaging your cabinet or drawer.
Tools and Materials
A. Overview of Necessary Tools
Be sure to have your drill, measuring tape, level, screwdriver, screws required for your particular slide model, and new drawer slides. If necessary, secure clamps, masking tape, and a safety mask for when drilling.
B. Tips for Sourcing Quality Tools and Materials
A hardware store can help you source quality tools specific to your job if you need assistance. Consider brands known for quality, or look at online reviews to find ideal products. This step may sound trivial, but proper tools and material will make the installation experience much smoother.
Tips and Tricks
A. How to Make Installation Easier and More Efficient
A handy tip is to assemble everything before starting the installation and lay it out within an arm’s reach. This will help keep things organized and ensure small screws and similar items do not get lost during the process. Be sure to label new slides properly, so they are identified easily and fastened securely.
B. Suggestions Like Assembling Everything Before Beginning Installation
Before installing, assemble everything needed and ensure the arrow symbol on the drawer slide is facing the front of the drawer.
Best Practices
A. Discussion on Safety and Proper Techniques
Always refer to the user manual whenever working with power tools. Ensure you wear appropriate safety gear, such as safety glasses and gloves. Also, work on a flat surface and use clamps to stabilize the drawer and/or cabinet.
B. Include Suggestions like Securing the Drawer before Beginning
Secure the loose drawer front during installation and avoid over-tightening the slide, which can cause excess friction during closing and opening.
Troubleshooting Guide
A. Issues Users May Encounter During Installation and Their Solutions
If the drawer does not sit correctly in the chassis, it is either due to improper installation of the slides or the incorrect size. Before drilling or fastening any screws, make sure you have the correct size and source slides specifically for your given drawer, cabinet, or chassis.
B. Conclusion/Review of How to Install Drawer Slides
By following these guidelines, you can easily install drawer slides yourself. Thoroughly review the steps listed above and gather all necessary materials and tools before beginning the installation process. When in doubt, reference the video tutorial and, above all else, prioritize safety.
Conclusion
A. Recap of the Steps Required to Install Drawer Slides
Installing drawer slides might seem intimidating, but it’s straightforward if you go step by step and use the right tools and materials. These steps include measuring and marking, attaching slides to the drawer, installing slides in the cabinet, testing the drawer movement, and troubleshooting common issues.
B. Mention of the Resources Provided in the Article
Remember that you can watch the video tutorial, review the common dos and don’ts, gather the tools and materials, and follow our best practices to make the installation process easier and more efficient. By utilizing these resources, you will be able to install your drawer slides with ease and have smooth, functioning drawers in no time.


