Introduction
If you’re tired of dealing with food scraps and waste piling up in your kitchen, installing a garbage disposal can be a game-changer. Not only does it make clean-up faster and easier, but it can also improve the overall hygiene of your space. While the idea of installing one yourself may seem daunting, with the right tools and knowledge, it’s an achievable DIY project. In this article, we’ll guide you through the step-by-step process of installing a garbage disposal, as well as provide tips for avoiding common mistakes and choosing the right disposal for your needs.
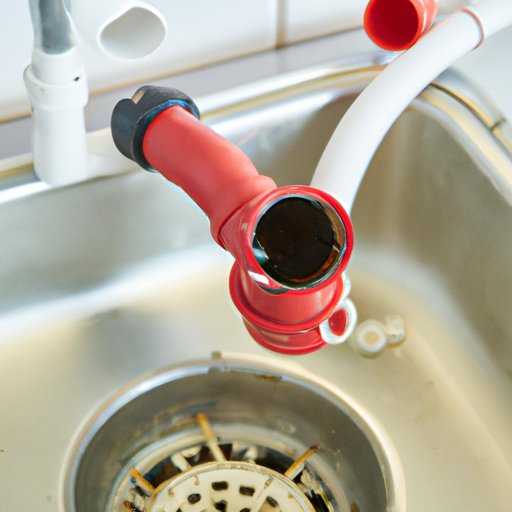
Step-by-Step Guide to Installing a Garbage Disposal in Your Kitchen
The first step in installing a garbage disposal is to make sure you have all the necessary tools and materials. This includes a mounting assembly, disposal unit, P-trap, plumber’s putty, electrical wire, wire connectors, screwdriver, hammer, adjustable wrench, and pipe wrench.
Once you have your tools ready, the next step is to turn off the power and water supply to the area where you will be installing the disposal. Remove any existing drain parts and start by installing the mounting assembly onto the sink flange. Tighten the mounting screws and attach the disposal unit to the mounting assembly. Connect the discharge pipes and the P-trap, making sure to tightly secure them with the appropriate wrenches. Finally, connect the disposal unit to the electrical wire.
Common Mistakes to Avoid When Installing a Garbage Disposal
One of the most common mistakes people make when installing a garbage disposal is failing to properly tighten all the connections. This can cause leaks and other plumbing issues down the road. Another mistake is not correctly aligning the disposal unit with the mounting assembly, which can cause instability and even damage to the unit. Additionally, it’s important to make sure you have the correct sized disposal for your sink and usage needs to prevent overloading and potential damage.
If you do run into any issues during the installation process, don’t hesitate to consult the manufacturer’s instructions or seek the advice of a professional plumber.
DIY Guide: How to Install a Garbage Disposal in Your Kitchen Sink
If you’re feeling confident in your DIY skills and want to install a garbage disposal yourself, here are some more in-depth instructions to follow. First, make sure to turn off the power and water supply to the area where you will be working. Next, remove any existing drain parts and install the mounting assembly onto the sink flange, making sure it’s flush against the sink surface. Use plumber’s putty to ensure a water-tight seal.
Install the disposal unit onto the mounting assembly and align it properly. Tighten the mounting screws and attach the discharge pipes and the P-trap. Make sure to use the correct torque settings and wrenches to avoid leaks. Finally, connect the disposal unit to the electrical wire with a wire connector and restore the power and water supply to the area.
Tools You’ll Need to Effectively Install a Garbage Disposal
As mentioned earlier, having the right tools is essential for a successful installation. Here’s a breakdown of what you’ll need and their functions:
- Mounting assembly – attaches the disposal unit to the sink flange
- Disposal unit – grinds the food waste and sends it to the septic or sewer system
- P-trap – prevents sewage gas from entering the home and is required by plumbing codes in most areas
- Plumber’s putty – seals the mounting assembly to the sink flange and prevents leaks
- Electrical wire – connects the disposal unit to the power supply
- Wire connectors – attach the electrical wire to the disposal unit
- Adjustable wrench – tightens and loosens the nuts and bolts during installation
- Pipe wrench – tightens and loosens the pipe joints during installation
Tips for Choosing the Right Garbage Disposal for Your Home
Not all garbage disposals are created equal, so it’s important to consider your specific needs and usage when selecting one. Some factors to consider include:
- Size – choose a unit that fits the space and plumbing under your sink
- Power – consider the horsepower and RPM to ensure it can handle your typical food waste
- Noise level – some disposals are louder than others, so think about any noise concerns you may have
- Brand and warranty – choose a reputable brand and look for a warranty that covers potential issues or defects
It’s also important to check with your local plumbing codes and regulations to see if a certain type or size of disposal is required or restricted in your area.
Professional vs. DIY: Pros and Cons of Installing Your Own Garbage Disposal
While installing a garbage disposal can be a DIY project, some people may prefer to hire a professional plumber to do it for them. Here are some pros and cons to consider:
- DIY Pros – can save money, knowing how it’s installed helps with future maintenance
- DIY Cons – can be time-consuming, improper installation could lead to plumbing issues
- Professional Pros – experienced and efficient, know all codes<
- Professional Cons – can be more expensive, may require scheduling and coordination with their availability
Ultimately, the decision of whether to install a garbage disposal yourself or hire a pro will depend on your comfort with DIY projects, budget, and available time.
Conclusion
By following the step-by-step guide and avoiding common mistakes, installing a garbage disposal can be a simple and rewarding DIY project. Remember to choose the right disposal for your needs, have the necessary tools and materials, and if you run into any issues, don’t hesitate to consult a professional. With a little effort and know-how, you can enjoy the convenience and hygiene benefits of a garbage disposal in your home.


