I. Introduction
Are you tired of wearing generic, mass-produced hats that don’t quite fit your personal style? Learning how to knit your own hat is a fun and rewarding project that allows you to customize your headwear to match your unique taste. In this article, we’ll walk you through a step-by-step guide for beginners to knit a hat, as well as offer tips for personalizing your creation with unique patterns and designs.
II. A step-by-step guide to knitting a hat for beginners
Before we dive into the nitty-gritty of knitting, let’s gather the materials you’ll need for this project:
- Yarn
- Knitting needles
- Scissors
- Tapestry needle
- Stitch markers (optional)
A. Casting on stitches
The first step in knitting a hat is to cast on stitches. This creates the base of your hat. The number of stitches you cast on will depend on the size of hat you want to make. A typical adult hat may require 80-100 stitches, while a child’s hat may require 60-80 stitches. You’ll want to use a long-tail cast-on method to ensure a stretchy edge.
B. Knitting the body of the hat
Once you’ve cast on your stitches, you’ll start knitting in the round. You can adjust the stitch pattern and texture to your liking for a unique look. Stockinette stitch is a popular choice for hats as it creates a smooth surface with a slight curl at the base. Keep knitting until the hat reaches your desired length.
C. Decreasing stitches
To shape the crown of the hat, you’ll need to decrease your stitches gradually towards the top. There are several decrease methods to choose from, but the most common is the knit-two-together (k2tog) technique. Simply knit two stitches together as one to decrease and create a smoother crown. Repeat this process with every row until you have only a few stitches left.
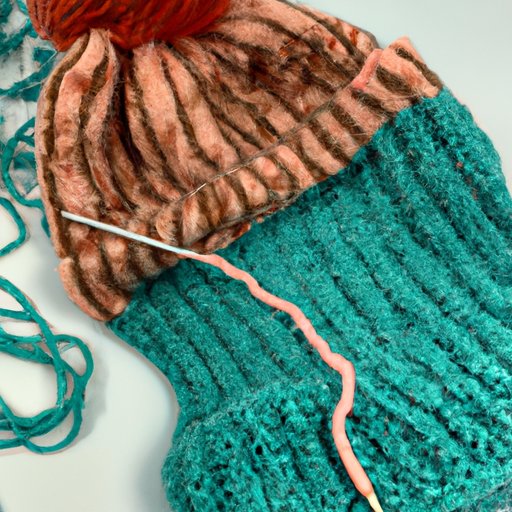
D. Closing the hat
After you’ve knit the crown of your hat, you’ll need to close it up. Cut the yarn, leaving a long tail, and thread it through the remaining stitches with a tapestry needle. Pull tight and weave in any loose ends. You can add a pom-pom or tassel for a fun finishing touch.
III. Tips and tricks for creating the perfect knit hat
While knitting a hat may seem like a straightforward project, there are a few tips and tricks to keep in mind to create a polished final product.
A. Choosing the right yarn
Yarn choice is crucial in determining the look and feel of your hat. Consider the level of warmth and softness you want, as well as the stretchiness and draping qualities of the yarn. Wool is a popular choice for hats as it is warm and durable, while cashmere and alpaca can add a luxurious feel.
B. Adjusting gauge for a perfect fit
Gauge refers to the number of stitches and rows per inch. It’s important to match the gauge of your pattern or adjust accordingly to ensure your hat fits properly. Taking the time to swatch and measure before starting your project can save you from disappointment later.
C. Avoiding common mistakes
Avoid common mistakes such as twisted stitches, dropped stitches, and uneven tension by checking your work regularly. Use stitch markers to help keep track of pattern repeats and count your stitches frequently. Rip out any mistakes as needed to ensure a clean final product.
D. Blocking the hat for a professional finish
Blocking involves wetting your hat and shaping it to the correct size and dimensions. This can help even out any bumps, improve stitch definition, and give your hat a polished look. Follow the blocking instructions for your specific yarn type for best results.
IV. How to personalize your knit hat with unique patterns and designs
Once you’ve mastered the basics of knitting a hat, you can take your creations to the next level with unique patterns and designs.
A. Intarsia technique for creating patterns
The intarsia technique involves using multiple colors of yarn to create geometric patterns or designs. This technique requires separate balls of yarn for each color and can create a professional-looking finished product.
B. Fair Isle technique for colorwork
Fair Isle is a popular technique for creating colorwork designs. This involves carrying two colors of yarn at once and alternating between them to create a pattern. This technique can be more challenging to execute, but it can yield impressive results.
C. Adding embellishments like pom-poms or patches
You can add a personal touch to your hat by adding embellishments like pom-poms, patches, or buttons. Choose items that complement the color and style of your hat for a cohesive look.
D. Using different stitch textures for emphasis
Experiment with different stitch textures, such as cables or ribbing, to create a unique look and add emphasis to certain areas of your hat. This can also give your hat a more three-dimensional appearance.
V. The benefits of knitting your own hat and why it’s a valuable skill to have
Learning how to knit your own hat offers several benefits beyond just a fun DIY project.
A. Customization
Create a hat that is completely personalized to your unique style and preferences. You are in control of the color, texture, and design, ensuring your hat is one-of-a-kind.
B. Cost-effectiveness
Knitting your own hat can save you money in the long run. Quality hats can be expensive, but with knitting, you can control the cost of materials and create multiple hats for the same price as one store-bought hat.
C. Stress reduction
Knitting can be a calming and meditative activity that allows you to take a break from the stresses of daily life. It can also improve dexterity and hand-eye coordination.
D. Creativity outlet
Knitting a hat offers endless opportunities for creativity and experimentation. You can mix and match yarns, patterns, and colors to create a hat that is uniquely you.
VI. Knitting safety: Precautions to take when knitting a hat
While knitting may seem like a low-risk activity, there are a few safety precautions to keep in mind.
A. Needle safety
Always be aware of where your needles are in relation to your body and others around you. Avoid leaving needles lying around where they can be stepped on or ingested by pets or children.
B. Ergonomic knitting practices to avoid injury
Knitting for prolonged periods of time can lead to repetitive strain injuries. Take breaks frequently and use ergonomic knitting tools, such as padded needles or wrist supports, to reduce the risk of injury.
C. Supervision for children
Teaching children to knit can be a rewarding experience, but it’s important to supervise them closely to ensure they are using their materials safely and not putting themselves or others at risk.
VII. Conclusion
Congratulations! You’re armed with the knowledge and skills to knit your own hats. Whether you’re a beginner or an experienced maker, there’s a world of opportunity waiting for you in the world of knitting. We hope this guide has inspired you to take on new challenges in your knitting practice and create hats that reflect your unique style and personality.


