Introduction
If you have gas appliances in your home, you have likely come across a pilot light. A pilot light is a small, constantly burning flame that ignites the gas for your appliance to function. While newer gas appliances may not require a pilot light, older models still rely on this technology. If you have an older gas appliance with a pilot light, it’s important to know how to light it. Not only does this make it possible for you to use your appliance, but it can also help you save money on costly repair services.
This article is for readers who have gas appliances that require a pilot light, but have little to no experience lighting one. We will provide a comprehensive guide on how to light a pilot light, including helpful tips and troubleshooting strategies.
Step-by-Step Guide to Lighting a Pilot Light
Before you begin lighting your pilot light, there are a few pieces of equipment you will need:
- Long-reach lighter/matchstick
- Flashlight
- Gloves (optional but recommended)
Now that you have gathered your equipment, here are the steps to follow in order to light a pilot light:
- Locate the pilot light valve. This is typically located near or on the gas valve. Consult the owner’s manual for your appliance if you are unsure where to find it.
- Turn the control knob to “off” and wait five minutes to allow any gas in the appliance to dissipate.
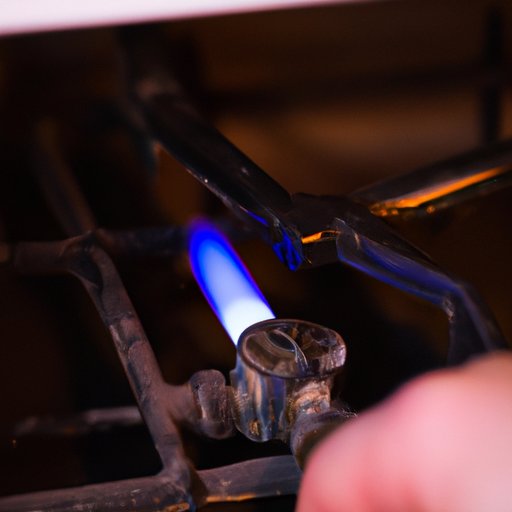
- Locate the pilot light by looking for a small, blue flame inside or near your appliance. Use a flashlight if necessary.
- Take your long-reach lighter, carefully bring it up to the pilot light, and ignite it. If you’re using a matchstick, strike the match and bring it up to the pilot light.
- Once the pilot light is lit, continue to hold the control knob down for 30 seconds before you release it. This will ensure that the flame stays lit.
- Turn the control knob to the “on” position. The flame should remain lit. If it does not, try relighting the pilot light.
- If the pilot light continues to go out after relighting it, you may need to call in a professional for further assistance.
Remember to follow all safety precautions when lighting your pilot light, including wearing gloves and using a flashlight in a poorly lit area.

Video Tutorial for Lighting a Pilot Light
If you’re a visual learner, a video tutorial can be an excellent resource for learning how to light a pilot light. Check out the video tutorial below for step-by-step instructions:
Remember, always prioritize safety when lighting your pilot light.
Tips and Tricks for Lighting a Pilot Light
While the steps for lighting a pilot light are relatively straightforward, there are a few tips and tricks that can make the process easier:
- Invest in a long-reach lighter with a flexible neck to make it easier to spark the pilot light without having to get too close to the flame.
- Always read your appliance’s owner’s manual before attempting any repairs or maintenance. It will have specific information on how to light your pilot light and other important safety tips.
- If you’re having trouble getting the pilot light to light, try turning off the control knob, waiting five minutes, and then turning it back on before attempting to light the pilot light again.
- If the pilot light still won’t light, it may be an issue with gas pressure or the gas valve. In this case, you should consult a professional to avoid causing further damage or risking injury.
Troubleshooting Common Problems with Lighting a Pilot Light
When it comes to lighting a pilot light, there are a few common problems that you may run into:
- Malfunctioning gas valve: A faulty gas valve can prevent the pilot light from lighting. If you suspect the gas valve may be the issue, refrain from attempting a DIY repair and consult a professional.
- Dirty pilot tube: If the pilot tube is dirty or clogged, it may prevent the pilot light from igniting. Try cleaning the tube with a fine wire or needle to see if that resolves the issue.
- Low gas pressure: Low gas pressure can cause pilot lights to go out frequently. Contact your gas provider if you suspect low gas pressure may be the issue.
If you still cannot resolve the issue after troubleshooting, it’s time to call a professional. Attempting to fix the problem on your own may result in further damage or injury.’
Preventative Maintenance for Gas Appliances with Pilot Lights
To avoid future problems with your pilot light and gas appliances, it’s important to conduct preventative maintenance. Here’s what you can do:
- Regularly inspect your pilot light and gas appliances for any signs of damage or wear and tear
- Clean your pilot light using a fine wire or needle to ensure it is free of dirt and debris
- Have your gas appliances serviced annually by a professional to keep them in top condition
Conclusion
Now that you know how to light a pilot light, you can save money on costly repair services and keep your gas appliances in top condition. Remember to always prioritize safety, read the owner’s manual, and call a professional if you’re unsure about any DIY repairs or maintenance.


