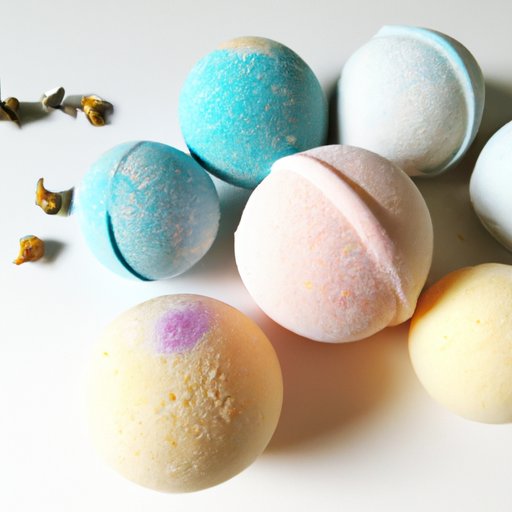
Make Your Own Bath Bombs: A Step-by-Step Tutorial
There’s nothing quite like a warm bath at the end of a long day, and adding a bath bomb can take the relaxation to the next level. Not only do they smell great, but bath bombs can also help soothe sore muscles and moisturize the skin. Making your own bath bombs is surprisingly easy and fun. In this article, we’ll give you a step-by-step tutorial, tips on common mistakes to avoid, ideas for special ingredients, suggestions for creating various moods, instructions for gifting, and considerations for making kid-friendly versions. Let’s get started!
Step-by-Step Tutorial
The following are the steps to make bath bombs:
Gathering Necessary Materials
Bath bomb molds are available online, or you can repurpose items like silicone ice cube trays or plastic Easter eggs. You’ll also need baking soda, citric acid, cornstarch, Epsom salt, liquid oils like coconut or almond oil, water, food coloring or mica powder (for color), and essential oils (for scent).
Mixing Dry Ingredients
Combine 1 cup baking soda, ½ cup citric acid, ½ cup cornstarch, and ½ cup Epsom salt in a large bowl. Use a whisk or fork to blend the powders together.
Adding Liquid Ingredients
In a separate bowl, mix 2-3 tablespoons of liquid oil with the desired amount of essential oil (10-15 drops is a good starting point). Slowly add the liquid mixture to the dry ingredients while stirring constantly.
Adding Color and Scent
Add 5-10 drops of food coloring or mica powder to the mixture, stirring thoroughly to distribute the color. Keep stirring until the mixture holds together when pressed firmly in your hand and has the consistency of damp sand. If the mixture is too dry, add a few sprays of water from a spray bottle, being careful not to add too much.
Molding the Bath Bombs
Fill each half of the mold with the mixture, pressing down firmly and packing the mixture tightly. Overfill the mold with both sides, then press them together and twist them slightly to seal the edges. Give the mold a tap or two with a spoon to release the bath bomb from the mold.
Letting them Dry
Place the bath bombs on wax paper or parchment paper and allow them to dry for 24-48 hours. When they are fully dry, they can be stored in an airtight container until use.
Common Mistakes to Avoid
While making bath bombs is relatively simple, there are a few mistakes that can spell disaster:
- Using too much liquid: Adding too much liquid, even a few drops, can activate the citric acid in the mixture and make it fizz in the bowl before it has a chance to set in the mold.
- Not packing the mixture tightly enough: If the mixture isn’t packed tightly enough into the mold, the bath bomb will crumble or fall apart when removed from the mold.
- Adding too much color or scent: A little goes a long way when it comes to color and scent. Too much can overwhelm the senses and even cause skin irritation.
- Not letting the bombs dry fully: If the bath bombs aren’t completely dry before storage, they can lose their fizziness and become soft or sticky.
Special Ingredients
Of course, not all bath bombs have to be the same. Here are some unexpected ingredients you can experiment with:
- Dried flowers: Lavender buds, rose petals, or chamomile flowers can add a subtle fragrance and texture.
- Oatmeal: Finely ground oats can soothe irritated skin and provide a more moisturizing experience.
- Cocoa powder: Adding cocoa powder to the mixture can give the bath bomb a chocolatey scent and color.
When using special ingredients, simply add them in with the dry ingredients and mix as usual.
Mood-Boosters
Essential oils can help set the mood for your bath time experience. Here are some popular options:
- Lavender: Calming and relaxing
- Peppermint: Invigorating and energizing
- Lemon: Uplifting and refreshing
Add 10-15 drops of the chosen oil to the liquid mixture in the recipe. Alternatively, you can create your own blends by combining different oils, such as lavender and peppermint.
DIY Gift
Bath bombs make excellent gifts for friends and family. Here are some ideas for packaging:
- Mason jars: Fill a mason jar with bath bombs and tie a ribbon or bow around the lid.
- Gift bags: Use a small gift bag and add some tissue paper along with the bath bombs for a simple yet elegant presentation.
Include a note with instructions for use: Simply drop one or two bath bombs into a warm bath and relax!
Kid Version
Kids love bath bombs too, but safety should always be a top priority. Here are some tips for making kid-friendly versions:
- Use skin-safe colorants: Natural food coloring or vegetable-based colorants are less likely to cause irritation than chemical dyes.
- Avoid strong scents: Kids may be more sensitive to strong fragrances, so opt for mild scents like lavender or vanilla.
- Use fun molds: Try using molds in the shape of animals, letters, or numbers for added excitement.
Conclusion
Making your own bath bombs is a fun and rewarding experience that can lead to a more enjoyable bath time. With these tips and tricks, you’ll be well on your way to creating your own custom bath bombs in no time.


