
I. Introduction
Are you tired of wearing the same old hairstyles every day? Want to add some creative flair to your look? A hair bow might be just what you need! Not only are hair bows an adorable accessory, but they are also versatile and easy to make. In this article, we’ll explore the ins and outs of hair bow crafting, from basic designs to current trends. Let’s get started!
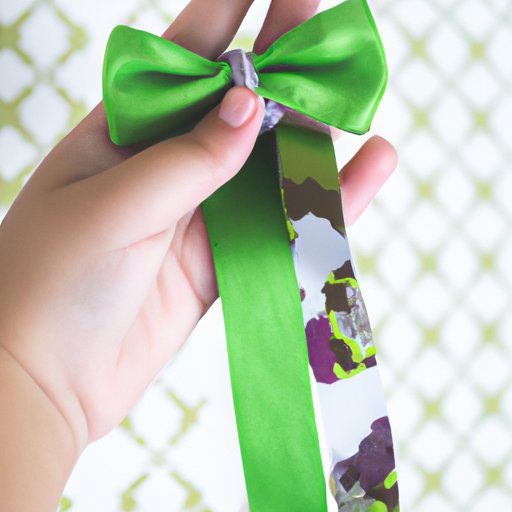
II. Step-by-Step Guide: How to Make a Hair Bow
Before we dive into different hair bow designs, let’s cover the basics of making a hair bow. You’ll need a few materials to get started:
- Ribbon or fabric
- Scissors
- Wire or thread
- Glue gun or fabric glue
- Bobby pins or hair ties
Now that you have your materials ready, follow these simple steps to create your own hair bow:
- Cut your ribbon or fabric to the desired length and width for your bow.
- Fold the ribbon or fabric in half and create a loop with the folded end, leaving a tail on both sides.
- Pinch the folded area with your fingers and secure it with a few stitches or glue.
- Create two more loops, one on each side of the center loop, overlapping them slightly.
- Secure the three loops at their centers with wire or thread, wrapping them tightly so they don’t unravel.
- Attach a small piece of ribbon or fabric to the center to cover the wire or thread and make it look neat.
- Attach the bow to a bobby pin or a hair tie with glue, and you’re done!
If you want your hair bow to look even more professional, you can try these extra tips and tricks:
- Use a ruler or measuring tape to make sure your bow is symmetrical and even.
- Use hair spray on the ribbon or fabric to make it stiffer and more manageable.
- Curl the ribbon or fabric tails with scissors to create a more intricate look.
- Experiment with different fabrics, such as lace, denim, or faux leather, to create unique and varied designs.
III. 10 Easy DIY Hair Bow Designs You Can Make at Home
Ready to try making different hair bow designs? Here are 10 easy DIY projects to get you started:
- The Classic Bow: Follow the basic steps above with your favorite ribbon or fabric colors.
- The Pinwheel Bow: Create four equal-sized loops and place them on top of each other to create a pinwheel effect.
- The Round Bow: Use a circular object, like a bottle cap or jar lid, as a template to create a round shape instead of a bow.
- The Scrunchie Bow: Create a scrunchie by wrapping a hair tie with fabric, then add a bow on top.
- The Looped Bow: Use a longer piece of ribbon or fabric and create several loops in different sizes, then stack them up to create a layered effect.
- The Knot Bow: Create a small bow and add a tied knot in the center for a minimalist touch.
- The Half-Up Bow: Create two small bows and attach them to hair clips or bobby pins, then use them to embellish a half-up hairstyle.
- The Double Bow: Create two identical bows and stack them vertically to create a dimensional effect.
- The Butterfly Bow: Fold your ribbon or fabric in a butterfly shape, with two loops on top and two tails on the bottom.
- The Tulle Bow: Use tulle fabric to create a fluffy, girly bow that’s perfect for weddings and special occasions.
When it comes to matching your bows with different outfits, the possibilities are endless. You can choose to coordinate your bow with the colors and patterns of your clothes, or create a bold contrast to make your bow stand out even more. Play around with fabrics, textures, and sizes until you find the perfect combination. And don’t forget to add some extra touches, like glitter or sequins, to make your bows even more eye-catching.
IV. Recycling Old Clothes: Making Hair Bows from Scraps
Do you want to create something new while reducing waste at the same time? Upcycling old clothes into hair bows is a great way to do just that. Not only will you minimize your environmental impact, but you’ll also end up with unique, one-of-a-kind accessories. Here are a few tips to get you started:
- Look for clothes made of cotton, linen, or other sturdy fabrics that will hold up well when you cut them into smaller pieces.
- Cut your scraps into strips or shapes, depending on the design you want to create. You can use pinking shears to prevent fraying.
- Sew or glue your pieces together to create a larger strip or patchwork piece.
- Follow the basic steps above to turn your patchwork into a hair bow.
Some ideas for using recycled fabrics include creating a patchwork bow with different denim scraps, using an old printed blouse to create a colorful hair accessory, or embellishing a plain bow with lace or crochet from an old dress. Let your creativity soar and see what unique designs you can come up with!
V. Hair Bow Crafting for Kids: Simple Tips and Tricks
Hair bow crafting isn’t just for adults – it’s a fun and accessible activity for kids too! Here are a few tips to keep in mind if you want to introduce your kids to this craft:
- Choose age-appropriate materials, such as softer ribbons or foam sheets, for younger kids.
- Use child-friendly scissors and avoid sharp tools or objects.
- Provide a template or guide to help kids follow the basic steps above.
- Encourage creativity and experimentation, even if it means creating asymmetrical or slightly messy bows.
- Offer pre-made materials, like pre-cut ribbons or fabric pieces, to make the process easier for young kids.
- Incorporate different themes, like holidays or seasons, to make the craft more engaging and festive.
Remember, the goal of this activity is to have fun and explore different shapes and colors. Don’t worry too much about the final outcome – sometimes the most adorable hair bows are the ones that are a little imperfect.
VI. The Perfect Gift: How to Make a Hair Bow for Your Friends or Family
Looking for a thoughtful and personalized gift idea? Create a hair bow for your loved ones! Here are a few ideas to get you started:
- Birthday Bow: Create a bow in the recipient’s favorite colors or with their name or age spelled out in sequins or beads.
- Wedding Bow: Create a bow in ivory or white to match the wedding dress, and add embellishments like pearls or rhinestones.
- Baby Bow: Create a small, delicate bow in pastel colors for a newborn baby, and attach it to a stretchy headband or a clip.
- Holiday Bow: Create a bow in festive colors, like red and green for Christmas or orange and black for Halloween, and attach it to a hair tie or a bobby pin.
- Sports Bow: Create a bow in the colors of the recipient’s favorite sports team, and add a small logo or emblem in the center.
Once you’ve created the perfect bow, you can add a personal touch by wrapping it in colored tissue paper and presenting it in a small gift bag or box. You can also create a matching set of bows for a more cohesive look.
VII. From Basic to Beautiful: Upgrading Your Hair Bow Game
Ready to take your hair bow crafting to the next level? Here are a few advanced techniques and tips to try:
- Use different widths of ribbons or fabric to create layered and textured bows.
- Combine different patterns and colors to create unique and bold designs.
- Use wire to create different shapes, like a heart or a star.
- Add feathers, beads, lace, or embroidery to your bows for an extra pop of color and texture.
- Create a statement bow by using a larger piece of fabric or ribbon and attaching it to a headband or a hat instead of a hair tie or a bobby pin.
The possibilities are endless when it comes to hair bow crafting. Don’t be afraid to experiment with different shapes, colors, and textures until you create the perfect bow for your style and personality.
VIII. Hair Bow Trends: Current Styles and How to Create Them
From oversized bows to subtle embellishments, hair bows are always in style. Here are a few current hair bow trends to explore:
- The Messy Bow: Create a slightly disheveled bow with looser loops and tails for a more casual look.
- The Velvet Bow: Use velvet fabric to create a luxurious and soft bow that’s perfect for the winter season.
- The Statement Bow: Create a large, eye-catching bow by using multiple layers of fabric or ribbon.
- The Pearl Bow: Add some glamour to your bow by attaching small pearls or other gemstones to the center.
- The Printed Bow: Use patterned fabric, like stripes or polka dots, to create a playful and colorful bow.
To create these trendy bows, follow the basic steps above and add your own personal touches. You can also search online for step-by-step tutorials or video guides for more complex designs.
IX. Conclusion
Congratulations – you’re now a hair bow crafting pro! We’ve covered everything from basic designs to advanced techniques and trendy styles. Remember, hair bow crafting is all about having fun and expressing your creativity. Whether you’re making bows for yourself, your kids, or your friends, we hope you enjoy the process and the beautiful results.


