Introduction
Are you looking for a fun and creative DIY project? Look no further than making your own hat out of paper! With materials you likely already have at home, you can create unique and stylish headwear that can be customized to your liking. This article will provide step-by-step guides and tips for making a basic paper hat, upcycling old newspapers into hats, and creating unique hat designs for any occasion.
DIY Guide: How to make a hat of paper
To get started, you will need a piece of paper (any size or color will do), scissors, and tape or glue. Begin by folding the paper in half horizontally, creasing it along the middle. Open the paper back up, and then fold the top edge down to meet the middle crease. Repeat the same fold with the bottom edge, making sure it lines up with the top edge.
Next, fold the paper in half vertically, creasing it along the centerline. You should now have four equal sections on your paper. Take one of the top corners and fold it towards the center crease. Repeat with the other top corner. Flip the paper over and repeat these same folds on the other side.
To create the brim of your hat, fold the bottom edges up towards the top crease. You can decide how wide or narrow to make the brim depending on your preference. Lastly, fold the hat in half along the center crease, bringing the two sides together, and secure the back seam with tape or glue. Voila! You now have a basic paper hat.
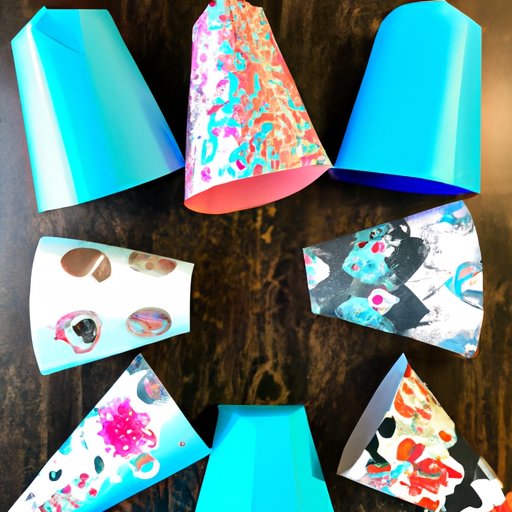
Customize your hat by coloring or decorating it with stickers, markers, or other crafting materials. You can even experiment with different materials, such as using patterned scrapbook paper or tissue paper for a unique look.
Upcycling made easy: Turn old newspapers into stylish hats
Upcycling is a great way to reduce waste and give new life to old materials. To make a hat out of newspaper, you will need a few sheets of newspaper, scissors, and glue or tape. Begin by folding a sheet of newspaper in half diagonally, forming a triangle. Crease the fold well to create a sharp edge.
With the widest part of the triangle pointing towards you, take the bottom vertex (the pointy end) and fold it up towards the top of the triangle. Fold it up again, creating a strip that will form the brim of your hat.
Next, take the left and right corners of the triangle and fold them inwards towards the center to create the hat shape. Secure the sides with tape or glue. You can leave the top pointed for a classic paper hat look, or cut it off and flatten it out for a different style.
Get creative with decorating your newspaper hat by adding paint, glitter, or even collaging other pieces of paper onto it. By using simple materials and upcycling old newspapers, you can make a fashionable statement without breaking the bank.
Show off your creativity with paper hats: A beginner’s guide
One of the joys of making paper hats is the opportunity to express your creativity and individuality. Start by choosing your paper and creating your basic hat shape, following the instructions from the previous sections. From there, the possibilities are endless for customization.
One idea for a creative paper hat is to use a larger sheet of colored paper and make a tall top hat, adding a band around the base for a polished look. You could also experiment with asymmetrical shapes, adding layers or cut-outs to the hat for added texture and dimension.
Another fun way to customize paper hats is by adding elements such as flowers or feathers. Glue or tape these on to create a unique and eye-catching hat. Felt cut-outs in animal or plant shapes can also make for an interesting and playful hat design.
5 Simple steps to create a document-themed party hat
A document-themed party hat is a fun and quirky way to celebrate any occasion, whether it’s a book club meeting or a work-themed party. To create this hat, you will need a printed or photocopied document, scissors, and glue or tape.
Begin by folding the paper horizontally in half, then in half again vertically. Unfold the paper and make a cut along the vertical crease to the center point. You should have a tab at the bottom and two flaps at the top.
Take the two top flaps and fold them down towards the center crease, overlapping slightly in the middle. Secure with glue or tape. If desired, trim the edges of the flaps to create a more rounded hat shape.
Finally, take the bottom tab and fold it up to create the brim of your hat. You can write a message or the event name on the document paper, or decorate it with stickers or stamps to fit the party theme.
Make a statement with paper hats: Unique designs for any occasion
A paper hat can be a conversation starter and a way to express your personal style. Try making a hat with unconventional materials, such as wrapping paper or scrap fabric, for added texture and interest.
You could also play with proportions, creating a mini top hat or oversized sun hat for a whimsical touch. Use themes or color schemes to tie in with specific events or outfits, such as a red and green holiday-themed hat or a rainbow-colored birthday hat.
If you’re feeling adventurous, try combining different hat shapes and designs to create a one-of-a-kind look. By experimenting with different materials and techniques, you can create a hat that is truly your own.
Conclusion
In summary, making a hat out of paper is an easy and fun activity for all ages and skill levels. From basic paper hats to upcycled newspaper designs, there are many ways to customize your hat and let your creativity shine. Whether you’re hosting a themed party or just looking for a unique accessory, making a paper hat is a simple and satisfying way to express yourself.


