I. Introduction
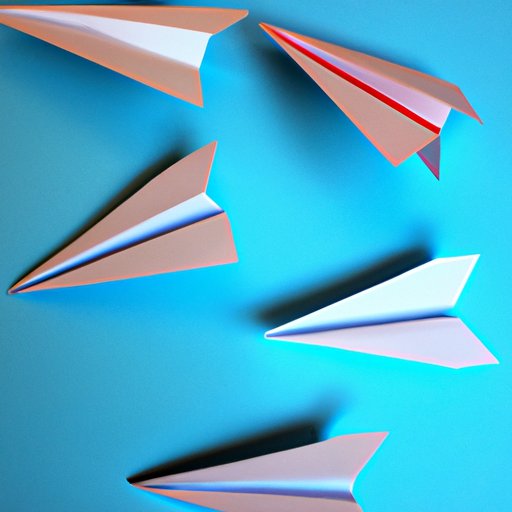
Paper airplanes are one of the oldest and most enjoyable pastimes for both children and adults. The joy of creating something out of paper and seeing it take flight is a timeless classic that has been passed down from generation to generation. In this article, we will explore the art of making paper airplanes, providing you with knowledge and insights to create a variety of planes, from basic to advanced. By the end of this guide, you’ll have the skills and tools you need to design paper planes that are sure to impress.
II. A Beginner’s Guide to Making Paper Airplanes
To get started, a basic paper airplane is the perfect place to start. First, take a standard sheet of 8.5 x 11-inch printer paper, and fold it in half vertically without creasing it too hard. Unfold the paper, and then fold the top right corner of the paper towards the center crease. Repeat the same on the left corner of the paper. Once the corners have been folded, fold the top edge of the paper downwards until it matches the center crease, forming a point at the top. Finally, fold the plane in half along the center crease, and then gently bend the wings downwards. Congratulations – you’ve just created a paper airplane!
When creating paper airplanes, it’s important to use precise folds, and a flat and even surface. This will enable the airplane to have the best possible structure to fly. Taking measurements and using guidelines can also be incredibly helpful for creating uniform paper airplanes.
III. How to Make a Paper Airplane that Flies Far
To make a paper airplane that flies far, it helps to understand basic concepts of physics and the Four Forces of Flight. These forces include lift, drag, weight, and thrust.
The force of lift is created by air passing over the wings that creates a pressure difference in the air above and below the wing. To optimize lift, you can try techniques such as adding flaps to the bottom edges of the wings or curving the wings to create lift.
The force of drag is the resistance that your airplane encounters due to the air’s friction as it moves through the air, and this can drastically affect the distance covered by your airplane. To reduce drag, choose a design with a streamlined body and ensure that the wings are symmetrical to eliminate any turbulence while in the air.
The force of weight is the downward pressure caused by gravity that dwells down upon your airplane. To decrease the force of weight on your airplane, you need to ensure that it is as light as possible without sacrificing structural integrity.
The force of thrust is the forward motion of your airplane that causes it to move through the air. To maximize the thrust, you can modify the design of your airplane by adding a primitive propulsion system.
Once you have a better grasp of the Four Forces of Flight, you can experiment with designs that cater to improving each of these forces. Adjusting the tail, wingspan, nose shape, and center of gravity can all improve your airplane’s flight distance. Practice and experimentation will lead you to your perfect design.
IV. The Best Paper Airplane Designs for Different Skill Levels and Flying Objectives
There are many designs for paper airplanes, and the ideal design for your paper airplane will depend on your skill level and goals of the aircraft.
The Dart airplane is an excellent starting point for beginners. This type of airplane is easy to make and has a simple design, making it a great option for short distance flights.
The glider is another beginner-friendly design. It’s a design that typically flies better when thrown lightly. By gliding onto the air currents around it, the glider can gain some mild altitude compared to how far it goes forward along the horizontal axis.
Stunt planes have unique designs and are pretty advanced to make. For a better understanding of this design, go ahead and add google for the name “Lockheed P-80 Shooting Star.” These types of planes are intentionally designed for specialized maneuvers, including loop-de-loops and barrel rolls. They typically require extra materials to make, making them a bit more challenging than other designs.
V. Advanced Paper Airplane Folding Techniques
Advanced folding techniques may be more complicated, but they are fantastic for creating planes with unique and impressive designs. For example, the Nakamura Lock design is a complex folding technique that leads to a plane with a sleek and aerodynamic design. Another design that is quite popular for its complex folding is the origami crane. Mastering more difficult folding techniques helps your paper airplanes to look more impressive and unique.

VI. Why Paper Choices Matter in Making Paper Airplanes
The type of paper you use is just as important as the design of the airplane. Paper weight, texture, and size can all impact how the plane behaves during flight and how long it stays in the air.
Typically, thin and lightweight paper such as bond paper or newsprint will allow for a more extended flight as it is more susceptible to lift. By contrast, thicker paper will provide more stability during flight. Different textured papers can also affect aerodynamics by providing less friction in the air. By experimenting with different paper options, you can find what works best for you and your airplane designs.
VII. Turning Paper Airplanes into an Art Form
Crafting paper airplanes has limitless potential to become an incredible art form providing endless opportunities for customization and creativity. From adding different colors to creating shapes like dragons or swans, using your imagination and creativity can lead to fascinating results.
Adding embellishments to your paper airplane is an ideal way to add some flair to your designs. Creative ideas include adding stickers, glitter glue, or painting intricate designs that make your airplane distinct and memorable.
VIII. Paper Airplanes as a Tool for Learning
Crafting paper airplanes can serve more than entertainment purposes and may be used as an effective teaching tool. Teaching kids how to make paper airplanes while at the same time illustrating basic teaching concepts like mathematics and physics can be a win-win. Paper airplanes teach the Four Forces of Flight in flight theory and the construction of the planes using math, measurement, and design principles, including geometry and aerodynamics.
IX. Conclusion
In conclusion, creating a paper airplane can be an enjoyable experience that encourages creativity and imagination. There is no wrong way to design your paper airplane, and experimentation is the key to creating truly fantastic planes. By taking the time to learn different designs, experimenting with different paper types and trying out various folding techniques, you can create paper airplanes that are both beautiful and functional. Don’t forget the mathematics and physics concepts in the process. Let your imagination fly and enjoy the process.
Additional resources:
- “The New World Champion Paper Airplane Book: Featuring the Guinness World Record-Breaking Design, with Tear-Out Planes to Fold and Fly” by John M. Collins.
- “The Klutz Book of Paper Airplanes” by Doug Stillinger.
- “The World Record Paper Airplane and International Award Winning Designs” by Ken Blackburn, Jeff Lammers.


