Introduction
Everybody cherishes yearnings for pictures in a pretty frame hanging at their walls, but when it comes to buying one, it can be really expensive, and often, it just does not suit the photo. A handmade picture frame solves these issues and also adds a personalized touch to your interior and makes your painting, artwork, or photograph even more special. In this article, we are here to help you create your own picture frames. We’ll be covering everything from tools and materials needed, to step-by-step instructions, and tips on some creative ideas.
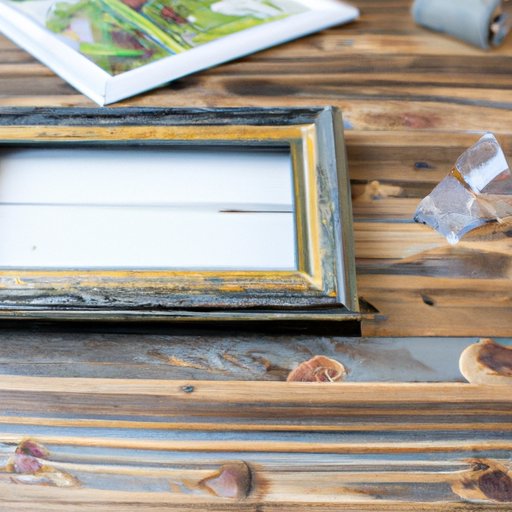
Step-by-Step Guide to Handmade Picture Frames
Before you start making your picture frame, you’ll need a few things. Here’s what you’ll need: saw, nail gun, drill, sander, safety goggles, sandpaper, wood glue, wood filler, clamps, wood stain, brush, and picture frame hardware.
Step 1: Cut your wood – cut four pieces of wood to the size you require, adding an additional 1/2 inch to the lengths of each piece of wood to accommodate the picture.
Step 2: Create the pocket – using a drill, make a hole through the inside edge of your four pieces of wood. This is where the picture will go to secure it.
Step 3: Assemble the frame – apply wood glue to the edges of the boards, align the ends, and attach them with a nail gun. Secure the corners with clamps.
Step 4: Sand the frame – sand it down to remove any roughness, creating a smooth finish, filling any holes, and sanding again once filled.
Step 5: Stain and finish – apply the wood stain using a brush and let it dry. Give it a final sand finish and coat it with a finishing layer.
Step 6: Add picture frame hardware – using a drill, add the hardware that will enable you to hang it on the wall.
Tips: Use a saw to make precise cuts, and always be sure to wear safety goggles when working with power tools.
10 DIY Picture Frame Ideas to Showcase Your Photos
If you want a creative and unique picture frame that showcases your photos in a beautiful way, then you can check out these creative picture frame ideas:
- Photo Memory Wreath
- Upcycled Book Photo Frame
- DIY Leaf Frame
- DIY Cork Memo Frame
- DIY Popsicle Stick Picture Frame
- DIY Beach-Themed Picture Frame
- DIY Rustic Picture Frame
- DIY Floral Picture Frame
- DIY Painted Twig Picture Frame
- DIY Fabric Covered Picture Frame
Every idea here has a step-by-step instruction set, and you can easily personalize it with your preference and style.
Upcycling Old Picture Frames: 5 Creative Ways to Repurpose Them
Instead of throwing away old picture frames, you could give them new life with some creativity. Here are five ideas to transform your old picture frames:
- DIY Jewelry Storage from a Picture Frame
- DIY Printer’s Tray Jewelry Organizer
- DIY Picture Frame Terrarium
- DIY Cork Board from Picture Frame
- DIY Chalkboard from Picture Frame
If you want to reduce waste and save money, repurpose your old picture frames with these projects. Each project has step-by-step instructions and details about required materials.
The Best Lumber for Making DIY Picture Frames
When it comes to selecting the best wood for DIY picture frames, there are a few options available. Elm, maple, poplar, and walnut are some of the great choices for picture frames. Here’s a breakdown of each wood’s pros and cons:
- Elm – Strong and durable, yet soft. Affordable. Light brownish beige color. Authentically unique wood grains.
- Maple – High quality, fine-grained, and strong. It comes in various colors, but the honey-brown ones are the most popular for picture frames.
- Poplar – Soft and lightweight wood, easy to use with DIY projects. Budget-friendly. Natural greenish color that fades into brown. Perfect for painting or staining.
- Walnut – Expensive, chocolate-brown in color, a finish that becomes richer with time. High-quality wood, durable, and easy to work with.
When selecting wood for a DIY picture frame, consider matching the wood’s natural hues to that of the artwork or photo it’s displaying. Uniquely shaped and rosewood woods are also fantastic options for picture frames.
How to Choose the Right Glass for Your Picture Frame
Choosing the right glass for your new picture frame depends on a few factors. Glass thickness, UV protection, and scratch resistance are among the considerations to make. Here are three types of glass that people can use for a picture frame:
- Standard Glass – most affordable, but it can easily shatter and discolor over time and get damaged by UV-rays.
- UV-Filtering Glass – a glass that blocks out ultraviolet light and offers some level of protection against fading and discoloration.
- Museum Glass – non-reflected, anti-glare glass that reflects the artwork or photograph up to us without reflection. Pricey, highly transparent, and typically used for more substantial art or pictures.
Be sure to measure the inside dimension of your frame accurately, and remember that the glass must be at least 1/8 inch shorter in both length and width than the frame’s inside dimension.
Conclusion
Now you have completed your comprehensive guide to making picture frames. We’ve covered everything from tools and materials needed to step-by-step instructions and tips on creative ideas, upcycling old frames, the right wood selection, and guides to selecting the best glass for your picture frames. It’s time to try your hands and make your personalized picture frames. Not only does it cost less, but it satisfies the thrill of creating something by yourself.


