Introduction
Are you looking for a craft project that is both fun and easy to make? Rubber band bracelets are the perfect choice! These colorful bracelets have been popular among kids and adults alike for years and are a great way to show off your style and creativity. In this tutorial, we will provide a step-by-step guide on how to make your very own rubber band bracelet, explore the history and different styles of rubber band bracelets, and offer tips for troubleshooting common issues.
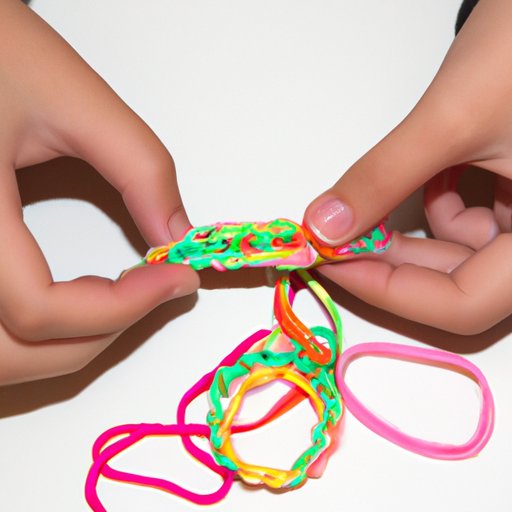
A Step-by-Step Tutorial
First, gather these materials:
- One loom or a simple wooden board with at least two rows of pegs.
- Rubber bands in your preferred color. You will need around 30-40 rubber bands depending on the bracelet’s size.
- A hook tool that is provided with the loom or can be purchased separately.
- A plastic S-clip to connect your bracelet.
Now that you have your supplies, follow these steps:
- Arrange your rubber bands in the order of your design. Place them around the pegs in your desired sequence and follow up with another rubber band parallel to each one until you have a single layer
- Then place a rubber band across two pegs, creating a diagonal stretch from one peg to another. With your hook tool, loop over the bottom rubber band and grab the top one towards the center. Pull it toward you and grab the left bottom band, pulling it over the peg and toward the center. You will then have two rubber bands over each peg, one of each color.
- Take your hook tool, grab the bottom left band and pull it up and over the peg to the center. Repeat with the bottom right band.
- Continue weaving the bands over the pegs, alternating left-to-right and right-to-left, until you reach the end.
- Take your hook, grab the band from the last peg, and pull it over to the empty one next to it. Add your S-clip on that band’s peg and hook it on the other end. Your bracelet should now be looped together.
- Repeat steps 4 and 5 until your bracelet reaches the desired length. When you’ve finished, place the last rubber band diagonally across the end pins and hook the band’s end on the last peg to finish it off.
- Finally, remove the bracelet from the loom and trim off any excess rubber bands in the bottom row of the bracelet, then carefully hide the open ending with the closing band.
That’s it! Your rubber band bracelet is ready to wear or give as a gift to your loved ones!
The History of Rubber Band Bracelets
Rubber band bracelets have been around since the early 2000s and became popular among kids and teenagers around the world. The Rainbow Loom, invented by Cheong-Choon Ng, was a huge contributor to the trend. It allowed kids to create bracelets, necklaces, and other accessories using elastic bands and a loom, spurring a toy industry trend.
There are different types of rubber band bracelets, with origins ranging from Southeast Asia to Latin America. In many places worldwide, children used them as colorful, fun bracelets for playtime. Rubber band bracelets have been significant in popular culture, often worn as a symbol of friendship or cause. For instance, in 2013, celebrities and people alike wore red rubber bracelets to support “Keep a Child Alive,” a charitable organization that deals with HIV and AIDS.
Different Styles of Rubber Band Bracelets
There are many different colors and combinations you can experiment with when making rubber band bracelets. One popular style is the single chain style, with a basic design that’s ideal for beginners. Another style is the fishtail pattern that resembles the braid of a fish’s tail. You can also do a double fishtail design for thicker bracelets. A clean and straightforward design involves the basic or inverted fishtail design, easily adaptable to any color or design combination. You can use different types of rubber bands or even glow-in-the-dark ones for a striking effect.
A popular style amongst teens is the ladder bracelet, an open-weave design with an appearance similar to a ladder. Another variant is the tree branch style, resembling the branches of a tree and displaying a woven, beautiful effect. Creating these rubber band bracelets is lots of fun, and you can experiment with different styles to find one that suits you.
How to Incorporate Charms or Beads
Charms and beads add another level of customization to your rubber band bracelet. You can attach them to your end caps or tie them into the rubber bands as you go. Before starting to loom, pull the beads and charms onto the rubber band you’re about to weave. Keep them pushed up out of the way until they’re needed for design. This technique works well with plastic pony beads or lightweight, dangling earrings or pendants.
You can purchase specific rubber band bracelet charms or make your pieces to use as charms. It’s as simple as using jewelry pliers and wiring, cut to the appropriate length, bent into a loop on one side, and tied onto a bracelet at the other end. Charms and beads make an excellent addition to your rubber band bracelet, personalizing it to perfection.
Tips for Troubleshooting Common Issues
While making a rubber band bracelet is relatively easy, a few issues may arise, but these tips can help:
- The bracelet keeps breaking: First, check that there are no broken or weak rubber bands on your bracelet. You can add additional bands to create an extra layer of security and hold up your bracelet’s design. If a single rubber band is sole weak spot that keeps breaking, gently stretch it before the next run.
- The bracelet is too tight: Pull the rubber bands a little before you start weaving. This will release the tension on the bracelet once it’s completed. If the bracelet’s finished design turns out too tight, add a few more rubber bands to the length before attaching the clasp.
- Difficulty forming the design: Be gentle when stitching, and don’t force the rubber bands. Two-rubber bands per peg can be difficult to manipulate, so work it carefully to avoid snapping the bands, and when pulling them over to the opposite peg, try and guide them over one at a time.
With these tips, there’s no reason why you can’t make superb quality rubber bracelets with a little bit of patience.
Conclusion
Creating rubber band bracelets is a fun and easy way to personalize your style. With only a loom or board, rubber bands, a hook tool, and some beads or charms, you can make bracelets to your heart’s content. Experiment with colors and designs, make it personal by tying in charms or beads, and avoid setbacks with our troubleshooting tips.


