I. Introduction
As winter approaches, many of us embrace the beauty and magic of snowflakes, which symbolize the uniqueness and fragility of nature. Making a snowflake out of paper can be a fun and rewarding activity for people of all ages and interests. Not only does it allow us to express our creativity and imagination, but it also offers educational and scientific insights into the formation and structure of snowflakes. This article will provide you with a comprehensive guide on how to make a snowflake out of paper, including step-by-step instructions, kids’ crafts, handmade Christmas decorations, video tutorials, origami-inspired techniques, and scientific insights.
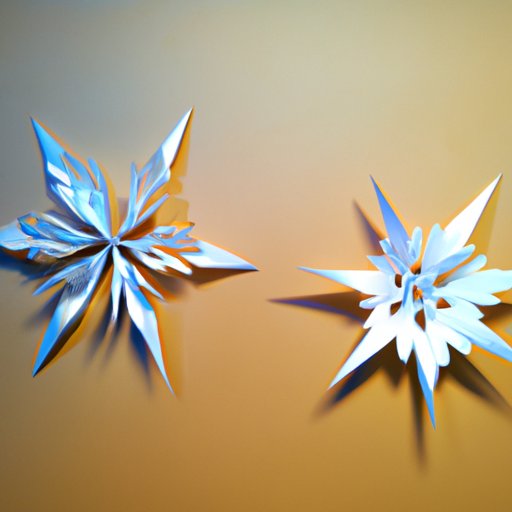
II. Informative: How to Make a Paper Snowflake in 10 Steps
To make a paper snowflake, you’ll need some basic materials that are easy to find around your house or office. These include white paper, scissors, and a pencil. Once you have gathered the materials, you can follow these ten steps:
- Fold the paper in half diagonally to form a triangle.
- Fold the triangle in half again to make a smaller triangle.
- Fold the triangle into thirds, bringing one corner to the opposite edge.
- Draw a design on the folded paper, using a pencil or marker. Keep in mind that the design will be symmetrical, so use shapes or patterns that mirror each other.
- Cut along the shapes, following the lines you drew. Be careful not to cut the folded edges, as they keep the snowflake together.
- Unfold the paper gently to reveal the snowflake. You may need to adjust the folds or trim some edges to make it even.
- Flatten the snowflake by pressing it between two sheets of paper or books.
- Add any additional decorations or colors, such as glitter, sequins, or paint.
- Display your snowflake on a window, wall, or tree to enjoy its beauty.
- Make more snowflakes using different designs or sizes, and have fun experimenting with different techniques and styles!
III. Kids’ Craft: Fun and Colorful Snowflakes to Make
If you’re looking for a kid-friendly way to make paper snowflakes, try these fun and colorful variations that use different types of paper and art supplies. Here are some ideas:
- Use construction paper or scrapbook paper instead of plain white paper, to add color and texture to the snowflake.
- Draw or stamp a picture on the paper before folding it, such as a snowman, a tree, or a reindeer.
- Use stencils or cookie cutters to trace shapes on the paper, such as stars, hearts, or circles.
- Add fun elements to the snowflake, such as googly eyes, pom-poms, or pipe cleaners.
- Create a snowflake garland by stringing multiple snowflakes together with twine or ribbon.
With these creative ideas, kids can make snowflakes that reflect their personality and creativity, while also developing their fine motor skills, spatial reasoning, and artistic expression.
IV. Handmade Christmas Decorations: Create a Winter Wonderland
Snowflakes are not only fun to make, but also serve as a beautiful and versatile decoration during the holiday season. Here are some ways to use paper snowflakes as handmade Christmas ornaments:
- Hang snowflakes from a tree or wreath using clear string or fishing line.
- Glue snowflakes onto a foam wreath or a wooden frame to create a three-dimensional display.
- Create a snowflake mobile by hanging multiple snowflakes from a wire hoop or a wooden dowel.
- Embellish a gift wrap or a card with a snowflake, using tape or glue.
- Light up your snowflake with LED lights or a battery-powered candle to create a cozy and warm atmosphere.
By making your own Christmas decorations, you can save money, reduce waste, and personalize your home with your own style and taste.
V. Video Tutorial: Watch How to Make a Stunning Snowflake
If you prefer a visual guide on how to make a snowflake out of paper, check out this video tutorial that walks you through the process step by step. This video is suitable for beginners and advanced paper crafters who want to learn some new techniques and tricks.
VI. Origami-Inspired: Fusion of Tradition and Innovation
If you’re a fan of origami, you’ll love to incorporate its sleek and elegant folds into your paper snowflake designs. Here are some tips and patterns to get you started:
- Learn the basic terminology and techniques of origami, such as valley folds, mountain folds, and pleats. These folds will help you create intricate and symmetrical patterns in your snowflakes.
- Try some simple origami patterns that resemble snowflakes, such as the Masu box or the Waterbomb base.
- Experiment with more advanced origami patterns that require multiple steps and folds, such as the Kusudama flower or the Modular star ornament.
- Combine different origami patterns and elements to create a unique and stunning snowflake design.
Origami-inspired snowflakes are not only beautiful to look at, but also challenge your problem-solving skills, patience, and creativity.
VII. Snowflakes for Science: Explore the Fascinating World of Snowflakes
Did you know that each snowflake is unique and has a six-pointed symmetry? Or that snowflakes form in different shapes and sizes depending on the temperature and humidity? Making paper snowflakes can be a fun and educational way to learn about the science and properties of snowflakes. Here are some ideas:
- Read some books or articles about snowflakes and their formation, such as “The Snowflake: Winter’s Frozen Artistry” or “Snowflakes in Photographs”.
- Watch some videos or documentaries that explain the physics and chemistry behind snowflakes, such as “How Snowflakes Are Formed” or “Secret Life of Snowflakes”.
- Visit a museum or a science center that features snowflake exhibits or demonstrations, such as the Liberty Science Center or the Ontario Science Centre.
- Make paper snowflakes that mimic the structure and patterns of real snowflakes, using a ruler, compass, and protractor to measure and cut accurately.
- Discover some fun facts and trivia about snowflakes, such as how many sides a snowflake has or what the largest snowflake on record is.
By exploring the science behind snowflakes, you can deepen your appreciation and admiration for these delicate and intricate natural wonders.
VIII. Conclusion
In summary, making a snowflake out of paper is a creative and enjoyable activity that offers a range of benefits, from developing your fine motor skills to expressing your artistic vision, from enhancing your home decor to understanding the science of snowflakes. Whether you follow the step-by-step instructions, try the kids’ crafts, explore the origami-inspired designs, watch the video tutorial, or investigate the scientific insights, you’re sure to have a great time. So grab some paper, scissors, and pencils, and let your imagination fly!
If you’d like to share your snowflake creations with others, use the hashtag #PaperSnowflakeChallenge on social media, or tag us on Facebook, Twitter, or Instagram. We’d love to see your designs and hear your feedback.
Finally, if you enjoyed this article and want to learn more about paper crafts, holiday decorations, origami, or science, please check out our website or subscribe to our newsletter. We’ll keep you updated with the latest trends and tips in the world of paper art and creativity.


