Introduction
If you have ever folded a paper airplane or a simple boat, you have already tasted the joy of origami. Origami is the art of folding paper to create beautiful three-dimensional shapes with intricate designs. It originated in Japan but has now become a beloved art form all over the world. Origami is not only a fun pastime but also a way to express creativity and precision. In this article, we will provide a comprehensive guide on how to make origami, from selecting the right paper to showcasing advanced techniques.
Step-by-Step Guide
The key to making great origami is selecting the right kind of paper. Origami paper is specially designed to crease well and hold its shape. It is thin, smooth, and comes in a variety of colors, patterns, and sizes.
To make a simple origami model, we will provide step-by-step instructions for a classic design – the origami crane.
Step 1: Start with a square piece of paper, with the colored side facing down. Fold the paper in half diagonally and then unfold it.
Step 2: Fold the paper in half diagonally the other way and then unfold it again.
Step 3: Fold the paper in half vertically and then unfold it.
Step 4: Fold the paper in half horizontally and then unfold it.
Step 5: Fold the paper in half diagonally and then lift the top layer on one side to create a triangular flap.
Step 6: Fold the top of the flap down to meet the bottom edge.
Step 7: Fold the opposite flap in the same way, creating a diamond shape.
Step 8: Rotate the paper so that the diamond points upwards. Fold the top point downwards, making sure it lines up with the bottom edge of the diamond.
Step 9: Fold the right and left corners of the diamond inwards towards the center crease.
Step 10: Turn the paper over and repeat step 9 on the other side.
Step 11: Fold the top triangle downwards, bringing it towards the bottom of the model.
Step 12: Lift the two flaps on either side of the model up to create the wings.
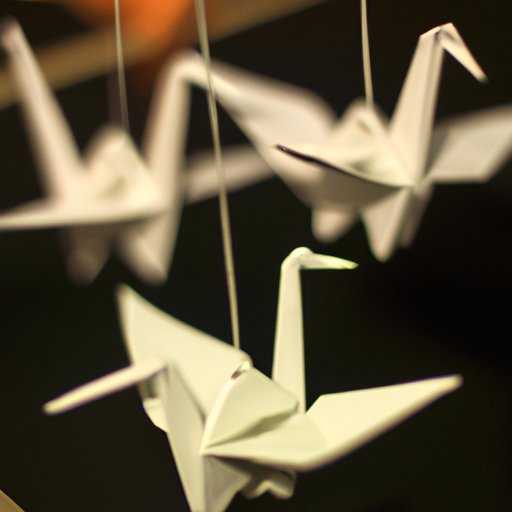
And there you have it: a beautiful origami crane!
When making origami models, it is crucial to pay close attention to each step to ensure that the final piece looks neat and precise. High-quality images can also be a helpful guide, allowing you to visualize each step and the final design. Additionally, some models may have tricky parts that require extra attention and patience. By following the instructions closely and practicing, you will get the hang of it in no time!
Beginner’s Guide
If you are new to origami, it can seem daunting at first. However, with a little practice and patience, anyone can create beautiful models. To start with the basics, it is essential to understand paper size, the types of folds required, and the different types of origami paper available.
Paper size is crucial as it decides how big or small your model will be. Most origami models are created using square pieces of paper. The standard size of origami paper is 15 cm x 15 cm, but it can come in various sizes to suit your needs.
Folding techniques are essential in origami and are divided into two types: valley folds and mountain folds. Mountain folds are where the paper is folded upwards, and valley folds are where the paper is folded downwards. By combining these two types of folds, you can create various shapes and designs in origami.
Origami paper comes in a variety of types, such as kami, washi, and foil paper. Kami is the most common type of origami paper and is made from thin, colored paper. Washi paper is more intricate and is made from natural fibers, giving it a unique texture and durability. Foil paper is made from thin sheets of aluminum foil. Each paper type has its advantages and disadvantages, depending on the model you are creating.
For beginners, it is best to start with easy-to-make models such as a paper hat, a boat, or a simple animal. By building confidence and perfecting basic techniques, you can progress to more challenging designs. Online resources and tutorials are handy for learning how to create origami models and can provide visual aids and detailed explanations of each step.
Tips and Tricks
Once you have mastered the basics of origami, you can explore advanced techniques that can elevate your models to the next level. Wet folding, color blending, and using non-traditional materials are some of the techniques that can add depth and texture to your creations.
Wet folding involves dampening the paper before folding, allowing the paper to hold its shape better and creating more natural-looking designs.
Color blending is where you use multiple colored sheets of paper to create a gradient effect. By overlapping the colored sheets, you can create unique shades that add depth and dimension to the final model.
Using non-traditional materials such as fabric or leather can add texture and depth to your models. However, it requires a lot of experimentation and patience to get the desired effect.
Expert tips for experienced origami artists include using tweezers to create more intricate designs and perfecting the reverse fold, which can create various shapes and textures.
Themed Origami
Origami can be a fun and creative way to celebrate different themes or topics. From animals to holidays, the possibilities for origami designs are endless.
Exploring a specific theme or topic for inspiration can help you find unique models to create. For example, creating an origami zoo can include models such as a lion, a giraffe, and a monkey. Nature-inspired origami can include models such as flowers, leaves, and trees. For the holiday season, you can create origami models such as Christmas trees, Santa Claus, and snowflakes.
Creating your designs from scratch is another way to add an extra personal touch to your origami. By studying different models and understanding the principles of origami, you can create unique designs that suit your preferences.
Cultural Significance
Origami is not just a pastime; it is also a symbol of culture and history. It originated in Japan during the 17th century and has since become a significant part of Japanese culture. Origami is often used in religious ceremonies, and it is believed to bring good luck and prosperity to those who practice it. The crane is a crucial symbol in Japanese origami, representing peace, longevity, and good fortune.
However, origami has now become a beloved art form all over the world, with each region having its own unique styles and variations. For example, in China, origami is called zhezhi and often involves using larger sheets of paper to create models such as boats, planes, and dragons. In Germany, origami is known as Papierfalten and is often used as an educational tool for children.
Famous origami artists, such as Akira Yoshizawa and Robert J. Lang, have made significant contributions to the art form, developing new techniques and designs that have inspired thousands of artists worldwide.
Important origami displays, such as the Origami In The Garden exhibit in the United States, showcase the beauty and intricacy of origami, attracting millions of visitors every year.
Conclusion
Origami is a fantastic art form that requires creativity, precision, and patience. By following our step-by-step guide and exploring beginner-friendly models, you can learn the fundamentals of origami and create beautiful designs. Tips and tricks for advanced techniques and exploring themes or topics can add a personal touch to your origami. Understanding the cultural and historical significance of origami and appreciating the work of famous artists can deepen your love for the art form.


