Introduction
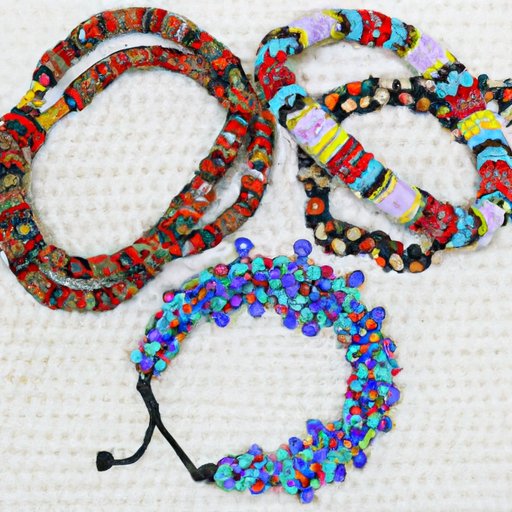
Bead bracelets are a fun and creative way to express yourself through jewelry-making. Whether you’re looking to make bracelets as a gift for a friend or as an addition to your own accessories collection, this article will guide you through the process of making your own bead bracelets. In this article, we will cover the basics of bead bracelet-making, provide step-by-step instructions for creating a basic bead bracelet, highlight 10 easy designs, offer tips for sustainable DIY and beginners, explore color theory concepts, and suggest ways to create a comfortable and creative workspace.
Step-by-Step Guide to Making Your Own Bead Bracelets
Before diving into the design and creation process of bead bracelets, it’s important to gather all the necessary materials.
Materials Needed
- Elastic cord or jewelry wire
- Beads of different sizes, shapes, and colors (assorted bead packs are available at craft stores)
- Jewelry pliers, scissors, and a ruler
Once you have your materials, follow these steps to make your own bead bracelet:
Step-by-Step Instructions for Making a Basic Bead Bracelet
- Measure your wrist and add about 1 inch to determine the length of your elastic cord or jewelry wire.
- Cut the cord or wire to the determined length using scissors or pliers.
- Thread beads onto the cord or wire in your desired pattern and arrangement.
- Make sure to leave a bit of extra cord or wire on both sides to tie knots and attach the clasp.
- Secure the final bead in place and tie knots on both ends of the cord or wire to hold the beads in place.
- Attach the clasp using pliers or by tying knots around the clasp rings.
Tips and Tricks for Making the Process Easier and More Successful
- Choose high-quality materials to ensure durability.
- Experiment with different bead sizes, shapes, and colors to create unique designs.
- Use pliers to help thread beads onto the cord or wire.
- Try using a bead tray or bead design board to plan out the pattern before stringing the beads.
- Use clear nail polish or glue on knots to prevent it from loosening.
10 Easy Bead Bracelet Designs to Create at Home
Now that you’ve got the basics down, it’s time to get creative with your designs. Here are 10 easy and popular bead bracelet patterns to try:
1. Simple Seed Bead Bracelet
This bracelet is a perfect starter project for beginners. It consists of tiny seed beads strung together in a basic pattern.
Instructions:
- Thread seed beads onto the elastic cord or wire in a pattern of your choice.
- Keep threading the beads onto the cord or wire until it fits comfortably around your wrist.
- End with a seed bead and tie knots to secure the bracelet.
2. Chevron Bracelet
This bracelet features a zig-zag pattern and is made from larger-sized beads. It creates a more intricate design but is still easy to create.
Instructions:
- Thread larger-sized beads onto the elastic cord or wire in a pattern of your choice to create the chevron pattern.
- Finish the bracelet by tying knots on both ends of the cord or wire and attaching the clasp.
3. Charm Bracelet
Give your bead bracelet personalized flair with charms. You can add birthstones, letters, and symbols to the bracelet to reflect your personal style or interests.
Instructions:
- Create the basic bead bracelet following the steps outlined above.
- Add a charm to the bracelet by attaching it with a jump ring or by threading it onto the cord or wire before securing the bracelet with knots and the clasp.
4. Multi-Strand Bracelet
This bracelet is made up of several strands of beads, adding depth and dimension to your accessory.
Instructions:
- Cut several strands of elastic cord or wire in your desired length and add beads to each individual strand. You can use the same bead on each strand or mix them up.
- Thread all of the strands through a bead stopper or tie knot at the end of each strand to hold it in place.
- Secure all of the strands together by tying knots at the other end and attaching the clasp.
5. Stretch Bracelets
A stretch bracelet is a one-size-fits-all option that is easy and comfortable to wear.
Instructions:
- Thread beads onto a stretchy cord.
- Continue adding beads until the bracelet fits comfortably around your wrist.
- Tie the two ends together using multiple knots and hiding the knot inside a bead.
6. Wrap Bracelet
A wrap bracelet is a versatile design that can be wrapped around the wrist several times or worn as a necklace. It combines the use of beads and cord or leather string.
Instructions:
- Cut a length of cord or string in your desired length.
- Thread beads onto the cord or string in a pattern of your choice.
- Wrap the cord or string around your wrist several times or until it is the desired length.
- Knot the two ends together and add a clasp if desired.
7. Friendship Bracelet
A friendship bracelet is a classic design that uses a simple knotting technique. It can be made with two or more colors of string or cord for a fun and playful look.
Instructions:
- Cut two or more lengths of string or cord in your desired length.
- Knot the two ends together and secure the knot to a surface using tape or a clipboard.
- Separate the cords so that each color is on opposite sides.
- Take the cord on the right side and knot it over the cord in the middle. Loop it under the cord on the left side and pull it up through the hole created.
- Do the same thing with the cord on the left side, knotting it over the middle cord and looping it under the right side cord and pulling it up through the hole.
- Repeat steps 4 and 5 until the bracelet is the desired length.
- Tie a knot on both ends of the bracelet and trim the excess cord.
8. Beaded Chain Bracelet
This simple and elegant bracelet uses small beads and a delicate chain to create a subtle accessory that is perfect for formal occasions.
Instructions:
- Thread beads onto a delicate chain in a pattern of your choice.
- Attach the clasp to the chain using pliers.
9. Braided Bracelet
This bracelet combines the use of beads and braiding techniques to create a unique and textured design.
Instructions:
- Cut several lengths of cord or string in your desired length.
- Thread beads onto one of the cords and loosely tie a knot at the end of the cord.
- Hold all of the cords together and braid them until the bracelet is the desired length.
- Secure the other end with a knot and add a clasp if desired.
10. Charm Bangle
A charm bangle puts a spin on the classic beaded bracelet by using a bangle as the base and adding charms onto it.
Instructions:
- Choose a bangle in your desired size and style.
- Add jump rings to the bangle in the desired positions and attach the charms to the jump rings using pliers.
Tips for Customizing and Adapting Patterns to Individual Preferences
- Experiment with different bead shapes, sizes, and colors to create your unique style.
- Try mixing and matching different patterns to create your fusion design.
- Use different materials like leather cords and ribbons to create contrasting textures to your bracelet.
- Draw inspiration from nature, the changing seasons, and different cultures and incorporate those themes into your designs.
Sustainable DIY: Creating Bead Bracelets with Recycled Materials
In today’s world where sustainability is becoming more and more essential, creating bead bracelets using recycled and upcycled materials is a great way to contribute towards a better planet. Here are some ways to source recycled materials for making bead bracelets:
- Use an old necklace or bracelet to repurpose the beads.
- Shop at local thrift stores for leftover supplies, accessories, and clothing that can be repurposed in jewelry-making.
- Use recycled paper beads.
- Use seeds, sea glass or other natural or organic materials for your beading.
- Recycle your old, broken jewelry pieces and incorporate them into new designs.
Step-by-Step Instructions for Making a Bracelet with Recycled Materials
- Begin by selecting the recycled materials you want for your bracelet.
- Clean the materials if necessary, especially if they’ve been lying around for some time.
- If the materials have holes in them, thread them onto the elastic cord or wire in your desired pattern.
- Finish the bracelet by tying knots at both ends, preferably using a fisherman’s knot for additional security and attaching the clasp.
Bead Bracelet Jewelry Making Tips for Beginners
Jewelry-making can be overwhelming for beginners. Still, there’s no need to worry. This section provides you with some fundamental and functional skills to get you started with your beading:
Explanation of Basic Jewelry-making Skills Needed for Beading
- Basic jewelry tools, including pliers, cutters, and a ruler or measuring tape.
- Understanding of the different types of wires, cords, and strings used in jewelry-making.
- Knowledge of knots and their functions in jewelry-making.
- The ability to use a crimp bead or tube to secure the beads to avoid slipping or falling off.
- The ability to add a clasp to complete the jewelry piece.
Detailed Instructions for Beadwork Techniques, Including Knotting and Attaching Clasps
There are several beading techniques that you must learn as a beginner. Here is a step-by-step guide to some of the essential techniques:
Knotting
- Thread the bead onto your cord, string, or wire.
- Take one end of the cord and pass it over the other end, then twist the upper end around the lower end several times.
- Thread the end through the loop formed next to the younger ends and pull the knot tight.
- Make several overhand knots in the same way, depending on the pattern.
Attaching Clasps
- Thread a crimp bead onto the elastic cord or wire, followed by a clasp.
- Squeeze the crimp bead using pliers, making sure the clasp is secured in place.
- Trim the excess wire or cord above the crimp bead using wire cutters.
Common Mistakes to Avoid and Troubleshooting Tips
- Avoid using too much pressure when cutting the wire because it may damage the finish or plating of a bead.


