I. Introduction
For those with gluten intolerance, a simple staple like bread can be a major challenge. Homemade bread is a great way to satisfy your cravings without compromising your health. In this article, we’ll provide a step-by-step guide on how to make gluten-free bread that tastes just as good as traditional bread. Whether you’re new to gluten-free baking or simply looking for tips to improve your current loaves, this article is for you!
II. Step-by-Step Guide on How to Make Gluten-Free Bread from Scratch
To make gluten-free bread from scratch, you’ll need a few key ingredients and tools:
- Gluten-free flour blend (we’ll discuss different options in section III)
- Xanthan gum (used to mimic the elastic properties of gluten)
- Active dry yeast
- Warm water
- Salt
- Large mixing bowl
- Electric mixer or stand mixer with dough hook attachment
- Bread pan (9 x 5 inches is standard)
- Parchment paper
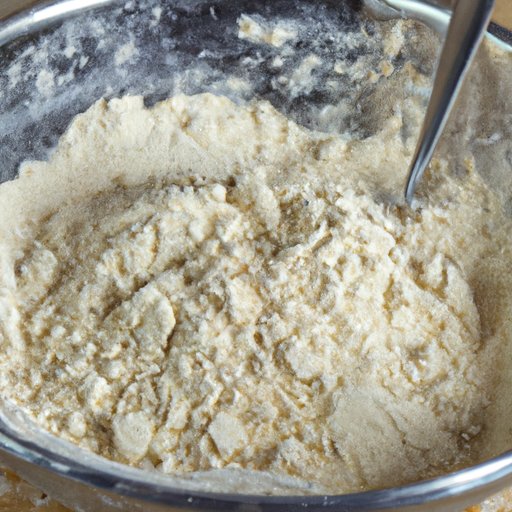
Mixing and Kneading:
- In a mixing bowl, combine the warm water and yeast. Let the mixture sit for 5-10 minutes, until it becomes frothy.
- Add the salt and xanthan gum to the bowl and stir. Then, add the gluten-free flour blend one cup at a time, mixing well after each addition. Keep mixing until the dough becomes smooth and elastic. This usually takes around 5-7 minutes with a stand mixer.
- Lightly grease another mixing bowl with oil. Transfer the dough to the greased bowl and cover it with a clean cloth. Allow the dough to rise for around 60-90 minutes.
- Dust a clean work surface with flour. Place the dough on the surface and knead it gently. Divide the dough into two pieces and shape them into loaves. Make sure that the loaves fit well into your bread pan. Place them in the pans, cover with a clean cloth, and allow the dough to rise again for another 30-45 minutes.
Proving and Baking:
- Preheat your oven to 375°F. Before baking, score the tops of the loaves with a sharp knife or serrated knife. You can also experiment with adding toppings like seeds, herbs, or cheese.
- Bake the bread in the preheated oven for about 30-35 minutes, until they turn golden brown on top and sound hollow when tapped. Remove the bread from the oven and let it cool. Then, remove the bread from the pans and cut into slices. Enjoy!
III. A List of Common Gluten-Free Ingredients to Use When Making Bread
Overview of Gluten-Free Flours: Some of the best gluten-free flour alternatives include:
- Buckwheat flour
- Chickpea flour
- Coconut flour
- Cornmeal
- Oat flour
- Rice flour
- Soy flour
When you’re just starting out, it can be helpful to use a gluten-free flour blend. These blends contain a mix of flour alternatives and sometimes even xanthan gum or other binders for added structure. Using a blend can also make breadmaking more approachable for beginners.
Other Gluten-Free Ingredients: Other key ingredients when making gluten-free bread include yeast, xanthan gum, warm water, and salt. These are the ingredients that allow the bread to rise and become fluffy and flavorful.
Where to Buy Gluten-Free Ingredients: Amidst the growing popularity of gluten-free baking, many grocery stores now stock gluten-free flours and other ingredients. You can also find these ingredients online or at specialty stores that cater to a variety of dietary needs.
IV. Comparing Different Gluten-Free Flours and How They Affect the Texture of Bread
Description and Properties of Different Gluten-Free Flours:
- Buckwheat Flour: Buckwheat flour provides a nutty, earthy flavor and a darker color to bread. Because it’s denser than other gluten-free flours, you may need to add a bit more water to the mix.
- Chickpea Flour: Chickpea flour, also known as garbanzo bean flour, is high in protein and has a distinct flavor. It holds moisture well, making it a good option for gluten-free breads.
- Coconut Flour: Coconut flour is highly absorbent, so it requires more liquid in a recipe to achieve the desired consistency and texture. It provides a slight sweetness and coconut flavor to bread.
- Cornmeal: Cornmeal is a versatile option that provides a slightly sweet and corn-like flavor. It provides a sandy texture to bread, which can be balanced out with other gluten-free flours.
- Oat Flour: Oat flour has a more neutral flavor and is often considered one of the easiest gluten-free flours to work with. It provides a slightly chewy texture and allows bread to hold its shape well.
- Rice Flour: Rice flour is a common choice for gluten-free baking because it’s affordable and easy to find. It provides a light and fluffy texture, but can be gritty if not balanced with other flours.
- Soy Flour: Soy flour offers a nutty flavor and a tender texture. It also provides a significant amount of protein, making it a popular choice for gluten-free breads.
Texture and Taste Comparisons: The texture and taste of gluten-free bread can vary significantly depending on the flour or blend used. In general, gluten-free breads tend to be denser and moister than traditional breads, but with the right ingredients and methods, it’s definitely possible to achieve a delicious and satisfying result.
V. A Guide on How to Substitute Traditional Bread Ingredients for Gluten-Free Alternatives
Identifying Gluten-Containing Ingredients: Gluten can be found in ingredients like wheat flour, barley, and rye. Some ingredients to watch out for include:
- Bread flour
- Cake flour
- Self-rising flour
- Wheat bran
- Wheat germ
- Couscous
- Matzo
- Pasta
Suggested Gluten-Free Alternatives: Some key gluten-free ingredient substitutions include:
- Gluten-free flour blends
- Rice flour
- Cornmeal
- Potato flour or starch
- Tapioca flour or starch
- Ground flaxseed
- Coconut flour
- Almond flour
Quantity and Ratio Adjustments: When substituting gluten-free ingredients, it’s important to experiment with ratios to get the right consistency and texture. For example, you may need to use more liquid when working with gluten-free flours to make up for their absorbent properties. It’s also helpful to consult recipes specifically designed for gluten-free bread making, at least until you get more experienced.
VI. Tips for Troubleshooting Common Issues When Making Gluten-Free Bread
Common Gluten-Free Bread Issues: Some common gluten-free bread issues include:
- Dense, heavy bread
- Crumbly bread
- Gummy or undercooked bread
- Bread that doesn’t rise
Possible Causes and Solutions:
- Dense, heavy bread: This is often a result of too much moisture or not enough leavening. Try increasing the amount of yeast, baking powder, or baking soda in the recipe. Also, be careful not to over-knead the dough.
- Crumbly bread: This can result from a lack of binding agents like xanthan gum or too much flour. Try adding a little more xanthan gum or working with a different gluten-free flour blend.
- Gummy or undercooked bread: This can result from too much liquid or not enough baking time. Make sure to follow baking times and temperatures closely, and avoid peeking into the oven too often.
- Bread that doesn’t rise: This can result from baking powder or yeast that has expired or been stored improperly. Be sure to use fresh leavening agents, and allow enough time for rising and proving.
Tips for Avoiding Common Mistakes: Some tips for avoiding common mistakes when making gluten-free bread include:
- Measure ingredients carefully, especially when working with gluten-free flours.
- Use a kitchen scale if possible for more precise measurements.
- Follow recipes closely and avoid adding too much extra flour or liquid.
- Leave enough time for the bread to rise and prove, but avoid letting it rise for too long as this can cause the bread to collapse or become gummy.
- Cover the bread with a damp towel or plastic wrap during rising to prevent it from drying out.
VII. Incorporating Unique Flavors and Mix-Ins to Customize Gluten-Free Bread
Ideas for Flavor Additions:
- Herbs like rosemary or thyme
- Cheese or vegan cheese alternatives
- Sundried tomatoes, olives, or roasted garlic
- Sweeteners like honey or maple syrup
- Cinnamon, nutmeg, or other warm spices
Suggestions for Mix-Ins:
- Nuts like almonds or walnuts
- Seeds like flax or chia seeds
- Dried fruits like raisins or cranberries
- Chocolate chips or vegan chocolate alternatives
- Savory options like diced ham or bacon
Recipe Modifications for Added Flavors and Mix-Ins: To modify bread recipes for added flavors and mix-ins, simply add them to the dough during the mixing or kneading process. Be careful not to add too much extra moisture or texture, as this can alter the consistency of the bread.
VIII. A Summary of the Health Benefits of Choosing Gluten-Free Bread and How to Adjust to the Taste and Texture
Overview of Potential Health Benefits: While going gluten-free isn’t necessary for everyone, there are many potential health benefits to making the transition. Some of these benefits include reduced inflammation, improved digestion, and increased energy levels.
Mindset Adjustments for Transitioning to Gluten-Free Bread: When making the transition to gluten-free bread, it’s important to keep an open mind and to be patient. While it can be frustrating at times, remember that it can take time to get used to the taste and texture of gluten-free bread.
Coping with Texture and Taste Differences: There are many ways to enjoy gluten-free bread without sacrificing flavor or texture. Try experimenting with spices and mix-ins to make your bread more flavorful. You can also try toasting or grilling your bread to add some texture and crunch.
IX. Conclusion
Recap of Key Points: Making gluten-free bread is easier than you might think. With a few key ingredients and the right methods, you can create delicious and satisfying bread at home. Remember to experiment with different flours and ingredients to find the perfect combination for your tastes!
Encouragement to Experiment: Don’t be afraid to experiment with adding unique flavors and mix-ins to your bread. The possibilities are endless!
Final Thoughts and Next Steps: Making gluten-free bread is a great way to take control of your health and satisfy your cravings at the same time. If you’re new to gluten-free baking, start with some simple recipes and work your way up to more complex loaves. Before you know it, you’ll be a pro at making delicious and healthy gluten-free bread from scratch.


