Introduction
Are you tired of store-bought lotions with questionable ingredients? Do you want to customize your own moisturizer to suit your skin type and preference? Making your own lotion can be a fun and rewarding experience, not to mention the peace of mind knowing exactly what goes into it. In this article, we will walk you through the entire process of making lotion, from necessary equipment and materials to troubleshooting common problems. We will also share DIY cosmetic recipes, natural and organic options, and creative packaging ideas for your homemade lotion.
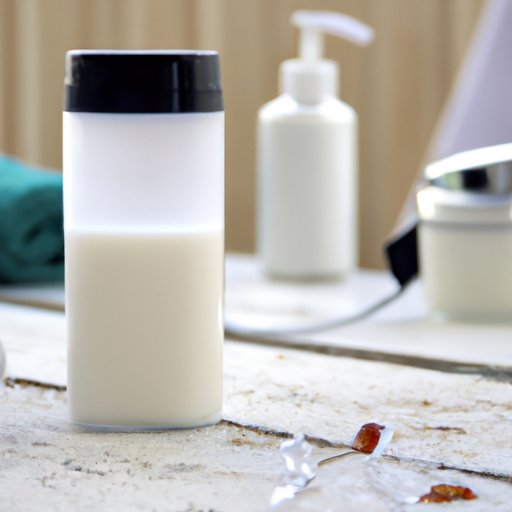
Step-by-Step Guide
Before we dive into the lotion-making process, let’s go over the necessary equipment and materials. You will need:
– A mixing bowl
– A double boiler or a heat-safe glass bowl that fits over a pot of simmering water
– Measuring cups and spoons
– A whisk or a hand-held mixer
– Sterilized glass jars or bottles with lids
– Beeswax or emulsifying wax
– Carrier oils (such as almond oil, grapeseed oil, or jojoba oil)
– Distilled water or hydrosol
– Essential oils (optional)
Now that you have all the equipment and materials, let’s start making lotion! Here are the steps:
1. Melt the wax in the double boiler or the heat-safe glass bowl.
2. Add the carrier oils to the melted wax and stir until well combined.
3. Heat the distilled water or hydrosol in a separate pot until it reaches at least 140°F (60°C).
4. Slowly pour the hot water into the wax-oil mixture while continuously whisking or mixing.
5. Keep mixing until the lotion cools down and thickens to your desired consistency.
6. Add essential oils (if using) and mix well.
7. Pour the lotion into sterilized jars or bottles and let it cool completely before sealing.
Congratulations, you’ve made your own lotion! You can watch video tutorials online for visual guidance.
DIY Cosmetic Recipes
The basic lotion recipe we just went over can be customized with different carrier oils, fragrances, and emulsifiers to suit your needs and preferences. For example, you can use shea butter instead of beeswax for a richer texture, or add glycerin or aloe vera gel for extra moisture. You can also use different essential oils for therapeutic or aromatic benefits.
Here’s a simple homemade lotion recipe to get you started:
– 1/4 cup beeswax or emulsifying wax
– 1/2 cup carrier oil (such as almond oil or coconut oil)
– 3/4 cup distilled water or hydrosol
– 10-20 drops of essential oils (such as lavender or peppermint)
Follow the basic lotion-making steps listed above, and add your preferred carrier oil and essential oils at the end. You can experiment with different oil combinations and amounts to achieve the texture and scent you like.
Natural and Organic Lotions
Natural and organic ingredients can offer extra benefits for your skin while avoiding harmful chemicals and artificial fragrances. Here are some common natural and organic ingredients used in lotions:
– Coconut oil: moisturizes and helps repair skin
– Shea butter: soothes and protects skin, promotes collagen production
– Jojoba oil: deeply hydrates and balances skin pH
– Almond oil: nourishes and softens skin, reduces inflammation
– Essential oils: provide various skin benefits and aromatherapy effects
Here’s a simple recipe for a natural and organic lotion, using coconut oil and shea butter:
– 1/4 cup shea butter
– 1/4 cup coconut oil
– 1/2 cup almond oil
– 20-30 drops of essential oils (such as tea tree or lemon)
Melt the shea butter and coconut oil in a double boiler, add the almond oil, and follow the lotion-making steps described earlier. Add your preferred essential oils at the end.
Troubleshooting Common Lotion-Making Problems
Don’t worry if you encounter some problems during the lotion-making process. Here are some common issues and solutions:
– Separation: the oil and water in the lotion don’t blend. Solution: use more emulsifying wax or whisk/mix longer.
– Too thick or too runny: the lotion consistency is not ideal. Solution: adjust the amount of carrier oils or water/distilled water accordingly, or add aloe vera gel.
– Clumps: beeswax or emulsifying wax clumps form in the lotion. Solution: melt the wax completely before adding the oils, or strain the mixture through a fine mesh sieve.
Creative Packaging Ideas
It’s always fun to dress up your homemade lotion with creative packaging ideas. Here are some options:
– Mason jars: add some ribbon or twine around the lid, or attach a label with custom design or scent information.
– Pump bottles: decorate the bottle with stickers or paint, or use a cute dispenser top.
– Tubes: use a homemade stencil or stamp to create a unique pattern on the tube.
– Gift boxes: put your lotion jars or bottles in a custom gift box with other self-care items, such as candles or bath bombs.
Conclusion
Making lotion at home not only allows you to customize your moisturizer to your liking, but also offers natural and organic options for healthier skin. By following these step-by-step instructions, DIY cosmetic recipes, and troubleshooting tips, you can become a confident lotion maker. Don’t forget to have fun with creative packaging ideas and share your homemade lotion with friends and family.


