I. Introduction
Are you looking for a festive activity to enjoy during the holiday season? Making paper snowflakes is an easy and entertaining craft for all ages. In this article, we will provide a step-by-step guide on how to make paper snowflakes in various shapes and sizes. Beyond the basic technique, we will also share tips, tricks, and ideas for decorating and adding a personal touch to your designs.
Did you know that snowflakes have six sides because of the hexagonal shape of water molecules? No two snowflakes are alike – each snowflake has a unique shape and pattern. So get ready to create your own unique snowflakes that will brighten up any room!
II. Step-by-Step Guide with Visual Aids
To make paper snowflakes, all you need is paper, scissors, and a little creativity. Follow these easy steps to create your own beautiful snowflakes:
- Begin with a square piece of paper. If you don’t have a square, fold one edge of a rectangular sheet over to create a triangle shape. Cut the excess paper to form a square.
- Fold the paper in half diagonally to make a triangle. Crease the sides well.
- Fold the triangle in half again to make a smaller triangle. Crease the sides again.
- Take the right corner of the triangle and fold it towards the middle of the triangle. Make sure the top corner of the paper remains straight.
- Take the left corner of the triangle and fold it towards the middle of the triangle. Make sure the top corner of the paper remains straight.
- You should now have a smaller triangular shape. Cut off the top layer of the paper to create a straight edge, leaving a triangle shape behind.
- Using scissors, cut shapes out of the folded paper. You can create triangles, circles, squares, or any other shape you wish. Make sure to leave some parts of the folded paper uncut to keep the snowflake shape intact.
- Unfold your paper to reveal your unique paper snowflake!
Find it easier to understand with visuals? Click this video below to aid you in your paper snowflake creations!
III. Adding a Twist to Traditional Designs
Do you want to try something new with your snowflakes? There are many ways to modify traditional snowflake designs to create different and unique patterns. Here are some ideas to get you started:
- Add a curve: Instead of cutting straight lines, try cutting curves to create a different look.
- Cut out negative space: Cut out shapes within your snowflake to add additional design elements.
- Combine shapes: Use different shapes to create multiple designs within your snowflake.
- Use different paper types: Experiment with different types of paper, such as glitter or metallic, to add extra texture and shine.
Here’s a video below to teach you how to make snowflakes with a twist. Check it out to get some inspiration for your next snowflake design!
IV. Use Household Materials for Decoration
Now that you’ve made your paper snowflakes, it’s time to think about how to use them for decoration. Here are some ideas for using paper snowflakes in your home:
- Hang from the ceiling: Create a snowflake garland by hanging multiple snowflakes from string or ribbon and suspending from the ceiling.
- Make window clings: Use a glue stick to adhere your snowflakes to windows or glass surfaces for a festive touch.
- Decorate gifts: Add a snowflake to the top of a wrapped gift for an extra special touch.
- Create a centerpiece: Use varying sizes of snowflakes to create a winter-themed centerpiece for your dining table or mantel.
Here’s a quick video tutorial to show you how to make a beautiful snowflake garland to hang in your home!
V. Paper Snowflakes for Kids
Making paper snowflakes is a great activity for children of all ages. Not only is it a fun craft, but it also helps develop fine motor skills and creativity. Here are some kid-friendly activities and designs to try out:
- Colored paper: Use colored paper instead of white to make the snowflakes more fun and festive.
- Stencil: Make a stencil of a snowflake shape for younger children to trace and cut out.
- Glitter: Add a touch of glitter to your snowflakes for some extra sparkle.
- Hang them up: Hang your snowflakes in your child’s room for added decoration.
Check out this fun tutorial for making paper snowflakes with kids!
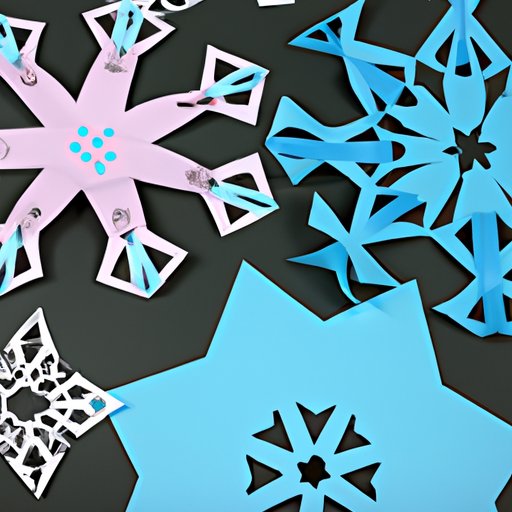
VI. Different Sizes and Shapes
To give your decorations a unique textural feel, try making paper snowflakes of varying sizes and shapes. Here are some instructions and examples for making different sizes and shapes:
- 3-D Snowflakes: Fold multiple sheets of paper in half diagonally and cut out small shapes. Layer the shapes on top of each other and glue in place to create a 3-dimensional snowflake.
- Lace Snowflakes: Using a paper doily, fold in half diagonally, and cut out shapes. Unfold for a delicate snowflake look.
- Giant Snowflakes: Use large pieces of paper to create giant snowflakes that can be hung on the wall as a statement piece.
Looking for some inspiration? Check out this video below for some unique and stunning snowflake designs!
VII. Elegant Paper Snowflakes
If you want to make your snowflakes more elegant, try using different types of paper materials and styling them accordingly. Here are some tips and inspiration to help elevate your creations:
- Vellum Snowflakes: Use vellum paper to create a translucent and delicate snowflake.
- Embossed Snowflakes: Use an embossing machine to add extra texture and dimension to your snowflakes.
- Jeweled Snowflakes: Glue small jewels or beads to your snowflakes for a glamorous touch.
- Styling Tips: Use your elegant snowflakes as place cards, hang them in a frame, or add them to a wreath for a sophisticated look.
Take a look at this video tutorial to learn how to make beautiful and elegant snowflakes using vellum paper!
VIII. A Holiday-Themed Article
Looking for a way to get into the holiday spirit? Making paper snowflakes is the perfect activity for Christmas or New Year’s Eve decorations. Here are some creative decorating ideas and designs tailored to the specific holiday:
- Christmas Designs: Create snowflakes in the shape of a tree, candy canes, or ornaments to add to your Christmas decorations.
- New Year’s Eve Decorations: Make glittery or clock-shaped snowflakes to celebrate the countdown to the new year.
Check out this video tutorial for creating festive holiday-themed snowflakes!
IX. Conclusion
Making paper snowflakes is a fun, easy, and affordable way to spruce up your home for the holiday season. Whether you’re hanging them from the ceiling or adding them to your gifts, they add a festive touch to any space. With the step-by-step guide, tips, and ideas provided in this article, you’re sure to create beautiful and unique snowflakes in no time.


