Introduction
If you’re looking for a fun and creative DIY project to do at home, making polymer clay earrings is a great choice. Not only is polymer clay easy to work with, but it also comes in a variety of colors and can be molded into endless shapes and designs. Plus, creating your own jewelry allows you to express your personal style and make a statement with your accessories.
In this article, we’ll provide a step-by-step tutorial on how to make polymer clay earrings, as well as tips for designing and customizing your pieces. We’ll also offer troubleshooting advice for common issues you may encounter and suggestions for beginners who are new to working with polymer clay.
Step-by-Step Tutorial
To create your own polymer clay earrings, you’ll need a few basic materials:
– Polymer clay in your desired colors
– Earring hooks
– Parchment paper
– Rolling pin
– Craft knife
– Baking sheet
– Oven
Here’s a step-by-step guide to making your polymer clay earrings:
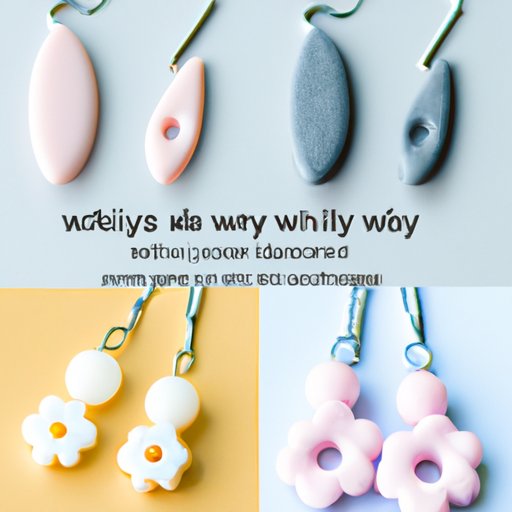
1. Roll out the clay: Start by working the clay in your hands to warm it up and make it more pliable. Then, use a rolling pin to flatten the clay to your desired thickness.
2. Cut out shapes: Use a craft knife or cookie cutter to cut out shapes from the clay. You can make any shape you like, such as circles, triangles, or hearts.
3. Make holes: Use the tip of the craft knife or a toothpick to make a small hole near the top of each clay shape. This is where you will attach the earring hooks later.
4. Bake the clay: Place the clay shapes on a sheet of parchment paper on a baking sheet, and bake them in the oven according to the manufacturer’s instructions. Usually, this involves baking them at a low temperature (around 275°F) for about 15-20 minutes.
5. Attach the earring hooks: Once the clay shapes have cooled, attach the earring hooks to the holes you made earlier. You can use pliers to open the earring hook loop, slide it through the hole and then close it again.
Video Tutorial
If you prefer to follow along with a visual tutorial, this video provides a great overview of the process: [insert YouTube link here].
Design Inspiration
One of the best things about making polymer clay earrings is that you can customize them to your specific tastes. Here are some unique and creative ideas for designing your own polymer clay earrings:
– Incorporate other materials: Mix polymer clay with other materials like beads, wire, or feathers to create a more textured look.
– Create intricate patterns and designs: Use a toothpick or needle tool to create unique patterns on the surface of the clay. You can also layer different colors of clay to create a marbled effect.
– Add texture: Create a textured look by using an embossing tool, pressing objects like lace or leaves into the clay, or making imprints with stamps.
– Make statement pieces: Oversized earrings or statement pieces are currently on-trend and are perfect for showcasing your polymer clay designs.
Troubleshooting Guide
Like any crafting project, making polymer clay earrings can come with some challenges. Here are some common issues you may encounter, and how to resolve them:
– Cracking: Polymer clay can sometimes crack during baking, especially if it is too thick or not conditioned enough before shaping. To prevent cracking, try conditioning the clay longer, rolling it thinner, and shaping it more evenly.
– Discoloration: Certain types of clay can change color during baking – for example, white clay may turn slightly yellow. This is usually due to a reaction with the baking temperature or the oven used. To prevent discoloration, try using a low-heat oven and a timer that is calibrated accurately.
– Stopping clay from sticking to your hands: Polymer clay can be sticky, making it difficult to work with. To prevent it from sticking to your hands, try dusting some cornstarch or baby powder on your hands or use a small amount of clay softener, which is available in some craft stores.
Beginner’s Guide
If you’re new to working with polymer clay, it can seem daunting at first. Here are some tips and suggestions to help you get started:
– Start with basic shapes: Begin by creating simple shapes, like circles or squares, to get a feel for the material before moving on to more complicated designs.
– Use a dedicated workspace: Cover your workspace with parchment paper or a silicone mat to prevent the clay from sticking to your work surface.
– Be patient: Learning to work with polymer clay takes practice. Don’t be discouraged if your first few attempts don’t turn out perfectly.
Tips and Tricks
Here are some additional tips and tricks for making your polymer clay earrings unique and personalized:
– Attaching studs: Some earring designs require attaching a stud to the back of the clay shape before attaching the earring hook. To do this, use a small amount of strong glue (such as E6000), and attach the stud before baking the clay shape.
– Achieving texture: You can create different textures on the surface of the clay by using materials like sandpaper or a pumice stone after the clay has been baked. This can give your earrings a more interesting and unique look.
– Mixing colors: Experiment with mixing different colors of clay to create a custom color palette for your earrings.
Seasonal Styles
Polymer clay earrings can be perfect for creating seasonal or themed designs that are perfect for holidays or special occasions. Here are some ideas:
– Halloween: Create spooky designs using black, orange, and white clay. You could make simple shapes, like bats or ghosts, or go for a more detailed design like a jack-o-lantern.
– Christmas: Use red, green, and gold clay to create festive designs, like Christmas trees or candy canes. Add some texture with glitter or tiny beads for an extra special touch.
– Weddings: Make delicate and elegant earrings using white or ivory clay. Add pearls, rhinestones, or crystals to create a sophisticated look.
Conclusion
Making polymer clay earrings is a fun and rewarding DIY project that allows you to express your personal style. With a few basic materials and some creativity, you can create unique and personalized statement pieces that are perfect for any occasion. Remember to experiment with different designs and colors, and don’t be afraid to try something new!
So, grab some clay and start crafting! And don’t forget to show them off to your friends and family.


