I. Introduction
Putty is an incredibly versatile material that can be used for various purposes, from filling gaps to helping clean sticky residue off surfaces. But did you know you can also make it yourself? By using simple ingredients and following our step-by-step guide, you can create your own putty from scratch.
In this article, we will show you how to make putty, provide you with alternative recipes, and suggest different uses for it. We will also share some safety tips and interesting facts about its history and evolution throughout the years.
II. Step-by-Step Guide
Before we start, let’s gather all the necessary ingredients, equipment, and tools:
- 1 cup white glue
- 1/2 cup liquid starch
- Food coloring (optional)
- A mixing bowl
- A spoon or spatula
Once you have gathered your supplies, you’re ready to begin. The following steps will guide you through the process:
- Pour 1 cup of white glue into the mixing bowl. You can find white glue in most craft stores or online retail stores.
- If you’re using food coloring, you can add a few drops now and stir it until the glue has changed to your desired color.
- Slowly pour a 1/2 cup of liquid starch into the glue mixture while stirring thoroughly using your spoon or spatula. Keep stirring until the mixture starts to pull away from the sides of the bowl and form one big ball of putty.
- If your mixture is too sticky, add more liquid starch gradually. If it’s too dry or stiff, add more glue slowly and mix until the consistency is right.
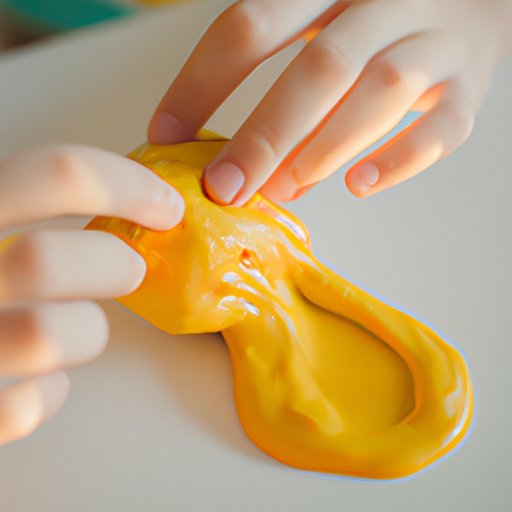
- Knead the putty with your hands until it is smooth and pliable. As you knead it, the putty will begin to tighten. If it’s too sticky, add more liquid starch and knead again.
- Voila! You now have some homemade putty that is ready to use for your desired purpose.
Below are some tips for the putty-making process:
- The color of your putty will be lighter when it is raw but will get brighter once you knead it a few times.
- If you want to make larger portions, you can double or triple the recipe. Make sure to adjust the ingredient ratios accordingly.
- If you’re adding glitter, be sure to knead it in after the putty ball has formed so it doesn’t make a mess.
- If you’re finding glue stains on your hands after the creation, rub some lotion or moisturizer to remove them.
III. Video Demonstration
If you are a visual learner, it may be easier to comprehend the putty-making process by watching someone do it first. To help, we have found an excellent video on YouTube that will guide you through the process. The video will also give you additional tips and tricks that we may not have included in our written instructions. Lose yourself as you watch and learn.
IV. Infographic
Visual aids are always helpful, especially when trying to follow instructions. Here is an infographic that can help you remember this recipe anytime you like. We have included some additional graphics that should make the piece more aesthetic for you. Enjoy!

V. Historical Context
Putty has a long history that dates back hundreds of years. For example, the ancient Greeks and Romans used putty for various construction, sculptural, and artistic purposes. They made it by using a mixture of lime, vinegar, and crushed marble.
The first modern-day putties were made in the early 20th century and were designed for sealing and plumbing work. Later, more versatile putties were created, like the well-known Plasticine and Silly Putty brands that were first introduced in the 1950s. Nowadays, putty comes in many forms, textures, and colors, making it an excellent medium for creativity and play.
Aside from being used for arts and crafts, many people use putty to clean up sticky and gummy messes on a variety of surfaces. Some people even use putty to help train pianists in proper finger positioning and to improve guitar player’s finger strength.
VI. Safety Tips
While making putty is generally a safe activity, there are a few things you should keep in mind:
- If you’re using food coloring to color your putty, be careful and make sure to not stain your clothes, furniture, or other objects in your work surface.
- Do not put the putty in your mouth or swallow it. The ingredients can cause harm if ingested.
- Always wash your hands before and after playing with putty.
- Do not leave the putty on surfaces that can be damaged by it.
VII. Alternative Recipes
If you’ve tried the original recipe we shared and are feeling adventurous, here are some alternative recipes that you can try:
Scented Putty
For this version, you’ll need a few drops of essential oil of your choice:
- Add 1 cup of white glue to the mixing bowl.
- Add a few drops of food coloring and the desired essential oil and stir until mixed.
- Add 1/2 cup of liquid starch and mix until consistency is right.
Textured Putty
For a unique sensory experience, try adding some different textures to your putty:
- Combine 1 cup of white glue and 1/4 cup of small beads or glitter into the mixing bowl.
- Add a few drops of food coloring and 1/2 cup of liquid starch and stir until mixed.
- Knead the putty until the texture is uniform.
Glow-in-the-Dark Putty
This one is perfect for a universe-themed party with planets and stars:
- Completely darken the room in which you will create the putty.
- Mix 2 cups of white glue with two tablespoons of glow-in-the-dark paint in the mixing bowl.
- Add food coloring (optional) and 1 cup of liquid starch and stir until mixed.
- Knead the putty until it is smooth and shiny before turning off the lights to test its glow-in-the-dark features.
VIII. Uses for Putty
Putty is incredibly versatile and can be used for countless purposes beyond just filling gaps. Here are some of our favorite creative uses for putty:
- Create temporary clamps by molding putty around the item you want to clamp.
- Make custom molds for cakes or other food items.
- Create custom stencils by rolling small balls of putty and sticking them to paper.
- Use it as a stress ball for fidgeters or as a hand exercise tool for the elderly.
- Create intricate sculptures and crafts using the putty much like you would with play-doh.
- Use it to improve finger strength for stringed instrument players by molding and stretching the putty over the fingers.
- Use it to clean gummy surfaces. Press putty down on the gummy surface and then carefully lift the putty to remove the sticky residue.
IX. Conclusion
Making putty is a fun, straightforward, and engaging activity for all ages. It’s a great way to encourage creativity and can also be used for practical purposes. We hope our step-by-step guide, video tutorial, and infographic have made it easy for you to create your own putty. Feel free to experiment with different recipes, uses, and techniques to make your putty even more personal and special.


