I. Introduction
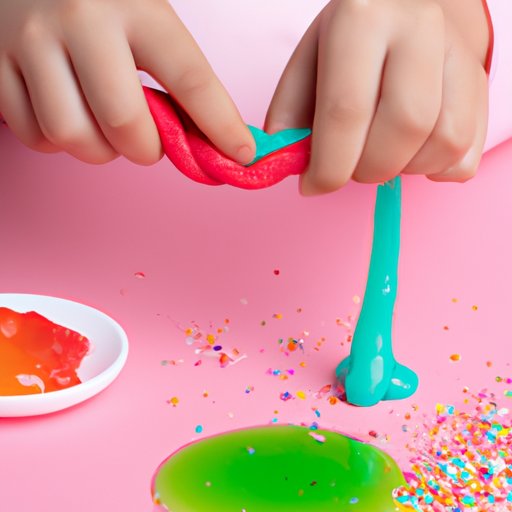
Slime-making is a fun and creative activity that engages kids and adults alike. Creating your very own version of a bouncy, sticky, and stretchy goo can be not just entertaining but also an excellent way to develop critical thinking and science skills. With a few essential ingredients and some techniques, you can create different types of slime that can glow in the dark, smell nice, or be even edible.
II. The Basic Recipe: How to Make Slime with Just Three Ingredients
Making slime is incredibly easy with just three basic ingredients: glue, borax, and water. The process is straightforward and does not require any special knowledge or skill. Here’s what you need to do:
- Pour 1/2 cup of glue into a bowl
- Add 1/2 teaspoon borax to 1 cup of water and stir until it dissolves
- Mix the borax solution into the bowl with glue and stir well
- Knead the mixture with your hands until it forms slime
Here are some tips on how to make slime perfectly:
- Start with clear glue instead of white glue to get clear slime
- Add food coloring or glitter to the mixture for an added effect
- Add water or borax to adjust the slime consistency
III. Mess-Free Slime: No Glue or Borax Required!
Creating slime does not necessarily have to be messy or use the same traditional ingredients. You can use some household items to make no-glue and no-borax slime instead. Here’s how:
- One option is to use baking soda and contact lens solution. Mix the two ingredients to create a small ball that will later transform into slime. Knead it with your hands for a few minutes until you achieve the desired texture.
- An alternative option is to mix shampoo or body wash with cornstarch and create your slime recipe with a few added drops of food coloring.
Make sure to clean any surfaces or tools used carefully:
- Use shallow containers or silicone trays when making slime
- Clean surfaces regularly and immediately if the slime accidentally falls off
- Use a towel or gloves to protect hands from any possible allergic reactions or irritation
- Mix 1/2 cup white glue, 1/2 cup water, and a few drops of neon green paint together in a bowl
- Add 1-2 tablespoons of glow-in-the-dark paint to the mixture (more or less depending on desired effect)
- Add 1/4 teaspoon of baking soda to the mixture and stir well
- In a separate container, mix 1 tablespoon of contact lens solution with 1 teaspoon of borax. Slowly add this mixture to the glue mixture while stirring to create slime
- Add more glow-in-the-dark paint for better results
- Add stars, glitter, or other decorations once the slime has been created
- Use a black light to enhance the glow effect
- Melt 10-15 large marshmallows with a few tablespoons of butter in a microwave or on a stove
- Stir in 1/2 cup of rice cereal and some food coloring until you achieve the desired color
- Knead the mixture with your hands until it forms a dough-like consistency
- Add some sprinkles or candy for added color and flavor
- Choose healthy and safe ingredients for edible slime such as marshmallows, rice cereal, gummies, or frosting.
- Create themed edible slime by using different colors and shapes according to the theme
- Store the slime in an airtight container and consume it within two days of creating it
- Slime consists of two main agents: polyvinyl alcohol in the glue and borate ions in borax
- When borate ions and polyvinyl alcohol are mixed, they form long chains of molecules which create slime
- Adding water, glue or food coloring to the mixture affects the consistency, texture, and brightness of the slime
- Keep a journal to log any changes in the slime consistency or texture
- Create a variety of slime recipes with different ingredients to see how they affect the outcome;
- Experiment with adding small plastic animals or beads to the slime
- Elmer’s Glow-in-the-Dark Slime Kit comes with everything you need to create the perfect slime
- Cra-Z-Art Nickelodeon DIY Slime kit includes all tools, ingredients, and instructions for creating your slimy masterpiece
- Choose a kit that fits your child’s age and skills, and enjoy it together
- Weigh between ready-made kits and options with specific instructions and ingredients
- Always read the labels and ingredients to ensure they are safe and nontoxic
- Add small items like beads, glitter, or sequins to slime to give it different textures
- Create different smells and aromas using essential oils or perfumes
- Experiment with colors and textures to create unique slime
- Use different textures, smells, and looks to create custom slime for parties, holidays, or special occasions
- Be cautious when creating slime mixtures, as some ingredients can be hazardous;
IV. Glow-in-the-Dark Slime: A Fun Twist on a Classic DIY
Creating slime that glows in the dark is a fun and creative twist on this DIY project. Here’s how to make a glow-in-the-dark slime:
Here are some additional tips for achieving the perfect glow-in-the-dark slime:
V. Edible Slime: Make a Safe and Yummy Treat for Kids
Edible slime is an excellent alternative for younger kids who may put anything in their mouths. Here’s how to make a quick and easy edible slime:
Here are some tips to make tasty and safe edible slime:
VI. Slime Science: Understanding the Chemistry Behind DIY Slime
Understanding the science behind slime can make creating it an educational experience. Here are some basic facts:
Here are some tips to enhance the science aspect of making slime:
VII. DIY Slime Kits: A Perfect Gift for Crafty Kids
If you want to create beautiful slime without worrying too much about finding the right ingredients, consider purchasing a pre-packaged slime kit:
Here are some tips for selecting the perfect DIY slime kit for your child:
VIII. Advanced Slime-Making Techniques: Adding Textures, Scents, and More
Once you have mastered the basic recipe, you can experiment with advanced techniques to create unique and customized slime:
Here are some tips on how to make advanced slime:
IX. Conclusion
Creating slime is not just an entertaining and engaging activity for kids but can also be a creative way for parents and kids to spend quality time together. From the basic recipe to the no-glue, no-borax option, from glow-in-the-dark to edible slime, making slime has many options. With a bit of creativity and imagination, anyone can create a unique, customized slime that is fun to play with and reflects their creativity.
So, go ahead and explore the possibilities of slime-making while keeping safety in mind.


