Introduction
If you have been baking for a while, chances are you have come across recipes that call for yeast. Yeast is an essential ingredient in producing many baked goods, including bread, pizza dough, cakes, and more. Store-bought yeast is widely available, but it may not always be readily accessible or cost-effective. That is why making your own yeast at home is an excellent alternative.
In this article, we will guide you through the process of making yeast at home. We will explore the science behind yeast and what it takes to cultivate it in your kitchen. Moreover, we will share creative ideas on how to use your homemade yeast and troubleshoot any problems that you may encounter.
The Science Behind Yeast
Yeast is a living organism belonging to the fungus family. For centuries, it has been widely used in baking to help raise dough and create the airy texture present in many baked goods. The biology of yeast involves a process known as fermentation, where the yeast cells break down sugars into carbon dioxide and alcohol. As carbon dioxide is produced, it creates air pockets within the dough, leading to the light and fluffy texture that we associate with baked goods.
The three main types of yeast commonly used in baking are active dry yeast, instant yeast, and fresh yeast. Active dry yeast is usually the most commonly used type of yeast in households. It comes in tiny granules and requires proofing before use. Instant yeast, on the other hand, can be added directly to dry ingredients, and it is more potent than active dry yeast. Finally, fresh yeast, also known as yeast cakes, have a higher moisture content and can spoil quickly, making them less convenient to use.
Making Yeast at Home
Making yeast at home may seem like a daunting task, but it is relatively easy once you get the hang of it. Here is a step-by-step guide to help you get started:
Choosing the right equipment and ingredients
Before you begin making your yeast, it is essential to have the right equipment and ingredients. You will need a mixing bowl or jar, flour, water, and sugar. You may also want to consider investing in a kitchen scale to precisely measure your ingredients. A thermometer is also useful to ensure that your mixture is at the right temperature.
Preparing the yeast culture
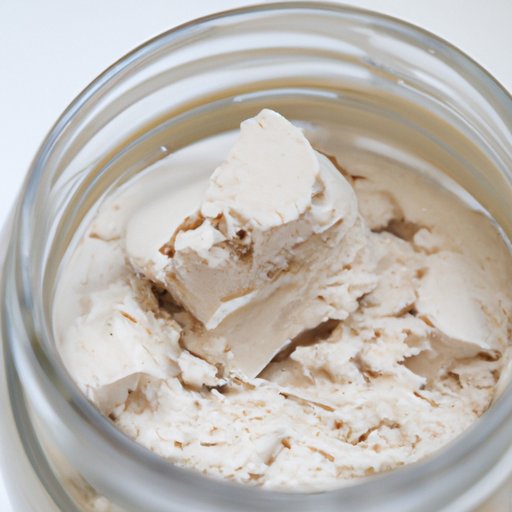
In a bowl or jar, mix equal parts flour and water and stir until well combined. Add a small amount of sugar to the mixture and stir again. Cover the mixture securely with a clean cloth and let it sit in a warm, draft-free location for 24 hours. This will allow your yeast culture to grow.
Cultivating the yeast over time
After 24 hours, the mixture should have small bubbles on the surface and give off a sour, yeasty odor. This is an indication that your yeast culture is growing correctly. Feed your yeast culture every day for the next few days by adding two tablespoons of flour and two tablespoons of water and mixing well each time.
Testing the yeast for readiness
After a few days of feeding, the yeast should have grown significantly and be ready to use. To test it, add one teaspoon of yeast culture to a bowl of warm water and stir well. If the mixture begins to bubble within a few minutes, your yeast is ready to use.
Using Natural Ingredients to Produce Yeast
Using natural ingredients to make yeast is a great alternative to commercial yeast. It produces a flavorful, unique taste and can be more cost-effective than store-bought yeast. Here are some natural ingredients that you can use to make yeast at home:
Fruit Yeast
Fruit yeast can be made using fruits such as apples, grapes, or berries. Crush the fruit and add sugar and water to it. Allow the mixture to ferment for several days, stirring occasionally until bubbles form. Strain the liquid through a sieve or cheesecloth and let it stand for a few hours before using the yeasty liquid at the top.
Sourdough Culture
Sourdough is a popular type of bread made from fermented dough. To make sourdough culture, mix flour and water in equal parts and let it sit at room temperature for several days. This will allow for naturally occurring yeast and bacteria to grow.
Flour and Water Paste
Mix equal parts flour and water to create a paste-like consistency and let it sit covered for several days. Stir the mixture every few hours until it develops a yeasty smell.
Tips for Maintaining and Storing Your Homemade Yeast
Keeping your yeast culture healthy and active is crucial to ensure successful baking results. Here are some best practices for maintaining and storing your homemade yeast:
Best practices for keeping your yeast culture healthy and active
Feed your yeast culture regularly every day to keep it active. Store it in a covered container at room temperature, and use it when you bake.
Overview of different storage methods
You can store your yeast culture in several ways, including in the fridge or freezer. Freezing your yeast culture extends its life and keeps it dormant, while refrigeration keeps it fresh.
How to revive dormant yeast
If your yeast culture has been stored for an extended period, it may become dormant. To revive it, take it out of cold storage and feed it two tablespoons of flour and water for a few days until it becomes active again.
Comparing Homemade Yeast to Store-Bought Alternatives
Homemade yeast has several advantages over store-bought yeast, including cost, availability, and quality. Homemade yeast is relatively inexpensive to make and uses natural ingredients, which can be eco-friendly and organic. Moreover, making yeast at home ensures that it is always readily available in case you run out of store-bought options. Finally, the quality of homemade yeast is typically better than store-bought alternatives, as it has a unique flavor and texture that adds character to baked goods.
Creative Ways to Use Leftover Yeast in Your Cooking and Baking
Repurposing excess yeast is an excellent way to reduce food waste and add flavor to other recipes. Here are some creative ways to make use of your leftover yeast:
Bread and Beer
Leftover yeast can be used to make bread or beer from scratch. By adding your yeast to a bread or beer recipe, you can create a unique flavor and texture that is entirely your own.
Marinades and Dressings
Try adding some leftover yeast to your marinades or salad dressings. The yeasty flavor adds depth and enhances the overall flavor profile.
Homemade Pizza Dough
Use your excess yeast to make homemade pizza dough. This allows you to control the ingredients’ quality and create a delicious, authentic pizza right at home.
Troubleshooting Common Issues When Making Yeast at Home
If you encounter problems making your yeast, such as contamination or difficulty growing, don’t worry. Here is a step-by-step troubleshooting guide to help you identify and overcome some common issues:
Contamination
If your yeast culture becomes contaminated, it will start to smell sour or bad. In this case, it is best to discard the culture and start over again.
Difficulty growing
If your mixture doesn’t grow after 24 hours, it may not be warm enough. Ensure that your mixture is kept in a warm place with a consistent temperature of around 25 degrees Celsius.
Conclusion
Making your yeast at home is an excellent alternative to buying store-bought yeast. Not only is it cost-effective and eco-friendly, but it also produces a unique flavor and texture that adds character to baked goods. Using natural ingredients and best practices for maintaining your yeast culture ensures that it stays active and healthy. Homemade yeast can be used in anything from bread and cakes to marinades and dressings, allowing you to explore new flavors in your cooking. With some patience and effort, you too can make your yeast at home and take your baking skills to the next level.


