I. Introduction
When it comes to streaming movies, playing games, and creating presentations, nothing beats the convenience of mirroring your laptop screen to your TV. Laptop-to-TV mirroring involves projecting the image on your laptop to the larger screen of your television. It’s a popular solution that makes it easy to share your laptop’s content with a wider audience, whether for entertainment or work purposes.
Knowing how to mirror your laptop to a TV is increasingly becoming a necessity in this digital age. The process used to involve a lot of cables and hassle, but modern technology has made it simpler and more efficient. In this article, we’ll walk you through every step and provide solutions to any issues you may encounter along the way.
II. Step-by-step guide for connecting a laptop to a TV
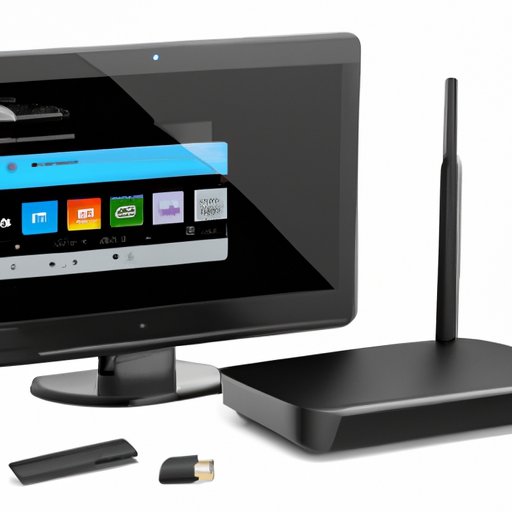
Before we start, it’s essential to ensure you have the proper cables for your laptop and TV. You’ll need an HDMI cable as this is the most straightforward way to connect your laptop to your TV. Once you have the correct cables, follow the steps below:
Preparations before connecting
Make sure both your laptop and TV are turned off before connecting the HDMI cable. Also, ensure that you have enough space around the HDMI ports to plug in the cable properly.
Connecting the laptop to the TV via HDMI cable
Connect one end of the HDMI cable to your television and the other end to your laptop. Most laptops have an HDMI port, but if yours doesn’t, you’ll need to purchase an HDMI adapter. Once you’ve connected the cable, turn on both the laptop and TV.
Selecting the right input on the TV
On your TV remote control, press the “Input” or “Source” button to choose where to get the signal you want to display. Make sure to select the HDMI input that corresponds to the port you plugged the HDMI cable into your TV. Once done, your TV will automatically display your laptop’s screen.
Changing display settings on the laptop
By default, your laptop’s screen resolution may not match your TV’s resolution. You may want to adjust this to avoid any stretching or distortion of the image. On Windows, right-click on your desktop and select “Display Settings.” On a Mac, go to “System Preferences” and select “Displays.” From there, adjust the resolution settings until you’re happy with the image quality on your TV.
Troubleshooting tips
If you’re having issues, make sure that both your laptop and TV are connected to an active power source. Ensure that the HDMI cable is connected to the correct HDMI ports and that you’re selecting the right input on your TV. Also, check that your laptop display settings are correctly configured.
III. Wireless options for laptop-to-TV mirroring
If you’d like a wireless solution instead of using an HDMI cable, there are two popular options:
Introduction to Wi-Fi Direct and Miracast
Wi-Fi Direct allows you to connect your laptop and TV wirelessly, without the need for any additional equipment. On the other hand, Miracast works similarly, but it’s a bit more complicated than Wi-Fi Direct. Miracast is a technology supported by Google, so it works great with Android devices.
How to use Wi-Fi Direct and Miracast for mirroring
Make sure your TV and laptop support Wi-Fi Direct or Miracast, then connect the two using their built-in wireless capabilities. On your laptop, go to “Settings” and select the Wi-Fi Direct or Miracast option, and your laptop’s screen will begin to appear on your TV. Ensure that your laptop and TV are on the same Wi-Fi network for this to work.
Benefits and limitations of wireless options
Wireless options offer more flexibility, and you can use them from anywhere in the room, unlike HDMI, which limits you to the length of the cable. They’re also compatible with devices whose HDMI connections might be hard to reach. However, wireless options can be less reliable and may encounter some lag if the Wi-Fi network is slow or overburdened.
Troubleshooting tips
If you encounter any issues with wireless mirroring, ensure both your TV and laptop support Wi-Fi Direct or Miracast technology. Check that your laptop’s wireless capabilities are turned on, and that both devices are on the same Wi-Fi network. Additionally, you can try moving your laptop closer to your TV to avoid signal interference.
IV. Software solutions for laptop-to-TV mirroring
Several software applications make it easy to mirror your laptop’s screen to a TV. These include AirParrot and Mirroring360.
Overview of popular software options
While several software applications exist, some are better than others. AirParrot and Mirroring360 are popular, affordable options that offer the best features for screen mirroring.
How to use AirParrot and Mirroring360 for mirroring
After downloading the software, you’ll be prompted to install it on your laptop. From there, follow the manufacturer’s instructions to pair the software with your TV. Once connection is established, you can click the “Start Mirroring” button from your laptop, and it’ll display your screen to your TV.
Benefits and limitations of software solutions
Software solutions offer different features such as multi-device streaming and customizable settings. They are also highly compatible with various devices. However, software solutions often require a paid subscription after the free trial ends. Also, installing software on your laptop may occupy disk space and memory, leading to slower performance.
Troubleshooting tips
If you’re having difficulty mirroring your screen using software, ensure that your laptop and TV are both connected to the same internet connection and that the software has adequately paired them. Make sure that all firewall settings allow traffic to pass through and that any antivirus software isn’t blocking connections.
V. Troubleshooting common issues
Regardless of the method you choose, you may still encounter some issues. Let’s take a look at common problems and how to solve them.
Common issues like black screen or no audio
A black screen or no audio is a common problem when mirroring your laptop to a TV. It can be caused by a variety of issues, such as incorrect input selection, loose HDMI cables, or outdated display drivers.
Possible causes of the issues and how to fix them
In most cases, these issues can be fixed by checking connections, resetting the display, or updating the drivers. If using wireless options, you may want to restart your Wi-Fi network or try switching to wired connections. Using software solutions, you can uninstall and reinstall the software, restart your devices or restore the default settings.
Advanced troubleshooting tips
If you’ve checked the basics and still can’t find a solution, you can try advanced troubleshooting. This may involve resetting your devices to their default settings, updating operating systems or software, testing different HDMI cables or opening the control panel to check settings.
VI. Mirroring a laptop to different types of devices
While most people tend to mirror their laptops to a TV, you can also use other types of devices. This section will walk you through how to do it.
Overview of different types of devices and their differences
Some common devices you can mirror to other than TVs include projectors and portable monitors. While each of these devices serves a specific purpose, they all operate similarly to TVs, making the connection process relatively easy.
How to mirror a laptop to each type of device
After ensuring you have the right cables, follow the same process mentioned earlier to mirror your screen to these devices. The only difference is that instead of selecting HDMI, you’ll choose other inputs such as VGA or DVI.
Troubleshooting tips
If you’re having trouble mirroring to other types of devices, check that your laptop and the device in question have compatible ports. Ensure that the device is properly turned on and that you’re selecting the correct input. Try different cables, drivers, or software applications to see which works best for that particular device.
VII. Conclusion
Mirroring your laptop to a TV, monitor, or projector is a convenient way to share your screen with others. By following the steps outlined in this guide, you can quickly and easily connect your devices and get started. Always ensure that you check cables, drivers, software applications, and troubleshooting tips before resorting to more advanced solutions. With this knowledge, you have the tools to enjoy uninterrupted content streaming from your laptop to any device of your choice.
Remember, the importance of knowing how to mirror a laptop to a TV cannot be overstated. It provides a broader audience for your content and makes everything more enjoyable. And with the advent of different, more efficient methods, everyone can now enjoy seamless mirroring. For more information, check out the additional resources listed below.


