Introduction
Painting a ceiling can feel like a daunting task for many people. It is often seen as a difficult and messy job that requires a lot of time and effort. However, with the right tools, techniques, and preparation, painting a ceiling can be an easy and rewarding DIY project that can transform the look of any room in your home. In this article, we will share a step-by-step guide on how to paint a ceiling like a pro, as well as offer helpful tips and tricks to make the process as smooth and mess-free as possible.
Step-by-Step Guide: How to Paint a Ceiling Like a Pro
The key to painting a ceiling like a pro is preparation. Follow these steps to ensure a successful painting project:
Step 1: Clean and sand the ceiling
Before painting, make sure to clean the surface of the ceiling to remove any dust, dirt, or grime. Sand the surface lightly to create a smooth and even surface.
Step 2: Select the right paint and primer
Choose a paint and primer that are specifically formulated for ceilings. They should be high-quality and offer good coverage and durability.
Step 3: Cut in the edges
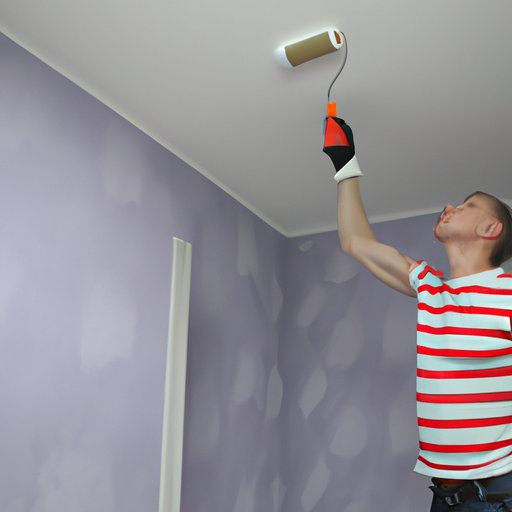
Using a paintbrush, cut in the edges of the ceiling around light fixtures, edges, and corners. This will help to create a clean and crisp finish.
Step 4: Roll on the paint
Using a paint roller, apply the paint in small sections, working from one end of the ceiling to the other. Try to maintain a wet edge to avoid any lap marks or overlap lines. It may be necessary to use more than one coat to achieve the desired coverage.
Step 5: Let it dry
Allow the paint to dry completely before applying a second coat. Follow the manufacturer’s instructions for drying times.
Remember to be patient and take your time. Rushing through any of these steps could result in an uneven finish.
Top 10 Tips for Painting a Ceiling Without Making a Mess
Painting a ceiling can be messy, but with these tips, you can keep your space clean and tidy:
Tip 1: Use a paint guard
A paint guard is a tool that can be attached to the bottom of your paint roller to prevent drips and splatters.
Tip 2: Cover the floors and furniture
Lay down drop cloths to protect your floors and furniture from any paint drips or spills.
Tip 3: Wear protective clothing
Wear old clothing that you don’t mind getting paint on to avoid any stains on your regular clothes.
Tip 4: Use proper ventilation
Open windows and use fans to promote good ventilation and prevent fumes from building up in your space.
Tip 5: Keep a clean work area
Clean as you go to avoid any unnecessary mess and to keep your work area neat and organized at all times.
Tip 6: Use a thick-nap roller
A thick-nap roller will hold more paint and help prevent drips and splatters.
Tip 7: Use a steady hand
Paint with slow, steady strokes, and avoid twisting the roller back and forth. This will help to prevent any splatters or drips.
Tip 8: Use proper lighting
Make sure that your space is well-lit to help you see any spots that you may have missed.
Tip 9: Cut in properly
Practice cutting in first before painting the entire ceiling. This will help you to develop a steady hand and create a clean and crisp line.
Tip 10: Take breaks
Take breaks when you need to in order to avoid becoming overwhelmed or fatigued. You will work more efficiently and with a clear head when you take breaks.
DIY Ceiling Painting: What You Need to Know Before You Start
Before starting your DIY ceiling painting project, there are a few things you need to know:
Choosing the right paint type
When choosing a paint for your ceiling, opt for a paint that has a flat or matte finish. Glossy finishes can be too reflective and make any flaws or imperfections more noticeable.
Proper preparation is key
Make sure to clean and sand the surface of the ceiling before painting to create a smooth and even surface. Failing to properly prepare the surface could result in an uneven or bumpy finish.
Tools you will need
You will need a paint roller, paintbrushes for cutting in, a paint tray, a ladder, and a drop cloth. Consider investing in a paint guard or a thick-nap roller to help prevent drips and splatters.
Mistakes to avoid
Avoid choosing the wrong paint type or failing to properly prepare the surface of the ceiling. Rushing through any of the steps or not allowing the paint to dry completely between coats can also result in an uneven finish.
Master the Art of Ceiling Painting with These Simple Tricks
If you want to achieve a professional-looking finish, follow these tips:
Tip 1: Feather your paint strokes
Feathering your paint strokes means blending them in so that there are no visible lines. This technique will help to create a smooth and even finish.
Tip 2: Blend in any overlap lines
Overlap lines can appear when you are painting in different sections. To blend them in, roll over the area again, using a lighter pressure.
Tip 3: Cut in around light fixtures
When cutting in around light fixtures, work in small sections and try to create a clean and crisp line. This will help to create a neat and polished finish.
Ceiling Painting 101: Techniques, Tools, and Preparation
Here’s a comprehensive overview of everything you need to know to achieve a successful ceiling painting project:
Paint type
Choose a paint that has a flat or matte finish. Avoid glossy finishes, as they can be too reflective and highlight any imperfections on the ceiling surface.
Paint finish
Consider using a paint that has a stain-resistant or moisture-resistant finish, especially in areas like the bathroom or kitchen.
Tools
You will need a paint roller, paintbrushes for cutting in, a paint tray, a ladder, and a drop cloth. Consider investing in a paint guard or a thick-nap roller to help prevent drips and splatters.
Preparation
Before painting, make sure to clean and sand the surface of the ceiling to create a smooth surface. Cover the floors and furniture with drop cloths to protect them from any drips or spills.
Painting techniques
Use a paintbrush to cut in the edges of the ceiling around light fixtures, edges, and corners. Use a paint roller to apply the paint in small sections, working from one end of the ceiling to the other. Allow the paint to dry completely before applying a second coat.
Checklist
Before starting your ceiling painting project, make sure to have all the necessary tools and equipment, choose the right paint type and finish, and properly prepare the surface of the ceiling.
Conclusion
Painting a ceiling can seem like a daunting task, but with the right tools, techniques, and preparation, it can be an easy and rewarding DIY project. Follow our step-by-step guide and helpful tips to achieve a professional-looking finish without making a mess. Remember to take your time and be patient, and you’ll have a beautifully painted ceiling in no time.


