Introduction
Spider plants, also known as Chlorophytum comosum, are a popular houseplant due to their ease of care, air-purifying qualities, and attractive appearance. One of the most exciting aspects of owning a spider plant is propagating and growing new plants from the parent plant. Plant propagation is a perfect way for spider plant enthusiasts to increase their collection or share their plants with friends and family.
Step-by-Step Guide: Propagating a Spider Plant in Water
Water propagation is one of the easiest methods of propagating a spider plant. It involves placing a spider plant cutting in a container of water and waiting for it to grow roots.
Materials needed for water propagation include:
- A healthy spider plant
- A glass or large jar filled with water
- A pair of clean, sharp scissors or pruning shears
- A warm, bright location for the container
Step-by-step instructions for propagating a spider plant through water:
- Choose a healthy spider plant with long, trailing shoots.
- Sanitize the scissors or pruning shears by wiping them with rubbing alcohol or boiling them in water for a few minutes.
- Locate an area of the plant that has at least two or three leaves and a stem, and cut off the stem with the scissors or pruning shears.
- Fil the glass or jar with water, and place the stem into the water, ensuring that at least two leaves remain above the waterline.
- Place the container in a warm, bright location that receives indirect sunlight.
- Change the water in the container every few days, ensuring that the stem remains submerged.
- Watch as the roots grow, and wait for several inches of new roots to form.
- When the new roots are at least two inches long, transplant the cutting into potting soil, ensuring that the top of the root ball is even with the surface of the soil.
- Water the soil and keep it moist, but not waterlogged.
- Enjoy watching your new spider plant grow!
Tips for success and troubleshooting:
- Choose a healthy parent plant with no signs of disease or pests. This ensures that the new plant will be healthy and vigorous.
- Make sure the container has enough bright, indirect light to promote root growth. Too little light will slow root growth or prevent it altogether.
- Change the water in the container every few days to prevent the growth of harmful bacteria or algae.
- Be patient. The rooting process can take a few weeks or more, depending on the plant’s health and environmental conditions.
- If the leaves begin to yellow or the roots begin to rot, the plant may be receiving too much water. Reduce watering and ensure that the soil is well-draining.
Spider Plant Propagation: The Benefits, Techniques, and Common Mistakes
Plant propagation provides many benefits for spider plant enthusiasts. Some advantages include:
- The ability to grow more plants and expand your collection.
- The option to share spider plants with friends and family.
- The ability to replace aging or dying plants with healthy new ones.
- The satisfaction of growing new plants from cuttings.
There are several techniques for propagating spider plants, including:
- Water propagation
- Soil propagation
- Division
- Runner or offset division
Common mistakes to avoid while propagating spider plants include:
- Using diseased or pest-infested plants for cuttings
- Overwatering the new plant
- Placing the new plant in direct sunlight
- Using a pot that is too small for the growing plant
Examples of successful spider plant propagation techniques include:
- Water propagation, as outlined in the previous section.
- Division, which involves separating the parent plant into smaller plants to grow independently.
- Runner or offset division, which involves removing small offshoots that grow from the parent plant and rooting them in water or soil.
Starting Your Spider Plant Family: Propagation without Tools
Propagation doesn’t always require tools or equipment. There are several methods for propagating spider plants without tools:
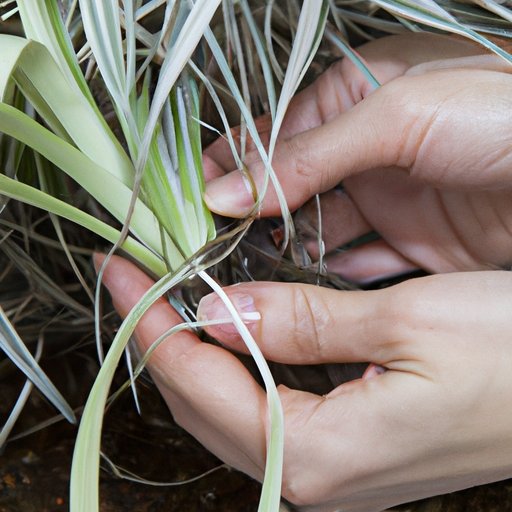
- Dividing the plant by gently pulling apart the leaves and roots.
- Runner or offset division, where the baby spider plant is allowed to mature on the parent plant until it has established its roots and then removed and planted.
Tips for success and troubleshooting:
- Be sure to keep a close eye on the baby spider plants to ensure they do not over or under grow.
- Dividing the plant can be stressful for the plant so give it some recovery time.
- If the baby spider plants begin to wilt or turn yellow, or the leaves begin to break or discolour, provide them with more water.
5 Creative Ways to Propagate Your Spider Plant
There are many creative methods you can use to propagate your spider plant. Here are 5 of the best, out-of-the-box ideas to try:
- Growing spider plant cuttings in a terrarium
- Creating a spider plant curtain by threading the spider plant cuttings through a fishing line or curtain rod
- Creating a spider plant topiary by carefully pruning and shaping your spider plant
- Growing spider plant cuttings in a decorative vase or jar filled with rocks or pebbles
- Getting creative with your spider plant by planting it in an unconventional container, such as a teapot or wine bottle
Tips for success and troubleshooting:
- Make sure the container or vessel you choose has proper drainage to avoid overwatering the plant.
- Monitor the plant closely and adjust watering as necessary to ensure the plant is healthy and thriving.
- Be mindful of the plant’s environmental needs, such as proper light and temperature, when choosing your propagation method.
The Dos and Don’ts of Spider Plant Propagation
There are several “dos and don’ts” to keep in mind when propagating your spider plant:
- Do sanitize your scissors or pruning shears before using them.
- Don’t use a container that is too large or too small for the spider plant cutting.
- Do use a healthy parent plant for cuttings.
- Don’t place the rooted cutting in direct sunlight.
- Do be patient. Rooting can take several weeks.
- Don’t overwater your new plant. Water only when the soil is dry to the touch.
Conclusion
Propagation is an excellent option for spider plant enthusiasts looking to grow new plants or share their collection with friends and family. While there are several methods for spider plant propagation, each requires a few essential materials and techniques to ensure success. Following the guidelines for spider plant propagation can provide a lifetime of satisfaction and enjoyment for those who love this beautiful and versatile plant. Remember to keep things simple, and most importantly, don’t be afraid to experiment and try new things.


