Introduction
Spider plants are a popular houseplant that adds a vibrant touch of green to any space. Propagating spider plants is a cost-effective way to expand your plant collection or share with fellow plant lovers. In this article, we will explore the steps to propagate a spider plant successfully.
Whether you are starting from leaves, stems, or offsets, spider plant propagation is simple and achievable for anyone. By following our step-by-step guide, beginners can become pros in no time. Let’s dive in!

5 Easy Steps to Propagate Your Spider Plant Like a Pro
Spider plant propagation is a straightforward process, and with proper care, new plants can quickly take root. Here is a step-by-step process for propagating spider plants:
- Choose a healthy mother plant – select a plant with healthy foliage and roots.
- Gather materials – prepare a potting mix, container, and pruning shears.
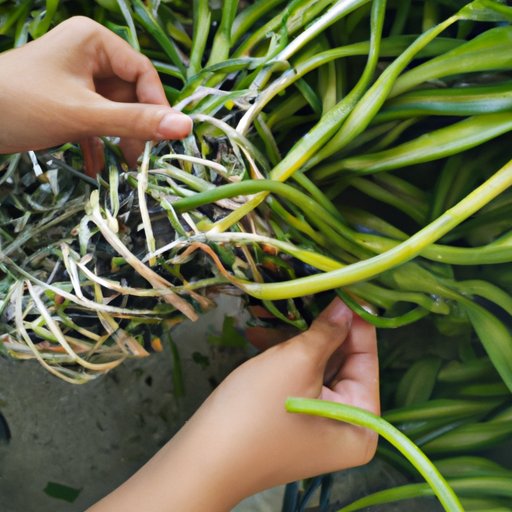
- Locate the offsets – spider plants produce offsets, or baby plants, on long stems from the mother plant.
- Prepare the offsets – use pruning shears to cut the offset or stem and remove the excess foliage or runners.
- Plant the offsets – plant the offsets or stems in the potting mix and water thoroughly.
Here are some additional tips to ensure success:
- Water the new plants regularly but be cautious of overwatering.
- Place the new plants in a warm, bright spot to encourage growth.
- Use a rooting hormone can help to enhance root growth and facilitate propagation success.
- Keep the potting soil moist but not water-logged.
DIY Guide: Propagating Spider Plants for Beginners
For beginners, spider plant propagation can be a fun and rewarding experience. Here is a more detailed explanation of each step;
Step 1 – Choose a healthy plant – select a mother spider plant with healthy leaves and roots. A healthy plant is more likely to have a higher success rate in propagation.
Step 2 – Gathering materials – prepare a well-draining potting mix in your container of choice. Use pruning shears or scissors to cut off the stems that have spider plant offsets on them.
Step 3 – Locate the offsets – start by identifying the offsets from the mother plant. Choose offsets with well-established roots and healthy leaves.
Step 4 – Preparing the offsets – use pruning shears to snip the runner or stem to separate the offset from the mother plant. Ensure you have a clean cut and remove any excess foliage, leaving only a few leaves near the base.
Step 5 – Plant the offsets – plant the offsets in the potting mix. Firmly press the soil around the roots and water the plant lightly. Ensure that the soil is moist but well-draining.
Common mistakes to avoid include overwatering the offsets as this may cause root rot. It’s also good to avoid planting the offsets too deep in the soil as this may cause the plant to rot. Remember to check the plant regularly for any signs of dehydration or pests.
Secrets to Successfully Propagating Your Spider Plant
Expert tips and tricks can help improve the chances of successfully propagating spider plants. Here are some:
- Use warm water to water the plants
- Avoid using cold water, as this may shock the plant and kill it.
- Use porous soil, for example, vermiculite, which will allow for good drainage and airflow.
- Cut the offsets or stems at a 45-degree angle to create a larger surface area for root germination.
- Place the cuttings in a rooting hormone to help promote root growth.
- Grow spider plants in a humid environment for quicker and fuller growth.
Using the above tips and tricks will help you grow beautiful and healthy spider plants.
Propagation 101: Spider Plant Edition
Spider plant propagation has been around for centuries, and modern-day gardeners have different techniques for propagating spider plants. Here’s an overview:
- Growing spider plants from seeds – spider plants produce small white or cream-colored flowers that turn into seeds. Growing spider plants from seed is the most challenging method as the seeds may not always germinate. However, if successful, this process will produce a genetically unique, mature spider plant.
- Propagating spider plants using leaves – cutting a leaf stalk in half and placing it in water until it develops roots. Once the stem has grown at least an inch long, plant it in potting soil.
- Propagation through cuttings – taking cuttings from the spider plant and placing them in potting soil or water until they develop roots. The cuttings include stem cuttings or offsets. Planting the cuttings in fresh potting soil or water will result in new, mature plants.
The method you use depends mainly on the number of plants needed and your preferences as a grower. It’s good to research and try the most suitable method for optimum results.
7 Tips for Propagating Your Spider Plant at Home
Here are seven additional tips to help you be successful in propagating spider plants:
- Ensure you have plenty of cuttings – multiple cuttings can increase the chances of success.
- Provide light shading – new plants can’t handle direct sunlight. Use a shade cloth or another fabric to screen your plants from the sun’s direct rays.
- Take care of the original plant – healthy plants produce healthy cuttings, resulting in more healthy spider plants.
- Don’t let the plants dry out – propagating spider plants should take place in a consistently moist environment.
- Ensure the cutting made by the propagator is deep enough to hold the cutting in place.
- Provide bright but indirect light – place the new plants in a well-lit area away from direct sunlight.
- Repot the plants regularly – as the plant grows, it will outgrow its pot, and a bigger pot will be necessary.
Following these tips will help ensure success in propagating your spider plant.
Spider Plant Propagation: From Cuttings to Healthy Plants
To propagate your spider plant, follow these simple steps:
- Select a healthy mother plant – look for the usual green foliage and healthy-looking root systems.
- Cut the runners or stems and leave 2-3 leaves per cutting.
- Place the cutting in water or soil – water propagation is a popular way of developing spider plant roots before planting in soil. Alternatively, plant it in soil directly.
- Provide adequate lighting – place the container in an area that will receive bright, but indirect sunlight.
- Care for the plants – water your spider plants regularly, but be mindful not to overwater them. Pay attention to any signs of dehydration to ensure the continued health of your new plants.
As your plant grows, you can transplant it into a bigger pot as needed. Ensure you select a container that can hold the roots adequately, and the soil has drainage holes.
How to Multiply Your Spider Plant Collection with Simple Propagation Techniques
Propagating spider plants is one of the easiest gardening activities for beginners, and the rewards are endless. Here’s how:
- Collect cuttings – choose cuttings from healthy plants.
- Rooting – place the cuttings in water and wait for them to develop roots.
- Plants the cutting – plant the rooted cutting in soil and care for the plant as usual once it has grown to a suitable size.
With the help of spider plant propagation, you can increase your plant collection quickly and easily. Sharing your results with friends and loved ones can make propagating spider plants an enjoyable hobby.
Conclusion
Spider plant propagation is an easy way for beginners to start expanding their plant collection. With these simple steps and tips, you can grow new spider plants in a matter of weeks that will add life and vibrancy to any space.


