Introduction
Driving on icy roads can be treacherous, and snow chains can provide the extra grip and traction needed to navigate safely. However, putting on snow chains for the first time can be a daunting task. This guide will break down the process into clear and manageable steps, with added tips on safety and maintenance.
Step-by-Step Guide
Before the snowstorm hits, take the time to familiarize yourself with the installation process. Keep in mind that all vehicles are different, so make sure to read your car’s manual and follow the manufacturer’s instructions. Here is a general guide to putting on snow chains:
Step 1: Choose the Right Snow Chains
Make sure the snow chains you’re using are appropriate for your tires and compatible with your vehicle. Check the tire size and ensure the chains are the right fit. If you’re unsure, refer to the manufacturer’s guidelines or consult a professional.
Step 2: Prepare Your Vehicle
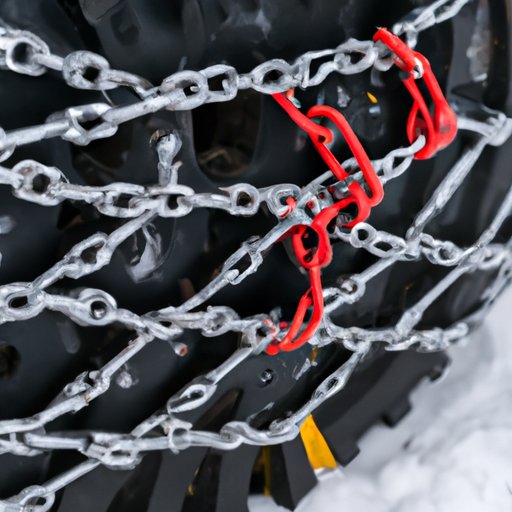
Make sure your vehicle is parked on a level surface, away from traffic. Engage the parking brake and put the car in gear (or set it to park if it’s an automatic). Make sure the chains are untangled, and the hooks are facing down.
Step 3: Install Snow Chains on the Front Wheels
If your car is front-wheel drive, start by putting the chains on the front tires. Place the chains over the tire and adjust the fit. Secure the chains by connecting the hooks or clasps. Make sure they are tight and locked in place.
Step 4: Install Snow Chains on the Rear Wheels
If your car is rear-wheel drive, you’ll need to install the chains on the back tires. Repeat the same process as with the front wheels, adjusting the fit and tightening the hooks or clasps. Be sure to keep the chains from twisting.
Step 5: Adjust the Tension
Start your vehicle and move it forward a few feet. Check the chains’ tension and adjust them as needed. Make sure they’re seated properly on the tire’s surface.
Step 6: Test Drive
Test the chains by driving slowly for a short distance. Listen for any unusual noises or vibrations. If the chains feel loose, stop and adjust the tension. If the chains come off, stop immediately and reinstall them properly.
Video Guide
Clear visual demonstrations can be helpful in understanding the process. Check out this video tutorial which provides a step-by-step guide to putting on snow chains:
Checklist
Before putting on snow chains, make sure you have the following items:
- Snow chains appropriate for your vehicle and tires
- Gloves to protect your hands from the cold metal chains
- A mat or blanket to kneel on while installing the chains
- A flashlight if it’s dark or snowy outside
It’s a good idea to practice installing the chains in your driveway or garage before heading out on the road. This will help you become more familiar with the process and ensure you have all the necessary tools and equipment.
Personal Story
My first time installing snow chains was definitely an adventure. I was stuck in a winter storm on my way to visit family and had no choice but to put on the chains myself. After a few attempts, I finally figured it out and learned some valuable tips along the way. The most important thing I learned was to keep the chains untangled, as twisting made them ineffective.
Safety Tips
While snow chains can provide extra traction and grip, they also require attention to safety. Here are some tips to keep in mind:
- Do not travel at high speeds with snow chains installed
- Remove the chains as soon as you don’t need them to avoid damaging the tires and road surface
- Avoid driving on bare pavement with chains, as this can cause excessive wear and damage
- Do not cross chains on drive wheels or brake systems
Expert Advice
When it comes to snow chains, consulting with a professional is always a good idea. They can help you choose the right chains for your vehicle and assist with installation and maintenance. Here are some additional tips from the experts:
- Inspect your chains before use to make sure they are free of breaks, kinks, or other damage
- Never drive with a broken or damaged chain
- Remove chains before entering automatic car washes
- Clean and dry your chains after use to prevent rust and prolong their lifespan
Comparison Review
There are several types of snow chains available in the market. Let’s take a closer look at some of the most popular options:
Traditional Chain Links
This is the most common type of snow chain. They are durable and offer excellent traction on snowy or icy roads. However, they can be heavy and require careful installation and removal.
Cable Chains
Cable chains are a lighter alternative to traditional chains, and they’re also easier to install and remove. They work well on icy roads, but they might not be as effective on deeper snow.
Diamond Chains
Diamond chains have metal studs that help the tire grip the road better, making it ideal for extremely icy conditions. However, they can be the most expensive option.
Conclusion
Putting on snow chains can be an intimidating task, but with practice and the right tools, it’s an essential skill to have for winter driving. Remember, safety should always come first, so make sure to follow the guidelines and choose the right snow chains for your vehicle. With the tips, personal stories, and expert advice provided in this comprehensive guide, you’ll be ready to tackle even the chilliest winter roads.


