Introduction
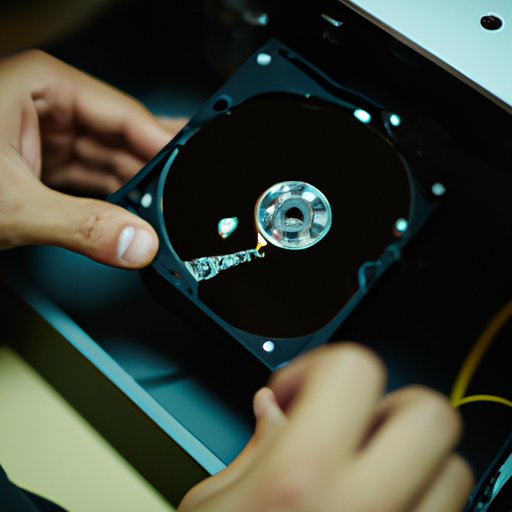
Reformatting a hard drive means erasing everything on the storage device and setting it up with a new file system. While this process can seem daunting, it is an essential skill for anyone who needs to optimize their computer’s performance or wants to wipe it clean before recycling or donating it. In this article, we’ll provide you with a step-by-step guide, along with tips, tricks, and tools to make the process go smoothly and efficiently.
Step-by-Step Guide
To reformat your hard drive, follow these simple steps:
1. Backup Your Data
Before reformatting your hard drive, backup all essential data to an external hard drive, cloud storage, or another storage device. This will help you avoid losing vital files and documents.

2. Create a Bootable Drive
Create a bootable drive that allows you to begin the reformatting process. To do this, download a bootable operating system, such as Windows or Linux, and save it on a USB drive or DVD.

3. Change Your Computer’s Boot Order
Insert your bootable drive into the computer and restart the system. During the startup process, press the key that takes you to the boot menu. It is usually F12 or Esc. Select the bootable drive, and the computer will boot from it.

4. Begin the Reformatting Process
Once the computer has finished booting from your bootable drive, select the option to begin installing the operating system. You will be asked to select the drive where you want to install it.

5. Delete Partitions, Create New Ones, and Reformat
At this point, you have the option to delete any existing partitions on your hard drive, create new partitions, and reformat the drive. This step will erase every file on the drive, making it impossible to recover data after the process is completed.

6. Install the Operating System
After reformatting the hard drive, proceed to install the operating system from your bootable drive. Follow the instructions and prompts as necessary.

7. Restore Your Data
When the installation process completes, reinstall your essential applications and software, and then restore your data from the backup you created earlier.

Tips for Successful Reformatting
- Ensure that you have enough free space on your external hard drive to back up all essential files before proceeding with formatting.
- Double-check that you have selected the correct drive during the formatting process to avoid losing data from the wrong drive.
- Choose a bootable drive that matches the operating system you use.
- Use a bootable drive with adequate storage space.
- Make sure that you want to proceed with reformatting before beginning the process, as it will erase all data completely.
Video Tutorial
For visual learners, we have a video tutorial that explains how to reformat a hard drive. In the video, you’ll see a demonstration of every step involved in the process. You can watch it here.
Benefits of a Visual Guide
The video tutorial provides an in-depth visual guide that will help you follow the steps more effectively, even if you have no prior experience with reformatting. Additionally, it may help you understand the process better when used in conjunction with the written guide.
Pros and Cons
Pros
Reformatting your hard drive has several benefits, including:
- Improved performance: Reformatting removes clutter and fragmented files, allowing your computer to work faster and more efficiently.
- More significant disk space: Formatting your hard drive frees up storage space by deleting unnecessary files.
- Fresh start: Reformatting your computer gives it a fresh start by removing all associated data.
Cons
While reformatting has many benefits, it also comes with the following risks:
- Data loss: Reformatting your hard drive erases everything from it, including important files, photos, and documents. Ensure that you have a backup of all essential data before proceeding.
- Time-consuming: Reformatting can be a time-consuming process, especially if you have a large hard drive or multiple partitions.
- Risk of making a mistake: It’s essential to follow the steps properly to avoid mistakes, which can lead to even more data loss.
Tips for Minimizing Risk
- Create a backup of all essential data to avoid losing it all during the process.
- Ensure that you use a reliable bootable drive and use it correctly to avoid losing progress during the process.
- Double-check every step before making any changes to ensure that it is the right one.
Comparison Article
There are several ways one can reformat a hard drive, including through built-in operating system features or third-party software. In this section, we’ll compare different methods and help you choose the best one for your needs.
Method 1: Built-In Operating System Features
Most operating systems have built-in features to format hard drives. These are reliable methods but are limited to the specific operating system you are using.
Advantages
- Preinstalled, you don’t have to download anything.
- It’s integrated into the operating system you’re using.
Disadvantages
- Limited to the operating system you’re using.
- May take a long time to complete formatting.
Method 2: Third-Party Software
Third-party software offers more flexibility, allowing you to format any hard drive regardless of the operating system. It also has more features and options.
Advantages
- Offers more flexibility.
- Makes the process faster and more efficient.
Disadvantages
- You have to download software.
- Some software can be unreliable and may contain viruses or malware.
Tips for Choosing the Best Method
- Consider the operating system you’re using and choose the method accordingly.
- Take note of the features that third-party software offers and determine if they have any features you need.
- Read reviews and feedback from other users before choosing any third-party software. This will help you avoid using unreliable software.
Common Issues and Fixes
Despite following the steps, some common issues can occur during the reformatting process. Here’s what you need to know about common issues and how to address them.
Issue: Stuck on the “Formatting” Screen
Sometimes, the formatting process hangs on the “Formatting” screen. This can be frustrating, but it’s easy to fix. Leave the screen for a few hours; it’s often a temporary hitch.
Issue: Booting from the Bootable Drive
If you’re having trouble booting from your bootable drive, make sure you select the correct boot order in the BIOS settings.
Issue: Incompatible Bootable Drive
If you’re using an incompatible bootable drive, you may encounter errors during the process. Ensure that you are using the correct bootable drive for your operating system.
Tips for Avoiding Issues
- Create a backup of all essential data.
- Ensure that you are using the correct bootable drive for your operating system.
- Double-check the boot order in the BIOS settings to avoid any problems booting the correct drive.
Conclusion
Reformatting your hard drive can be a daunting task, but it is an essential skill for anyone who wants to optimize their computer’s performance or needs to wipe it clean before recycling or donating it. We’ve provided you with a step-by-step guide, video tutorial, and tips to make the process go efficiently and without a hitch.
If you follow the advice and tips provided in this article, you’ll have a well-organized computer with all your desired applications in no time. We encourage you to share your experiences and provide feedback in the comments section below.


