I. Introduction
Rivets are commonly used in construction, industrial machinery, and automotive projects. They are incredibly durable and long-lasting, but eventually, you may need to remove them. Whether you want to make repairs or replace parts, removing a rivet can seem daunting at first. However, with the right tools and techniques, it can be done safely and efficiently.
In this article, we will explore the different approaches you can take to remove rivets. We will provide step-by-step guides, highlight common pitfalls to avoid, and even show you how to use everyday household tools to get the job done. By the end, you’ll have a better understanding of how to remove rivets and feel ready to tackle your next project!
II. Step-by-Step Guide
The first step in removing a rivet is to gather your tools and put on protective gear. You’ll need safety glasses, protective gloves, and a mask to avoid inhaling metal shavings. Make sure you’re working in a well-ventilated area.
The tools you’ll need include a drill with a metal-cutting bit, a drill stop, a hammer, center punch, and pliers. Once you have everything you need, follow these steps:
- Using the center punch and hammer, create a small dimple in the center of the rivet. This will help guide the drill bit and prevent it from slipping
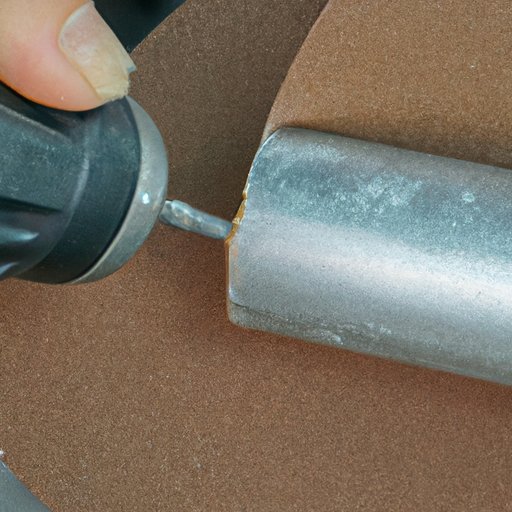
- Insert the metal-cutting drill bit into the dimple and begin drilling. Be sure to use moderate pressure and steady hands, as too much pressure can cause the drill bit to break.
- Use the drill stop to prevent the drill bit from penetrating too deeply and damaging the material underneath.
- Once you’ve drilled through the entire rivet, remove the pliers and pull the rivet out. If it’s still stuck, you may need to use the pliers to pry it loose.
This process can be repeated for each rivet you wish to remove. Be sure to take your time and use caution to avoid injury or damage to your project.
III. Video Tutorial
If you’re a visual learner, a video tutorial can be a great way to supplement written instructions. A video tutorial can provide a step-by-step visual guide that can be easier to follow and understand than written directions.
To create a video tutorial, you’ll need a camera, tripod, and microphone. You can also use screen recording software or a digital whiteboard to illustrate the process further.
When filming, make sure to have good lighting and clear audio. Speak slowly and clearly and show each step in detail. Edit the footage to remove unnecessary footage and add text overlays where appropriate.
IV. Pros and Cons of Different Rivet Removal Methods
While drilling is the most commonly used method for removing rivets, there are other options available. Let’s take a look at some of the other methods, their pros and cons, and when they might be appropriate.
Drilling
Pros: It’s a straightforward process that’s easy to learn. Drilling is a precise method, allowing you to remove the rivet without damaging the surrounding material.
Cons: It can be time-consuming if you have a lot of rivets to remove. If the drill bit slips, it can scratch or damage surrounding areas.
Grinding
Pros: Grinding can be faster than drilling and can be useful for large rivets or extremely hard materials.
Cons: It’s difficult to control the cutting depth, which can damage surrounding areas. Grinding can also generate a significant amount of heat, which can cause the material to expand and create further damage.
Cutting
Pros: Cutting can be a useful method for removing rivets in confined spaces where drilling and grinding are not suitable.
Cons: It can be challenging to control the cutting depth, which can damage surrounding material. Cutting can also be dangerous if you’re not experienced with power tools.
V. DIY Solution
If you don’t have access to power tools or want to avoid the noise and dust generated by drilling or grinding, you can use household tools to remove rivets.
First, use a small drill bit to create a pilot hole in the center of the rivet. Then use a larger drill bit to enlarge the hole. Finally, use a flathead screwdriver or pliers to snap off the rivet’s head, allowing you to remove the remainder.
This method requires patience and manual labor, but it can work well for smaller projects or if you only need to remove a few rivets.
VI. Common Mistakes to Avoid
While removing rivets is a straightforward process, there are some common mistakes to avoid.
First, never force the drill bit or tool. Too much pressure can cause the drill bit to break or damage the surrounding material.
Second, be careful not to scratch or damage surrounding areas while drilling or grinding. Use painters’ tape or masking tape to protect the surrounding material.
Finally, be sure to wear protective gear and work in a well-ventilated area. Metal shavings and dust generated during the process can be harmful if inhaled.
VII. Conclusion
Removing rivets may seem daunting at first, but with the right tools and techniques, it can be done easily and efficiently. Whether you choose to use power tools or household tools, be sure to take your time, follow safety precautions, and avoid common mistakes. Remember, practice makes perfect, and with a little bit of patience and persistence, you’ll be removing rivets like a pro in no time!
We hope you found this guide helpful.


