I. Introduction
Removing a toilet seat can be a daunting task, especially for beginners. Often, people find themselves struggling to remove their old toilet seat, causing them frustration and possibly injuries. However, when done correctly, removing a toilet seat is a quick and easy process that anyone can do without calling a professional. In this article, we’ll take a closer look at the reasons why you need to know how to remove a toilet seat, and a step-by-step guide on how to do it.
A. Explanation of the common problem that the audience faces
Most people will need to remove a toilet seat at some point, whether it’s because of damage, wear and tear, or just a desire for a change. The most common issue is that people don’t know how to remove the seat safely and without causing any damage. This can lead to frustration, injuries, and even costly repairs.
B. The importance of knowing how to remove a toilet seat
Knowing how to remove a toilet seat is crucial for anyone who wants to keep their bathroom in top condition. Not only will it save you money, but it will also ensure that you don’t accidentally cause any damage to your toilet or injure yourself in the process.
C. Brief overview of the topics covered in the article
In this article, we’ll be taking a closer look at several methods for removing a toilet seat, from quick and easy steps for beginners to more advanced techniques for experienced DIYers. We’ll also provide helpful tips, tools required for the job, and safety precautions to take.
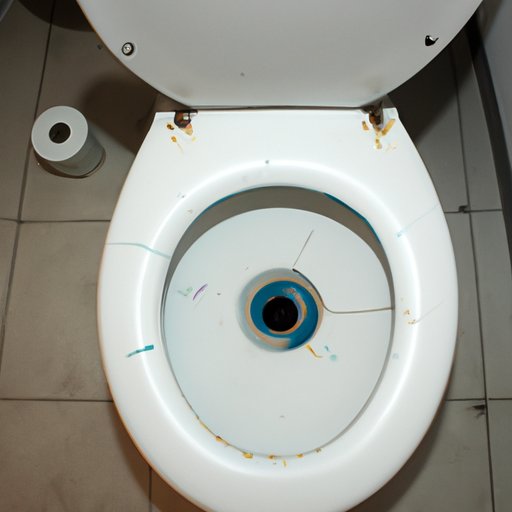
II. Quick and Easy Steps to Remove Your Toilet Seat
If you’re looking for a quick and easy way to remove your toilet seat, then this method is for you. With just a few simple steps, you can have your old seat off in no time.
A. Step-by-step guide to removing your toilet seat
Step 1: Locate the two bolts that attach the seat to the toilet bowl.
Step 2: Use a flathead screwdriver or a wrench to unscrew the nuts from the bolts.
Step 3: Lift the seat and lid off the toilet bowl.
Step 4: Clean the area around the bolts and check the bowl for any damage.
B. Tools required for the job
- Flathead screwdriver or wrench
- Cleaning cloth
C. Tips for a hassle-free experience
- Wear gloves to protect your hands from germs and bacteria.
- Use a cleaning solution to remove any stubborn stains around the bolts.
- If you’re having trouble removing the nuts, try holding them in place with a pair of pliers while you turn the screwdriver or wrench.
III. The Ultimate Guide to Removing Your Toilet Seat in Just Minutes
If you’re looking for a more comprehensive guide to removing your toilet seat, then this method is for you. This guide covers all types of toilet seats and provides handy tips to speed up the process.
A. Comprehensive guide to removing all types of toilet seats
Step 1: Remove any covers or caps from the bolts that attach the seat to the toilet bowl.
Step 2: Use a screwdriver or wrench to unscrew the nuts from the bolts.
Step 3: Lift the seat and lid off the toilet bowl.
Step 4: Clean the area around the bolts and check the bowl for any damage.
B. Handy tips to speed up the process
- If the nuts are too tight, try using some lubricant or penetrating oil to loosen them.
- Use a power drill or impact wrench to speed up the process.
- Use a hacksaw or reciprocating saw to cut through any stubborn nuts.
C. Common mistakes to avoid
- Don’t use too much force when unscrewing the nuts as this can damage the bowl.
- Don’t use a metal tool on a plastic bolt as this can cause damage.
- Don’t rush the process as this can lead to mistakes and injuries.
IV. DIY Tutorial to Remove Your Toilet Seat Without Asking for Help
If you’re looking for a DIY approach to removing your toilet seat, then this method is for you. This tutorial provides a detailed explanation and instructions on how to troubleshoot common problems.
A. Detailed explanation for a DIY approach
Step 1: Turn off the water supply to the toilet.
Step 2: Remove the tank lid and flush the toilet to empty the tank.
Step 3: Use a bucket or towel to remove any remaining water from the bowl.
Step 4: Follow the steps outlined in Methods II or III to remove the seat.
B. Instructions on how to troubleshoot common problems
- If the bolts are rusted, use a rust dissolver or vinegar to remove the rust.
- If the nuts are stripped, use pliers to grab the edges and turn them.
- If the bolts break, use a hacksaw or reciprocating saw to cut through them.
C. Safety precautions to take
- Wear safety glasses to protect your eyes from any debris.
- Wear gloves to protect your hands and avoid contact with bacteria.
- Turn off the water supply to the toilet to avoid any accidental flooding.
V. A Beginner’s Guide to Removing a Toilet Seat Step by Step
If you’re a beginner and looking for a simplified guide, this method is for you. This guide covers the basics and provides tips for using household tools.
A. Simplified guide for beginners
Step 1: Find the two bolts that attach the seat to the bowl.
Step 2: Use a wrench or screwdriver to loosen the nuts from the bolts.
Step 3: Lift the seat and lid off the bowl.
Step 4: Clean the bolts and seat area with hot soapy water.
B. Tips for using household tools/li>
- Use a flathead screwdriver or pliers to hold the nut in place while turning the bolt with a wrench.
- Use a silicone spray lubricant to loosen up any stubborn bolts.
- If you don’t own a wrench, use a pair of pliers or an adjustable wrench.
C. Common pitfalls to avoid
- Make sure to turn off the water before removing the toilet seat to avoid any accidental flooding.
- Don’t rush the process and be gentle with the bolts to avoid damaging the bowl.
- Make sure to clean the bolts and area around the seat to prevent bacteria buildup.
VI. How to Remove Your Toilet Seat with Common Household Tools
If you don’t have any specialized tools, don’t worry. This method uses common household tools to remove your toilet seat and provides tips for making the task easier and safer.
A. List of common household tools that you can use
- Adjustable wrench
- Flathead screwdriver
- Pliers
- Vinegar or rust dissolver
- Silicone spray lubricant
B. Tips for making the task easier and safer
- Use a silicone spray lubricant to loosen up any stubborn bolts.
- Make sure that the wrench or screwdriver is the correct size for the job.
- Take your time and be patient.
C. Alternative tools in the absence of conventional tools
- If you don’t have pliers, use a pair of channel locks or vice grips.
- If you don’t have a screwdriver, use a butter knife or coin.
- If you don’t have a wrench, use a pair of pliers or an adjustable wrench.
VII. Expert Tips on How to Remove Your Old Toilet Seat Without Breaking a Sweat
For those who want to learn advanced techniques, this method offers tips and tricks from seasoned experts, as well as common issues you may face and how to overcome them.
A. Tips and tricks from seasoned experts
- Remove the bolts and nuts with a power drill or impact wrench for fast and easy removal.
- Use a hacksaw or reciprocating saw to cut through stubborn bolts.
- If the screws are painted over, use a painter’s scraper to remove the paint before unscrewing them.
B. Advanced techniques you may not know of
- Remove the bolt with a reciprocating saw, then remove the nut using a pair of pliers.
- Use a Dremel or rotary tool to grind off the bolts if they’re corroded.
- Insert a trimmer line or similar tool between the seat and bowl, then slice through the adhesive with a gentle sawing motion.
C. Common issues you may face and how to overcome them
- If the bolts are too rusted, use penetrating oil or vinegar to dissolve the rust.
- If the nuts won’t budge, try heating them with a hairdryer to loosen the adhesive or nut.
- If the seat is glued to the bowl, use a paint scraper or putty knife to loosen up the adhesive.
VIII. The Most Efficient and Effortless Ways to Remove Your Toilet Seat
If you’re looking for the most efficient and effortless ways to remove your toilet seat, use this method. You’ll find tips for fast and effortless removal, innovations or products that can make the job easier, and a recap of the most important points.
A. Tips for fast and effortless removal of the toilet seat
- Use a cordless drill or impact wrench to remove the bolts and nuts quickly.
- Use a hacksaw or reciprocating saw to cut through any stubborn nuts.
- Remove the seat’s adhesive by applying heat with a hairdryer or using a solvent such as WD-40 to dissolve the adhesives.
B. Innovations or products that can make the job easier
- Use Bolt Caps to protect the bolts and give your toilet a fresh new look.
- Use Toilet Snap-On Caps to cover up the exposed bolts and give your toilet a sleeker look.
- Use Toilet Seat Hinges to replace worn-out hinges and make it much easier to remove the seat in the future.
C. Recap of the most important points
- Turn off the water supply to the toilet before removing the seat.
- Use the right tools for the job.
- Follow the instructions for removing the seat, and take your time if needed.
IX. Conclusion
Removing a toilet seat can seem like a daunting task, but with the right tools and knowledge, you can do it safely and easily. We hope that this guide has given you the confidence and knowledge you need to remove your toilet seat without any issues. Remember to follow the tips and advice we’ve outlined in this article and stay safe while doing so. Good luck!
A. Recap of the article’s key points
Removing a toilet seat is a quick and easy process with the right tools and knowledge.
B. Final thoughts and advice
Don’t be afraid to ask for help if you need it. Removing a toilet seat can be a challenge, especially if you encounter unexpected issues along the way. Stay safe and take your time.
C. Encouragement to put the knowledge into practice
Don’t hesitate to put your knowledge into practice and remove your old toilet seat today. You’ll save money and have the satisfaction of knowing that you’ve accomplished something on your own.


