Introduction
As a homeowner, you’ve likely experienced issues with your toilet at some point. One of the most common problems is a faulty fill valve, which can cause an annoyingly running toilet and skyrocketing water bills. In this article, we’ll explain how to replace the fill valve in your toilet, saving you time and money in the long run.
Importance of Replacing the Fill Valve
A malfunctioning fill valve can result in a constant flow of water into the toilet bowl, leading to wasted water and higher bills. Replacing the fill valve not only fixes the problem, but it ensures that your toilet is running efficiently. This also avoids potential damage to your toilet and home, preventing costly repairs in the future.
Preview of Topics Covered
In this guide, we’ll cover the necessary steps to replace a fill valve, including the tools and materials required. We’ll also share tips for success, common mistakes to avoid, and pro tips to make the process smoother. Additionally, we’ll provide a comparison chart of different types of fill valves and review some of the top-rated products.
Step-by-Step Guide
Overview of Tools and Materials Required
Before beginning the replacement process, you’ll need a few tools and materials. Firstly, turn off the water supply to the toilet and drain the tank using a sponge or towel. The tools required include a pair of pliers, a crescent wrench, a bucket, and Teflon tape. The replacement fill valve should have all necessary parts included, such as the valve assembly, refill tube, and flapper.
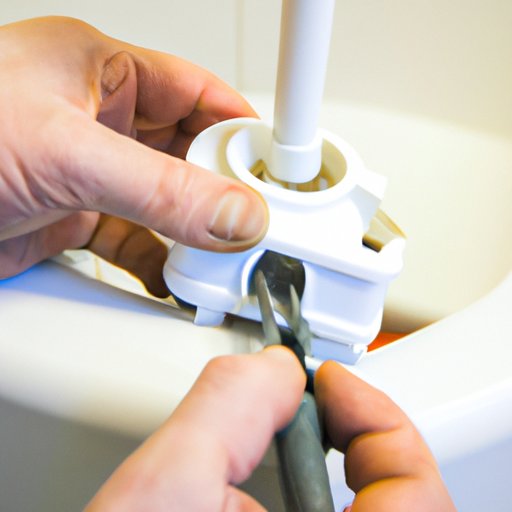
Detailed Steps with Images for Replacing the Fill Valve
The first step is to remove the old fill valve by turning it counterclockwise using the pliers. Then, remove the refill tube and the flapper. Install the new valve by inserting it into the hole on the bottom of the tank. Attach the lock nut and tighten with the pliers. Connect the refill tube and replace the flapper.
Finally, turn on the water supply and check for any leaks. Use Teflon tape on any connections that require it. Adjust the fill valve if necessary to set the proper water level in the tank.
Tips for a Successful Replacement
Ensure that you select the correct replacement valve for your toilet. Follow the manufacturer’s instructions closely, including the correct positioning of each part. Keep a towel or bucket handy throughout the process to prevent any water damage. Use Teflon tape to create a tight seal and prevent leaks. Lastly, check for any leaks after the installation and make any necessary adjustments.
Video Tutorial
Benefits of a Video Tutorial
If you prefer a visual guide, a video tutorial can be more helpful. Watching someone complete the process step-by-step can help you better understand each stage of the replacement.
Step-by-Step Demonstration of Fill Valve Replacement
In this video tutorial, we’ll demonstrate the process of replacing a fill valve in a toilet. We’ll cover the necessary tools and replacement parts, as well as tips for success along the way. Follow along and ensure a smooth installation process.
Highlighting Important Tools and Techniques
We’ll highlight important tools and techniques, such as turning off the water supply, removing the old valve, and adjusting the water level. We’ll also show how to avoid common mistakes that can occur during the replacement process.
Comparison Chart
Overview of Different Types of Fill Valves
There are different types of fill valves, including float cup valves, ballcock valves, and pressure-assisted valves. Each type has its own unique advantages and disadvantages.
Comparison of Pros and Cons of Each Type
Floating cup valves are advantageous because they are quiet and efficient. Ballcock valves are affordable and easy to replace. Pressure-assisted valves are high-performance and conserve water. However, each type also has its cons, such as being more complicated to install or being less durable.
Recommendations for Choosing a Replacement
Consider your budget, water pressure, and personal preferences when selecting a new fill valve. The ballcock valve is an excellent option for those on a budget, while pressure-assisted valves are great for conserving water.
Common Mistakes
Common Mistakes Made During Fill Valve Replacement
Common mistakes include overtightening the lock nut, installing the valve upside down, or forgetting to turn off the water supply before beginning the replacement.
Tips for Avoiding These Mistakes
To avoid these mistakes, take your time and follow the manufacturer’s instructions carefully. Use a wrench to tighten the components, and ensure that all parts are installed in the correct position before tightening.
Explanation of Why Mistakes Can Cause Problems
Mistakes can cause problems such as leaks, inefficient toilet performance, and even further complications that may require costly repairs. Taking the time to follow the correct steps and install the valve correctly can save you significant time and money in the future.
Pro Tips
List of Pro Tips for Replacing the Fill Valve
Pro tips include draining the tank completely before removing the valve, marking where the water level should be, and taking photos before disassembling the old valve to ensure that you have a reference for reassembly.
Explanation of How Each Tip Simplifies the Process
Draining the tank completely ensures that no water is left in the tank, reducing the risk of damage. Marking where the water level should be ensures that the tank fills to the correct level, preventing future issues. Taking photos before disassembling the old valve ensures that you have a reference for each step, simplifying the reassembly process.
Tips for Making the Process More Efficient
Having all necessary tools and parts on hand before beginning the replacement can streamline the process. It’s also helpful to have a towel or bucket handy in case of any leaks or spills. Lastly, take your time and carefully follow each step to ensure a successful replacement.
Trouble-Shooting Guide
Common Issues that Arise During Fill Valve Replacement
Common issues include leaks, incorrect water level, and difficulty aligning the valve.
Tips and Techniques for Troubleshooting Those Issues
To troubleshoot leaks, check that all connections are tightened and that Teflon tape has been used where necessary. To adjust the water level, turn the adjustment screw to the correct height. To align the valve, ensure that all parts have been installed correctly before tightening.
Explanation of How to Avoid Future Issues
To avoid future issues, take care when installing the valve to make sure that all parts are installed correctly. Test after installation to ensure that there are no leaks. Lastly, adhere to regular maintenance and cleaning schedules to keep your toilet running efficiently.
Product Review
Overview of Top Fill Valve Replacement Options
Some of the best fill valve replacement options include the Fluidmaster 400AH PerforMAX, the Korky 528MP Universal Fill Valve, and the Toto TSU99A.X Adjustable Fill Valve Assembly.
Comprehensive Reviews of Each Option
The Fluidmaster 400AH PerforMAX is designed for high-efficiency toilets and is easy to install. The Korky 528MP Universal Fill Valve is versatile and compatible with most toilet models. The Toto TSU99A.X Adjustable Fill Valve Assembly is adjustable and designed to reduce noise.
Recommendations for Different Types of Toilets
The Fluidmaster 400AH PerforMAX is an excellent option for high-efficiency toilets. The Korky 528MP Universal Fill Valve is recommended for most toilet models, while the Toto TSU99A.X Adjustable Fill Valve Assembly is best for those who want a quieter toilet.
Conclusion
Summary of Key Points
Replacing a faulty fill valve in your toilet can save you money, time, and avoid potential damage to your home. The process is simple and straightforward, but it’s important to follow the necessary steps carefully. Take your time, have the required tools and materials, and adhere to instructions from the manufacturer.
Encouragement to Try the Replacement Process
If you’re experiencing an issue with your toilet, there’s no need to call a plumber. Replacing the fill valve yourself is a manageable process that can be completed in a short amount of time.
Final Thoughts and Tips
Remember to use Teflon tape to avoid leaks and to troubleshoot any issues that arise. Take advantage of video tutorials and pro tips to make the process go more smoothly. Lastly, be sure to review the product comparison chart and select the best fill valve for your needs.


