I. Introduction
If you notice that your toilet is running constantly, or the water in your toilet bowl is low, it may be time to replace the fill valve. A faulty fill valve can also cause your toilet to flush improperly or make strange noises. In this article, we will provide you with a step-by-step guide on how to replace a toilet fill valve so that you can fix these common problems yourself.
II. Step-by-Step Guide
Before starting the replacement process, you will need to gather some tools. You will need an adjustable wrench, pliers, a bucket, towel or rag, and a new fill valve. You can purchase a replacement fill valve at any hardware or home improvement store. Once you have the necessary tools, follow these steps:
A. Tools needed for the replacement process
Gather an adjustable wrench, pliers, a bucket, towel or rag, and a new fill valve.
B. Steps to remove the old fill valve
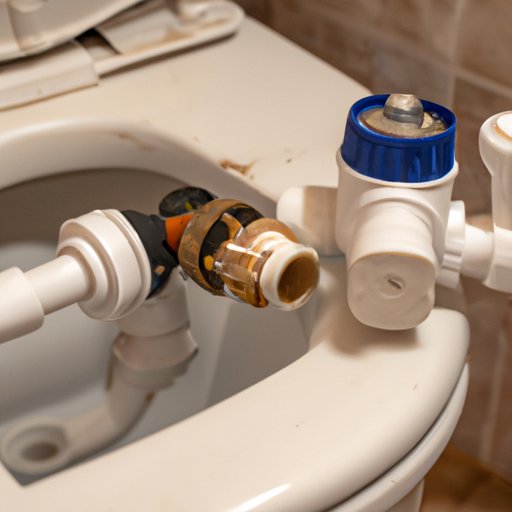
- Shut off the water supply to the toilet by turning the valve next to the toilet clockwise.
- Flush the toilet to drain out the water in the tank and bowl.
- Use pliers to detach the water supply hose connected to the bottom of the tank.
- Locate the fill valve, which is connected to the float and overflow tube inside the tank.
- Use an adjustable wrench to loosen and remove the nut that connects the fill valve to the bottom of the tank.
- Remove the old fill valve from the tank.
C. Steps to install the new fill valve
- Insert the new fill valve into the hole in the bottom of the tank.
- Attach the nut to the bottom of the tank and tighten with an adjustable wrench.
- Connect the water supply hose to the bottom of the tank.
- Restore the water supply by turning the valve next to the toilet counter-clockwise.
- Adjust the float on the new fill valve to the recommended level. This can usually be found in the manufacturer’s instructions.
D. Testing the new fill valve
- Turn on the water supply to the toilet by turning the valve next to the toilet counter-clockwise.
- Allow the tank to fill with water.
- Check that the water level in the tank is at the recommended level.
- Flush the toilet to ensure that the new fill valve is working properly and that the toilet bowl fills with water to the appropriate level.
III. Common Problems & Solutions
There are several signs that indicate a toilet fill valve needs to be replaced. These include constant running water, low water levels in the bowl, problems with flushing, and strange noises coming from the toilet. Common issues with toilet fill valves include clogs, leaks, and valve malfunctions. In many cases, replacing the valve will solve these problems.
IV. Video Tutorial
Visual tutorials can be incredibly helpful when attempting a DIY project like replacing a toilet fill valve. In this video tutorial, we will walk you through the process step-by-step. Additional tips and helpful hints are included to help make this task as simple as possible:
A. Highlights of the benefits of visual tutorials
Visual tutorials can provide a clear guide to follow, and can help you to understand the process from a different perspective. They can also provide a valuable safety guide to ensure that you are not creating any damage to your toilet, while making the process easier for you to understand and follow.
B. Introduction to the video tutorial
Begin by watching the video tutorial in its entirety, so that you understand the entire process before you begin.
C. Step-by-step guide to replacing a toilet fill valve
Follow the video guide for a thorough walk-through of the process, which will help you to complete the task as smoothly as possible.
D. Additional tips and helpful hints
Pausing the video after each step will allow you to complete each part of the process successfully. Take advantage of additional tips and hints to make your work as effective as possible.
V. Product Guide & Recommendations
Purchasing a high-quality replacement part is essential to ensure that your toilet functions correctly after the replacement of the fill valve. There are different types of fill valves available in the market. The most common are diaphragm fill valves, which tend to be the most reliable. We recommend the following brands and models:
A. Importance of purchasing a high-quality replacement part
Ensure that you purchase a high-quality replacement part to guarantee that the value will have a long-lasting performance.
B. Brief overview of the different types of fill valves available
There are different types of fill valves available in the market. The most common are diaphragm fill valves, which tend to provide a reliable output.
C. Recommended brands and models
Top brands include Fluidmaster, Korky, and Toto.
D. Features and benefits of top-rated products
The top-rated fill valves will typically feature adjustable water levels and consistency of water supply pressure. They come with a reliable design, backed by a long-lasting warranty to offer peace of mind to the user.
VI. Troubleshooting & FAQ
Common problems when replacing toilet fill valves include leaks, incorrect water pressure, and difficulties fitting the valve in place. Solutions to these issues can all be found in our helpful troubleshooting guide. Below are answers to frequently asked questions for your reference.
A. Common problems that may arise during the process
Problems that can arise when replacing toilet fill valves include leaks or incorrect water pressure.
B. Step-by-step solutions to common issues
To fix leaks, check for faulty connections or improperly adjusted fittings. For incorrect water pressure, adjust the float to the appropriate level as stated in the manufacturer’s instructions. Difficulties fitting the valve can be resolved through a careful and methodical installation, following the steps and details provided in the guide.
C. Answers to frequently asked questions
- What can cause a toilet fill valve to fail?
- How often should I replace the toilet fill valve?
- Can I replace the fill valve without the help of a professional?
VII. Conclusion
If you are experiencing problems with your toilet, it may be time to replace the fill valve. This step-by-step guide, video tutorial, and product recommendations can make the process easier to handle. By following our troubleshooting tips and FAQ, you will be able to fix common fill valve problems confidently, without the need for a professional plumber.
Our final tip is to always invest in high-quality replacement parts to ensure a longer-lasting performance. With the information provided in this guide and following our step-by-step procedure, you will soon have a fully functioning toilet.


