Introduction
As a guitar player, it is important to know how to take care of your instrument. Restringing is one of the most vital parts of maintaining your guitar. Not only is it essential for getting good tone and intonation, but it also helps extend the life of your guitar. This article is meant for anyone who wants to learn how to restring a guitar. Whether you’re new to playing the guitar or have been playing it for years, you’ll find this article helpful.
The Importance of Restringing Your Guitar and How to Do It
Why is restringing a guitar so important? Over time, the guitar strings will wear out and lose their tone. They may even break, which could be dangerous. Restringing your guitar regularly will keep your guitar sounding fresh. Moreover, it can also help prevent intonation and tuning issues. Here’s a step-by-step guide to restringing a guitar:
Removing the Old Strings
The first step is to remove the old strings. Loosen the tension on each string and then remove it. Most guitars have either a locking mechanism or pegs that hold the strings in place. Lift the string out of its groove and remove it from the guitar.
Cleaning the Guitar
Before installing the new strings, it’s important to clean the guitar. Dust and dirt can accumulate on the instrument, especially on the fretboard. Use a clean, dry cloth to remove any debris.
Measuring the New Strings
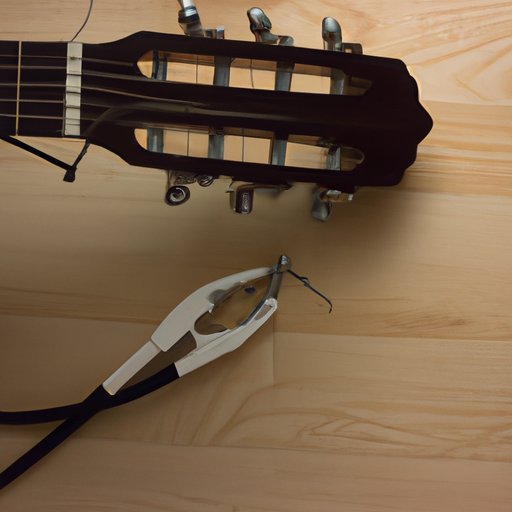
Measure the new strings against the old ones to ensure that they are the correct size. To avoid confusion, it’s a good idea to string each string individually. Cut off the excess length of wire if necessary by using a wire cutter.
Installing the New Strings
Insert the new strings into the pegs or the locking system. Wind the string around the peg several times, leaving enough slack for tuning. Make sure the strings fit snugly in their grooves. It’s important to put the strings in the right order and in the correct place. Usually, the thinner strings go on the top, and the thicker ones go on the bottom.
Tuning the Guitar
Once you’ve installed the new strings, tune the guitar. This is the most important step in the process. Start with the lowest string and work your way up. Tighten each string slowly until it reaches the correct pitch. You can use a tuner to help you get the correct pitch. Stretch the strings by gently pulling on them. Do this several times to help them settle into place. Then, retune the guitar until it’s perfect.
Step-by-Step Guide to Restringing Your Guitar for Perfect Sound
Let’s go through a detailed guide with photos and/or videos on how to change your guitar strings and enhance the sound.
Step-by-Step Process with Photos
– Step 1: Loosen the old strings and remove them.
– Step 2: Clean the guitar.
– Step 3: Take the new strings and adjust them to the guitar.
– Step 4: Install the new strings.
– Step 5: Tune the guitar.
– Step 6: Stretch the strings.
– Step 7: Retune the guitar until it’s perfect.
Accessories You May Need When Restringing Your Guitar
– A wire cutter.
– A tuner.
– A string winder.
– Cleaning cloth.
– Extra strings for backup.
DIY Guitar Maintenance: How to Restring and Tune Your Own Guitar
It is always better to know how to take care of your guitar, and restringing is an essential skill to learn as a guitar player. One of the main benefits of knowing how to restring and tune your own guitar is that you can save money in the long run. Here are some steps to help you tune your guitar:
Tuning Your Guitar
– Play the 6th string, and adjust the pitch using the tuning peg until the sound matches the note, as shown on your tuner.
– Repeat the process for the rest of the strings.
– On the upper two strings, you may need to use the octave setting of the tuner.
– Stretch the strings to the point where the pitch will no longer go sharp when you pull on them.
– Retune your guitar after each stretch.
– Tune your guitar again after playing it for an extended period.
5 Tools You Need to Restring Your Guitar Like a Pro
Restringing your guitar can be an easy and simple task if you have the right tools. Here are the essential tools you will need:
String Winder
Some guitars come with a built-in tool for winding strings. If you don’t have this feature, you can buy a string winder. This tool will help speed up the process of restringing your guitar.
Wire Cutters
You will need wire cutters to trim off the excess string once the new string is installed. Be sure to use these tools with caution, so as not to harm yourself or your guitar.
Tuner
You need a tuner to help you get the right pitch when tuning your guitar. Electronic tuners are affordable and easy to use.
Cleaning Cloth
Cleaning your guitar before and after restringing will help keep it in good condition. A clean cloth is perfect for this.
Extra Strings
It’s always best to have backup strings in case of an emergency. You don’t want to be caught short-handed during a performance or recording session.
Avoid Common Mistakes: Top Tips for Restringing Your Guitar
Restringing a guitar can be a simple task if done correctly, but mistakes can sometimes be made. Here are some tips to avoid common mistakes:
Mistake #1: Not Locking the Strings into Place
If your guitar has a locking mechanism, be sure to lock the strings in place to prevent them from slipping out of the grooves when playing.
Mistake #2: Over-tightening the Strings
You don’t want to over-tighten your strings as they can snap or break. Tighten them just enough to get them in tune.
Mistake #3: Not Stretching the Strings
Stretch your strings by gently pulling and bending them. This will prevent them from stretching once you start playing.
Mistake #4: Not Tuning Your Guitar Regularly
Be sure to tune your guitar regularly to prevent it from sounding out of tune and causing frustration while playing.
How Often Should You Restring Your Guitar? A Complete Guide for Beginners
Restringing your guitar depends on how often you play and the type of guitar. If you play often, you will need to restring your guitar more frequently than if you only play occasionally. The type of music you play can also impact how often you need to change your strings. For example, if you play heavy metal, you will probably need to restring more often than if you play acoustic folk music.
Factors to Consider When Deciding How Often to Restring
– How often you play.
– The guitar’s condition.
– The type of music you play.
– The type of strings you use.
– Personal preference.
Expert Advice on Restringing Your Instrument
Here are additional tips from experts on how to restring your guitar:
Tip #1: Use High-Quality Strings
Using high-quality strings will not only make your guitar sound better, but they will also last longer. Cheap strings can break easily and need to be changed frequently.
Tip #2: Change Strings One at a Time
Do not remove all the strings at once. Change them one at a time starting from the low end. Replacing all the strings at once can cause an imbalance in tension and cause other problems.
Tip #3: Clean Your Hands Before Playing
Your hands produce oils that can accumulate on the strings, which can shorten their lifespan. Washing your hands before playing can help prevent this.
Conclusion
Restringing your guitar might seem intimidating, but it’s an essential part of guitar maintenance that can be done by anyone with the proper tools and the right mindset. Follow these simple steps and tips, and you’ll be able to change your guitar strings like a pro in no time. The result is superior sound, reliable playability and longevity of your instrument. Remember to keep up with regular maintenance so that you can enjoy playing your guitar for years to come.


