Introduction
Screen printing is a versatile printing technique perfect for producing high-quality prints at a low cost. Whether you are looking to make custom t-shirts, posters, or even business cards, screen printing is an excellent choice. In this guide, we will take you through the step-by-step process of screen printing, from supplies needed to tips for achieving great results.
Supplies Needed for Screen Printing
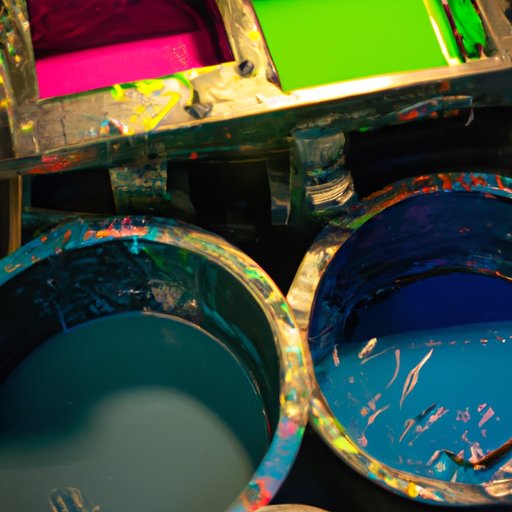
To get started with screen printing, you will need some essential supplies such as screens, squeegees, and inks. Purchase these items from a specialized supplier to ensure their quality.
Screens, Squeegees, and Inks
Invest in a good quality screen as it will impact the quality of the final print. Squeegees with square edges work best, and you will require a different one for each color of ink. Finally, select the right ink for your project — choose between water-based or plastisol-based ink depending on the material you are printing on.
Where to Buy Supplies
You can purchase supplies for screen printing from local arts and crafts stores or specialized screen printing suppliers. It is best to buy supplies from a supplier to ensure you are buying high-quality materials, and they have knowledgeable staff to assist you. You can also find supplies online from trusted suppliers such as Amazon or Blick Art Materials. Check for reviews before making a purchase and compare prices.
Preparing the Design
The first step in screen printing is preparing your design. You can create designs using a computer software such as Adobe Illustrator or by hand using a pen and paper.
Design options (computer or by hand)
Design computers are a great option for those who are not skilled in drawing. You can use software such as Adobe Illustrator to create your design. Alternatively, you can draw the design by hand, scan it, and digitize it using software.
Selecting the right font size and type
The font type and size is essential to make your message stand out. Choose a font that is legible and works well with the design. Avoid using too many fonts as it can look cluttered, and keep in mind the font’s size when printed out may be slightly smaller than what it looks like on your computer screen.
Choosing the right colors
Choose colors that will make your design pop. Consider the color of the material you will be printing on and choose a color that will not clash with it. Use colors that represent your brand or message. You can use software to test out different color combinations before printing.
Preparing the Screen
Once you have your design, it’s time to prepare the screen for printing.
Applying light-sensitive emulsion
This is the process of applying a light-sensitive emulsion onto the screen. Place the emulsion on the screen and use a squeegee to evenly coat it. Place the screen in a dark room and wait for it to dry completely. Once it has dried, expose it to a light source to harden the emulsion.
Creating a stencil
Creating a stencil involves placing the design onto the emulsion-coated screen and then blocking out areas with light-blocking materials, such as stencil paper. Once you have blocked out the necessary areas, place it under a light source, which will harden the emulsion in the open areas. Then wash away the emulsion from the areas covered by the stencil paper, creating a stencil for your design.
Using the Squeegee
Once your screen and stencil are prepared, it’s time to print your design.
Pushing ink through the stencil
Place the screen on top of the material you want to print on, and then place the ink on one end of the stencil. Use the squeegee to drag the ink across the stencil, applying it to the material beneath it. Repeat the process for each color of ink required by the design.
Printing on different surfaces
You can use screen printing on a range of surfaces, including paper, plastic, metal, and fabric. Different surfaces require a different type of ink so make sure you are using the right type of ink to produce the best results. Test your print on a small piece of the material before printing on larger surfaces.
Clean-up
After printing, it is essential to clean the screen and squeegee.
Cleaning the screen and squeegee
Use warm water to clean your screen and squeegee, scrubbing gently until the ink is removed. Once the ink is removed, let the screen dry completely before storing it.
Removing ink stains
If the ink seeps through the screen, you may need to remove it from the surface below. Use a simple solution of water and detergent, or ink remover to remove it.
Tips for Achieving Great Results
Screen printing can produce professional-looking prints with a few tips and tricks.
Using sharp images
Use high-quality images for your design, as this will determine the final print’s quality. Sharp images will produce cleaner lines and text than blurry, pixelated images.
Choosing the right material
Not all materials are created equal, so make sure you are using the right type of ink and screen for your project. Experiment with different materials to see what works best.
Experimenting with colors and designs
Screen printing is all about getting creative, so don’t be afraid to experiment with colors and designs. Test out different color combinations to make your design stand out and try different printing techniques to achieve a unique look.
Conclusion
Screen printing is an excellent option for producing high-quality prints at a low cost. With the right supplies and techniques, you can produce professional-looking prints for your next project. Follow our guide step-by-step, and try out different techniques to get creative.


