I. Introduction
With the rise of remote work and telecommuting, the ability to sign documents digitally has become increasingly important. Thankfully, if you own an iPhone, you can sign documents on the go without having to print, sign, and scan them. In this article, we’ll show you how to sign a document on iPhone with different apps and services.
II. Step-by-Step Guide
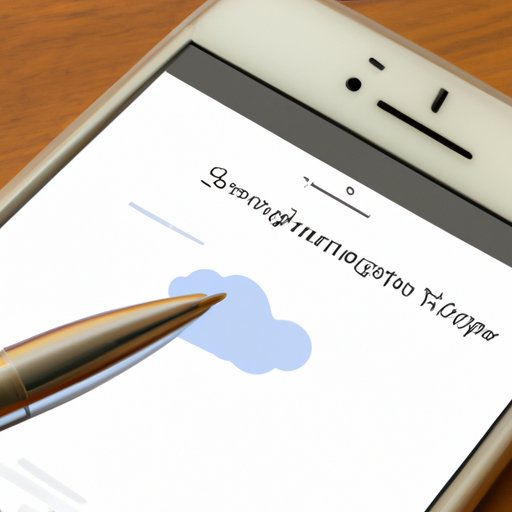
The quickest and easiest way to sign a document on iPhone is to use the built-in Markup tool. Here is a step-by-step guide:
A. Open the document in the email or app
Start by opening the email or app that contains the document you need to sign.
B. Tap the document to open it
Tap the document to open it in full screen.
C. Look for “Markup” option at the top right of the screen
Once the document is open, look for the “Markup” option at the top right corner of the screen. It looks like a toolbox.
D. Choose “Signature” and choose to add a signature or use the one already created
Tap on “Signature” and you will be prompted to add or create a signature. If you already have a saved signature, you can use it by choosing “Done” in the top right corner. If you need to create a new signature, tap on “Add Signature.” You can sign your name using your finger or Apple Pencil.
E. Sign the document
Once you have added your signature, tap on the screen where you want to insert it in the document. You can also adjust the size and position of the signature by tapping and dragging it.
F. Save the signed document
After you have signed the document, tap on “Done” to save it. You can now share it by tapping on the “Share” button.
III. Using Apple’s Built-In Tool
If you don’t want to use the Markup tool, you can use Apple’s built-in Notes or Pages app to sign documents. Here are the steps:
A. Open the document in the Notes or Pages app
Open the Notes or Pages app and start a new note or document, then insert the document you need to sign by tapping on the “+” sign, then “Insert Document.”
B. Look for “Markup” option at the top right of the screen
With the document open, tap on the Markup tool at the top right corner of the screen.
C. Choose “Signature” and choose to add a signature or use the one already created
Tap on “Signature” and follow the same steps as mentioned above to add or create a signature.
D. Sign the document
Tap on the document where you want to insert your signature and position it by dragging it around. You can also resize it as needed.
E. Save the signed document
When you’re finished signing, tap on “Done” and save the signed document. You can now share the document or save it to the cloud.
IV. Third-Party Apps
If you need additional features, such as the ability to create templates, send documents for signature, or receive reminders when documents are signed, third-party apps can be a great option. Here are some popular options:
A. Adobe Sign
Adobe Sign is a comprehensive digital signature app that allows you to sign or send documents for signatures, track their progress, and more. You can also create reusable templates.
B. DocuSign
DocuSign is another popular digital signature app that allows you to sign documents on the go, send documents for signature, and track their progress. It also offers advanced features such as in-person signing.
C. SignEasy
SignEasy is a simple digital signature app that allows you to sign documents using your fingertip or Apple Pencil. You can also add fields such as date or your initials to the document.
D. HelloSign
HelloSign is a user-friendly signature app that allows you, among other things, to sign documents, add fields, send documents for signature, and track their progress. You can also create templates and use reminder notifications to ensure that your documents are signed in a timely manner.
V. Using iCloud
With iCloud, you can access your documents from any of your Apple devices, including iPhones and iPads. Here’s how to sign documents on iPhone using iCloud:
A. Open the document in iCloud Drive
Open the iCloud Drive app and locate the file you want to sign.
B. Tap the document to open it
Tap the document to open it in full screen.
C. Look for “Markup” option at the top right of the screen
Once the document is open, look for the Markup tool at the top right of the screen.
D. Choose “Signature” and choose to add a signature or use the one already created
Tap on “Signature” and add or create a signature as before.
E. Sign the document
Add your signature to the document by tapping where you want to insert it. You can also adjust the size and position of the signature as needed.
F. Save the signed document
After signing, tap on “Done” to save the document. You can now share it or save it to your device or cloud service.
VI. Sharing Options
If you need to share a document after you’ve signed it, you can use the share menu to do so. Here’s how:
A. Tap the document to open it
Open the document you want to share in the app or email.
B. Look for “Share” option
Tap on the “Share” button located on the bottom left corner of the screen.
C. Choose “Markup”
Find the “Markup” option in the list and tap on it.
D. Choose “Signature” and choose to add a signature or use the one already created
Select “Signature” and add or create a new signature if necessary.
E. Sign the document and share
Add your signature to the document by tapping where you want to insert it. Once you’ve signed the document, tap on “Done” to save it. You can now share the document with others by selecting an app or service to share it with.
VII. Saving Signed Documents
Once you’ve signed a document, you may want to save it for future reference or sharing. Here are some ways to save signed documents:
A. Save the document to iCloud Drive
Save the document to iCloud Drive for easy access across all your Apple devices.
B. Share the document with other apps such as email or Dropbox
You can share your documents with other apps for quick and easy sharing or safekeeping.
C. Save the document as a PDF and store it in a cloud service or local storage
If you can’t easily share the document or want to keep a copy for safekeeping, you can save it as a PDF and store it in your cloud service or local storage.
VIII. Conclusion
Signing documents on your iPhone is a breeze with the built-in Markup tool, Apple’s Notes and Pages app, and third-party apps like Adobe Sign, DocuSign, SignEasy, and HelloSign. Additionally, using the iCloud services, sharing documents, and saving signed documents are all relatively straightforward processes.


