Introduction
Staining wood furniture is an essential step in enhancing its beauty, protecting it from damage, and prolonging its lifespan. A properly stained piece of furniture can add warmth and personality to any room. This guide will provide step-by-step tips for staining wood furniture, from selecting the right stain to cleaning up.
Choose the Right Stain
Choosing the right stain for your furniture is crucial in achieving the desired finish. There are various types of stains available in the market, including oil-based, water-based, and gel stains. Selecting the appropriate stain depends on the type of wood you are working on. Cedar and Redwood, for example, absorb different stains than Maple or Oak. Match the type of stain with the type of wood to get the desired finish. Make sure to try samples of a stain type before you start the project.
Preparation is Key
Preparing the surface of the furniture before staining is essential in achieving a high-quality finish. Sanding the furniture can help smoothen the surface and remove rough edges. Avoid using sandpaper with a grit coarser than 220, or it may leave behind noticeable scratches. After sanding, use a tack cloth to wipe down the furniture surface and remove any remaining sawdust.
Applying the Stain
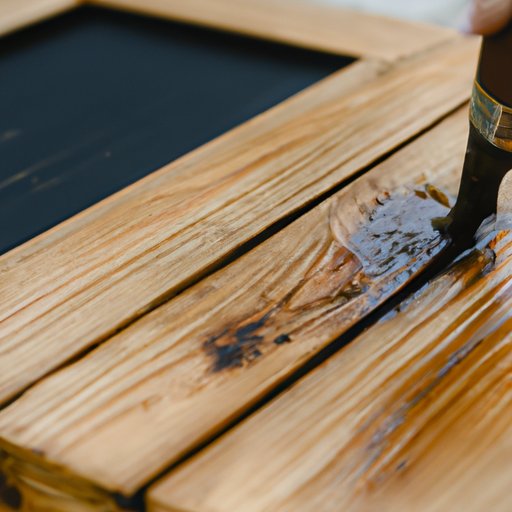
There are three main methods of applying stain: brushing, wiping, and spraying. Each method requires skill and patience. For example, brushing is most suited for an even finish, whereas wiping is advantageous for a lighter shade. Spraying may be more suitable for a larger surface area application. For an excellent finish, apply the stain lightly, and leave to absorb in the wood. Ensure an even coverage and a seamless finish.
Timing is Everything
The timing of staining furniture is essential. Make sure not to apply stain in direct sunlight or in the rain. Temperature and humidity must also be considered while staining. Ensure the first coat has dried before applying a second coat of stain. After the second coat, leave for 24 hours to dry. Avoid moving or placing the furniture during this time, as it may cause damage to the stain.
Protecting the Finish
Sealing or varnishing the finished furniture piece is crucial in protecting it from damage and wear-and-tear. Several options are available, including lacquer, polyurethane, shellac, and varnish. Choose the seal or varnish type based on the type of wood and stain used and the desired finish. Apply it with a brush after making sure the stain is entirely dry.
Troubleshooting
Several problems can arise when staining furniture. Blotching, streaking, and uneven color may be an issue. The solution to these problems, however, depends on the type of wood and stain used, making it essential to research the various options before deciding which one to use. If a mistake is made and the stain doesn’t look good, sand the affected area and apply the stain again.
Cleaning up
Cleaning brushes after staining is crucial. Water-based stains can be cleaned with soap and water, whereas oil-based stains require mineral spirits to be cleaned. Once the brushes are clean, leave them to dry. If the brushes are in good condition, they can be reused in future projects. If not, it is best to dispose of them. Leftover stain needs to be disposed of carefully, preferably by taking it to an appropriate recycling center.
Conclusion
Staining wood furniture is an art form that requires knowledge, patience, and care. With the right stain, preparation, tools, and technique, anyone can create a unique and beautiful piece of furniture that lasts a lifetime. This guide offers tips and tricks to help achieve this and overcome any obstacles encountered along the way. Have fun with your next staining project, and remember to take your time.


