I. Introduction
The Xbox One controller is a critical component of the gaming experience, but it’s not indestructible. Over time, controllers can become damaged or suffer from performance issues. Knowing how to take apart an Xbox One controller can help you save money on repairs and upgrades, and get the most out of your controller.
II. The Ultimate Guide to Taking Apart Your Xbox One Controller: A Step-by-Step Tutorial
Before we get started, make sure to have your tools ready. You will need a screwdriver, a spudger, and tweezers. Here is an overview of the disassembly process:
- Remove the battery cover and batteries.
- Remove the top shell by prying it with a spudger tool.
- Unplug the LED cables and vibration motors.
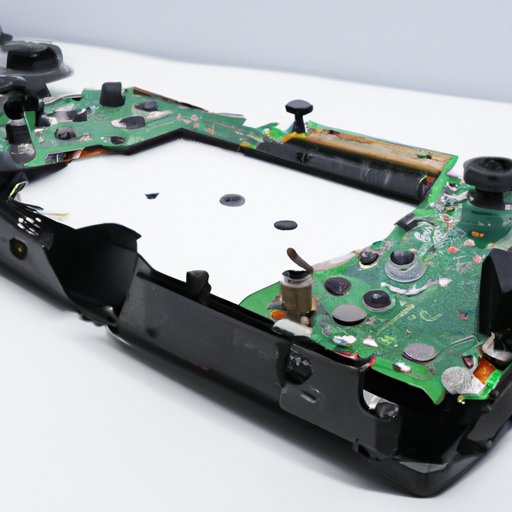
- Remove the circuit boards and triggers.
Be careful while removing the small screws and components as they can be fragile. Here are detailed step-by-step instructions for taking apart an Xbox One controller:
- Step 1: Turn the controller over and remove the battery cover and batteries.
- Step 2: Use a flat spudger tool to gently pry the front plate of the controller away from the back plate. Be careful not to damage the plastic tabs that connect the front and back plates. Start from the bottom of the controller and work your way up.
- Step 3: Once the front plate is released, carefully lift it away from the back plate. You may need to slide it up or down to clear the analog sticks and ensure that it’s released from all parts of the controller.
- Step 4: Unplug the LED cables from the front plate by gently pulling them straight out from their sockets. Be careful not to damage the cables or connectors as they are delicate.
- Step 5: Use tweezers or small fingers to carefully unplug the vibration motors from the circuit board before removing the board. Be careful not to damage any other components or the cable, as they are fragile.
- Step 6: Using a small screwdriver, remove the screws that hold the circuit board in place. Set them aside in a safe location for later. Be careful not to strip or lose any screws, as they are important for reassembly.
- Step 7: Once the screws are removed, carefully lift the circuit board away from the back plate. You may need to use a spudger to gently pry it away. Be careful not to damage any other components or the cable, as they are fragile.
- Step 8: Once the circuit board is removed, you can access the triggers. You can remove them by gently pulling away from the back plate. Be careful not to damage any other components or the cable, as they are fragile.
When handling small parts and fragile components, always use caution and take your time to ensure that you don’t cause any damage.
III. DIY Xbox One Controller Repair: Taking Apart Your Controller for Fixes and Upgrades
One of the main reasons people take apart their Xbox One controllers is to fix problems that may arise. Here are some common issues that can be fixed through disassembly:
- Sticky buttons and triggers
- Worn or damaged thumbsticks
- Broken rumble motors or LED lights
- Overly sensitive buttons or triggers
While you have the controller apart, you can also consider upgrading certain components to improve performance or customize the controller. Here are some suggestions:
- Replace thumbsticks with different colors or styles that offer different grip options.
- Upgrade the rumble motors to more powerful or quieter versions.
- Install custom LED lights to change the color of your controller.
- Replace the buttons and triggers with more durable or responsive options.
It’s important to note that any changes made to the controller may affect its compatibility with certain games or systems. Always check before making any upgrades or modifications.
When reassembling the controller, make sure to be patient and follow the same steps in reverse order, making sure each component clicks into place and cables are reconnected properly.
IV. Everything You Need to Know About Disassembling Your Xbox One Controller
Now let’s take a closer look at each component of the Xbox One controller and how to safely remove and replace them.
- Battery cover: Simply pull the battery cover off the controller.
- Top shell: Use a spudger to carefully pry the shell away from the controller. Be careful not to damage the buttons or analog sticks.
- Front and back plates: Use a spudger to carefully separate the plates. Unplug the LED cables and vibration motors from the front plate and set it aside.
- Analog sticks: These can be removed by gently pulling upward on them from the back side of the controller.
- Triggers: These can be removed by gently pulling them away from the back plate.
- Circuit board: Remove the screws that hold the board in place and carefully lift it away. The vibration motors and LED cables are connected to the board, so take care when unplugging them.
- Button pads: These are held in place by small clips and can be removed by gently prying them away.
- Buttons: These can be removed by gently pushing them away from the front plate. Be careful not to damage the clips that hold them in place.
If you encounter any issues, double-check that you are following the correct steps and using the appropriate tools. If you are still having trouble, consult online resources or seek advice from experts in the community.
V. Expert Tips for Safely Taking Apart Your Xbox One Controller Like a Pro
Here are some tips from experts to help minimize the risk of damage to your Xbox One controller during the disassembly process:
- Use a magnetic screwdriver to make it easier to handle small screws.
- Work in a clean, well-lit area to avoid losing small components or screws.
- Take your time and use gentle pressure when prying components apart.
- Label and organize screws to ensure they are replaced in the correct location during reassembly.
- If any screws are difficult to remove, try applying a small amount of oil or lubricant to loosen them.
It’s important to note that disassembling your Xbox One controller can void the warranty. Consider this before taking your controller apart and attempting any repairs or upgrades.
VI. The Dos and Don’ts of Dismantling Your Xbox One Controller: A Comprehensive Guide
Here are some dos and don’ts to keep in mind when taking apart your Xbox One controller:
- Do: Work in a clean, well-lit area with good ventilation.
- Do: Use the appropriate tools and take your time to avoid causing damage.
- Do: Label and organize screws to ensure they are replaced in the correct location.
- Don’t: Rush the process or use excessive force to separate components.
- Don’t: Use metal tools that could scratch or damage components.
- Don’t: Attempt to fix complex issues without consulting expert resources.
VII. Get the Most Out of Your Xbox One Controller: How to Take it Apart Like a Pro
Now that you know how to take apart your Xbox One controller, here are some suggestions for customizing it and getting the most out of your gaming experience:
- Swap out the standard thumbsticks with taller or more responsive versions to improve accuracy and control.
- Replace the standard buttons with more durable or responsive versions for a better tactile feel.
- Upgrade the rumble motors to more powerful or quieter versions for a more immersive gaming experience.
- Install custom LED lights to completely customize the look and feel of your controller.
Whatever upgrades or customizations you choose, make sure to follow the same steps and take the same precautions when disassembling and reassembling the controller.
VIII. Why Pay for Repairs? Learn How to Take Apart Your Xbox One Controller and Do it Yourself.
The cost of repairing or replacing a damaged Xbox One controller can be high, so learning how to do it yourself can save you a significant amount of money. While there are risks associated with DIY repair, following best practices and consulting resources can help minimize these risks.
Another benefit of knowing how to take apart your Xbox One controller is the ability to customize it to your liking. Whether it’s swapping out components for improved performance or adding custom LED lights, taking apart your controller can open up new possibilities for your gaming experience.
IX. Conclusion
Taking apart an Xbox One controller may seem daunting at first, but with the right tools and knowledge, it can be a valuable skill to have. Use caution when handling small parts and fragile components, and follow best practices and expert tips to avoid causing damage. With a little bit of patience and attention to detail, you can save money on repairs, customize your controller, and get the most out of your Xbox One gaming experience.


