Introduction
Have you ever struggled with tying a bow ribbon? Whether you’re wrapping up a present, decorating a DIY project, or adding a finishing touch to an outfit, tying a bow ribbon can be a frustrating and time-consuming task. But fear not! In this article, we’ll take you through a step-by-step guide on how to tie a classic bow and offer alternative techniques for fun and quirky bow designs. We’ll also provide tips on creating perfect bows, explore the cultural significance of bows, share style insights on matching bows with outfits, and offer DIY bow tutorials and templates. So let’s get started!
A Step-by-Step Guide on Tying a Classic Bow
The basic technique of tying a bow ribbon involves making two loops of equal size and tying them together in the middle. Here’s a step-by-step guide:
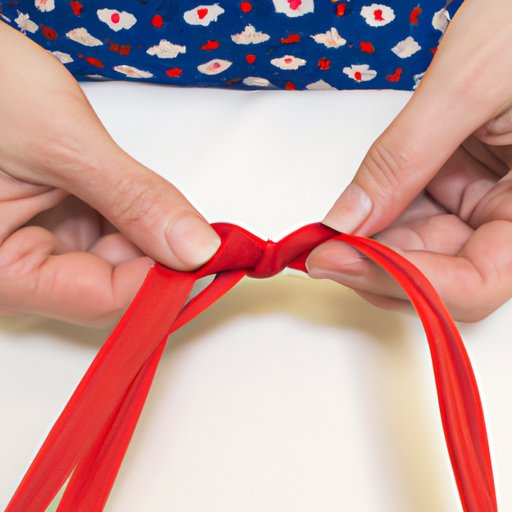
Step 1: Begin by making a simple knot in the center of your ribbon, leaving long tails on both sides. These tails will form the loops and the tails of your bow.
Step 2: Take the left tail and make a loop, placing it on top of the knot so that the tail faces down towards the ground.
Step 3: Take the right tail and make a loop similar in size, placing it on top of the left loop so that the tail faces up towards the sky.
Step 4: Take the left loop and bring it over the right loop, tucking it under and pulling it through the hole in the middle. Tighten the loops by pulling on the tails of the ribbon, adjusting the size of the loops to your liking.
Step 5: Adjust the tails of the bow by cutting them to a desired length or curling them with scissors, making sure they are even and not too long or short. Your classic bow is now complete!

How to Tie a Fun and Quirky Bow
If you’re looking for something different and unique, there are alternative ways to tie a bow ribbon with different shapes, sizes, and styles. Here are some quirky bow designs you can try out:
Knot Bow: Start by tying a simple knot in the center of the ribbon, then create two loops on either side of the knot, tying them together in the middle with a separate piece of ribbon.
Bunny Ear Bow: Follow steps 1-3 in the classic bow technique, but instead of looping the tails through the middle, tie them together into a knot to create bunny ears.
Layered Bow: Use two or more ribbons of different sizes and colors to create layered loops, stacking them on top of each other in a desired pattern.

Creating Perfect Bows
The key to creating perfect bows is to avoid common mistakes people make when tying them. Here are a few easy tips and tricks:
Use high-quality ribbon: Choosing the right ribbon can make all the difference in creating perfect bows. Choose ribbons that are not too thick or too thin, and with a smooth, satiny texture.
Maintain equal size loops: Make sure that your loops are of equal size, using a ruler or your fingers to measure as needed.
Securely tie the middle: Make sure to tightly tie the center knot of your bow, as this will keep the loops in place.
Adjust the loops: Adjust the size of the loops by pulling on the tails of the ribbon, but be careful not to pull too hard or crinkle the loops. Keep them neat and tidy.
Finish off: Trim the tails of the bow to a desired length, curling them with scissors as needed.
The History of Bow Tying
Bows have been a symbol of femininity, elegance, and refinement throughout history, dating back to ancient Egypt where they were used to embellish clothing, jewelry, and accessories. In the Middle Ages, bows were often worn by women as headdresses or adornments on garments. By the 18th and 19th centuries, bows became a popular style of neckwear for men, worn with collars or on cravats. Today, bows continue to be used in fashion and design, and have become a popular icon in many cultures globally.

Matching Bows with Outfits
Adding a bow to an outfit can transform a look in an instant, but it’s important to know how to match and coordinate bows with different outfits. Here are some style insights:
Casual outfits: Opt for a small and simple bow in a fun pattern or bright color to add a playful touch to your casual wear.
Formal outfits: Choose a classic bow in a neutral or metallic shade to add a touch of elegance and sophistication to formal wear.
Sportswear: A simple ribbon bow can be tied onto a ponytail, braid or bun to add a pop of color and femininity to workout wear.
Accessorizing: Coordinate your bow with other accessories, such as earrings, necklaces, or shoes, to create a cohesive look.
DIY Bow Tying
For those who want to take their bow tying skills to the next level, DIY bow tutorials and templates provide a fun and creative way to make unique, personalized bows. Here are a few tips for customizing your DIY bow:
Add embellishments: Embellish your bow with fabric paint, glitter, or iron-on patches for a personal touch.
Mix and match materials: Experiment with different types of ribbons and fabrics, such as lace, burlap, or velvet, to create unique textures and looks.
Vary sizes and shapes: Play around with the size and shape of your bow to make it fit the occasion or your personal style.

Conclusion
Tying a bow ribbon may seem like a daunting task, but with this step-by-step guide, we hope to have made the process easy and even enjoyable! There are so many ways to tie a bow ribbon, from the classic technique to fun and quirky designs. By avoiding common mistakes, creating perfect bows is easy too. Knowing the history and cultural significance of bows, matching them with outfits, and experimenting with DIY bow tutorials and templates is both fun and rewarding.


