I. Introduction
Green screens have been used in filmmaking and video production for decades. They allow creators to change the background of their footage to anything they desire, creating unique and visually stunning videos. In this article, we will cover everything you need to know about using a green screen for your projects. From setting up your green screen to editing the footage, we’ll explore all aspects of green screen work.
II. The Basics of Using a Green Screen: A Step-by-Step Guide
Setting up a green screen can seem daunting, but it’s actually quite easy. Here are the basic steps:
A. Setting up the green screen
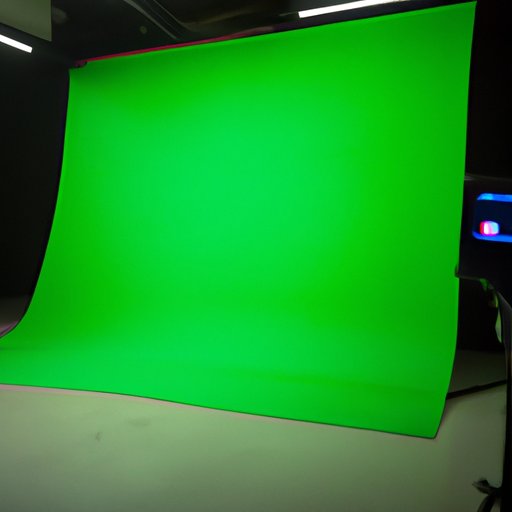
The first step is to choose and set up your green screen. You can buy a pre-made green screen or create a DIY version by painting a wall or a sheet green. Once you have your green screen set up, you need to ensure that it is wrinkle-free and evenly lit.
B. Lighting the green screen correctly
The lighting is crucial to getting great results with a green screen. You need to light the green screen separately from the subject to avoid shadows and ensure even lighting. Using soft light sources, such as softboxes and diffusers, can help create a more even lighting setup.
C. Choosing and setting up the camera
Once your green screen and lighting are set up, you need to choose and set up your camera. Choose a camera that supports a high resolution and can shoot at a high frame rate. Set up your camera so that it is positioned at a visually pleasing angle to your subject.
D. Editing the footage in post-production
The final step is to edit the footage in post-production. The software you choose will depend on your preferences and your budget. Once you have your footage, you can use your software to change the background to anything you desire. Remember to keep the lighting and shadows of the new background in mind; it should look natural and realistic.
III. Top 5 Green Screen Software Programs
Choosing the right software can make all the difference in your green screen work. Here are the top five software programs:
A. Overview of the different software programs available
The five software programs we will explore are Adobe Premiere Pro, Final Cut Pro X, HitFilm Pro, DaVinci Resolve, and iMovie. Each program offers unique features and capabilities, so it’s essential to choose the right one for your project.
B. Comparison of the pros and cons of each program
Adobe Premiere Pro is great for beginners and professionals and offers advanced editing capabilities. Final Cut Pro X is exclusive to Mac users and offers a streamlined editing process. HitFilm Pro is ideal for visual effects and compositing work. DaVinci Resolve is perfect for color grading and high-end post-production work, while iMovie is great for beginners and those on a budget.
C. Recommendation for the best fit based on your needs
The best fit for you will depend on your needs, budget, and experience. Adobe Premiere Pro and Final Cut Pro X are great for most users, while HitFilm Pro and DaVinci Resolve are better for more advanced users. If you’re just starting, iMovie is a good option to learn the basics before moving on to more advanced software.
IV. Creating Your Own Home Studio: Green Screen Edition
Creating your own home studio can save you time, money, and provide you with a creative space to work. Here’s how to set up your green screen studio:
A. Choosing the right space and backdrop for your studio
Choose a space that is large enough to accommodate your green screen and lighting setup. You can use a spare room, garage, or even a basement. Make sure that the walls and ceiling are neutral colors and avoid any reflective surfaces.
B. Lighting the studio effectively
Lighting is critical to the success of your studio. Use soft light sources and position them correctly to avoid shadows and uneven lighting. You can also use reflectors and diffusers to create a more even lighting setup.
C. Selecting the best camera for your projects
Choose a camera that supports a high resolution and can shoot at a high frame rate. You can use a DSLR or mirrorless camera, or even a smartphone. The key is to choose a camera that fits your needs and budget.
D. Budget-friendly equipment options for home studios
If you’re on a budget, there are many affordable options for equipment. You can use DIY lighting setups, such as lamps and reflectors, instead of expensive professional lighting. You can also use free software programs, such as OBS Studio or Blender, instead of paid ones.
V. 10 Creative Uses for Green Screen Technology
Green screen technology is not just for filmmaking and video production. Here are ten creative ways to use green screens:
A. Examples of green screen use in movies and TV
Green screens are commonly used in movies and TV to create incredible visual effects. Examples include the iconic Star Wars’ lightsabers, the dragon scenes in Game of Thrones, and the futuristic cityscapes in Blade Runner.
B. Unusual ways to use green screens in video production
You can use green screens for more unusual video projects, such as music videos, commercials, and explainer videos. You can also use green screens to create virtual backgrounds for online meetings and events.
C. Potential uses for green screens outside of the entertainment industry
Green screen technology can be used outside of the entertainment industry. Examples include virtual tours of real estate, interactive museums and exhibits, and educational videos and materials.
VI. Avoiding Common Mistakes in Green Screen Production
Even experienced green screen users can make mistakes. Here are some common mistakes to avoid:
A. Common mistakes in lighting, camera setup, and editing
Common mistakes include uneven lighting, poor camera placement, incorrect exposure, and using poor-quality green screens. In editing, mistakes can include poor color grading, incorrect keying, and mismatched shadows and lighting.
B. Tips to avoid these mistakes and improve your results
To avoid mistakes, make sure your lighting is even and properly positioned, use a clean green screen, and take your time in post-production. You can also use color grading tools and practice your keying skills.
VII. Green Screen on a Budget: How to Do More with Less
You don’t need to break the bank to create excellent green screen work. Here are some tips to help you do more with less:
A. DIY equipment options for green screens
You can use DIY options for lighting and even green screens instead of expensive professional equipment. Examples include using PVC pipe and green fabric to create a DIY green screen or using lamps and aluminum foil to create a DIY lighting setup.
B. Free or low-cost software programs for green screen work
You can use free or low-cost software programs, such as OBS Studio, Blender, or Shotcut, instead of expensive professional programs. These programs can still provide you with many features and capabilities for your green screen work.
C. Tips for getting great results without spending a lot of money
Use what you have available, be creative, and practice your skills. You can still achieve excellent results on a budget by using these tips and tricks.
VIII. Conclusion
Green screens are an excellent tool for filmmakers, video producers, and anyone who wants to create visually stunning videos. By following the tips and tricks in this article, you can create your own green screen studio and produce high-quality videos on a budget. Remember to practice your skills and be creative in your work.


